Last Thursday, I was standing in my kitchen at 7:15 PM, staring into the open fridge like it held the secrets to the universe. I was exhausted. The kind of exhausted where your brain feels like static, and the idea of chopping vegetables or monitoring a sauce sounds like a punishment. My kids were already in the car seat zone, whining about hunger, and I knew that if I didn’t have a “dessert” ready soon, we’d be ordering pizza. Again. I didn’t want pizza. I wanted something sweet, something that felt homemade but required zero brain power.
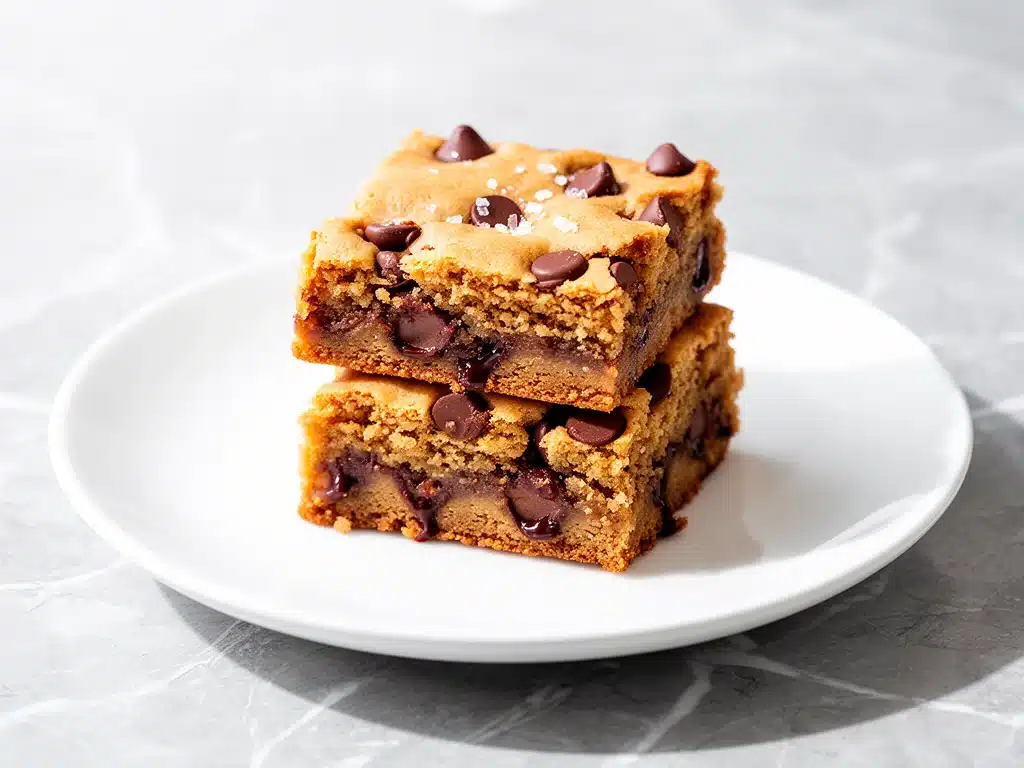
So I did what I always do when I’m tired: I opened the pantry, grabbed the peanut butter, and threw together what I thought would be a mediocre microwave mug cake. But then I remembered I had chocolate chips. And butter. And a box of blondie mix I’d bought on impulse three weeks ago. I dumped it all into one bowl. I mixed it with a fork. I put it in the oven. And twenty minutes later, the smell of warm peanut butter and toasted chocolate filled the house. My kids didn’t even ask about the pizza. They just sat there, sticky-fingered, eating warm gooey peanut butter blondies with chocolate chips straight from the pan.
That was the moment I realized I had stumbled onto the perfect weeknight rescue. These aren’t just blondies. They’re the gooey, chewy, peanut-buttery savior of my dinner routine. I’ve made this recipe at least fifteen times in the last two months—sometimes for a quick snack, sometimes as a proper dessert, and sometimes just because I needed a win in the kitchen. It’s stupid simple, it takes about fifteen minutes of active time, and it tastes like a bakery treat that you definitely didn’t bake from scratch.
If you’re looking for a dessert that doesn’t require a mixer, three bowls, or a degree in pastry arts, this is it. It’s the perfect balance of salty and sweet, with a texture that’s somewhere between a cookie and a brownie. And the best part? You can make it while your actual dinner is simmering on the stove. No stress. No mess. Just warm, gooey bliss.
Why You’ll Love These Peanut Butter Blondies
There are about ten reasons I keep making these, but here are the big ones. This recipe has completely changed our weeknight dessert routine. It’s reliable, it’s fast, and it’s universally loved by everyone from my picky six-year-old to my chocolate-obsessed husband.
- One Bowl Wonder — Seriously. One bowl. One spoon. No mixer, no stand blender, no extra dishes to scrub. I’ve walked my teenage daughter through this recipe over FaceTime while she was at college, and she nailed it. If you can mix batter, you can make these.
- Lightning Fast — From “what’s for dessert?” to “can I have seconds?” is about 45 minutes. But the active time is literally 15 minutes. I make this on Tuesdays when I get home late, and it feels like magic because the house smells amazing before I even finish plating the main course.
- Pantry-Friendly — You probably have 80% of these ingredients already. Peanut butter, flour, sugar, butter, eggs. I keep a jar of creamy peanut butter stocked specifically for this. It’s my go-to when I need to pull something together on a whim.
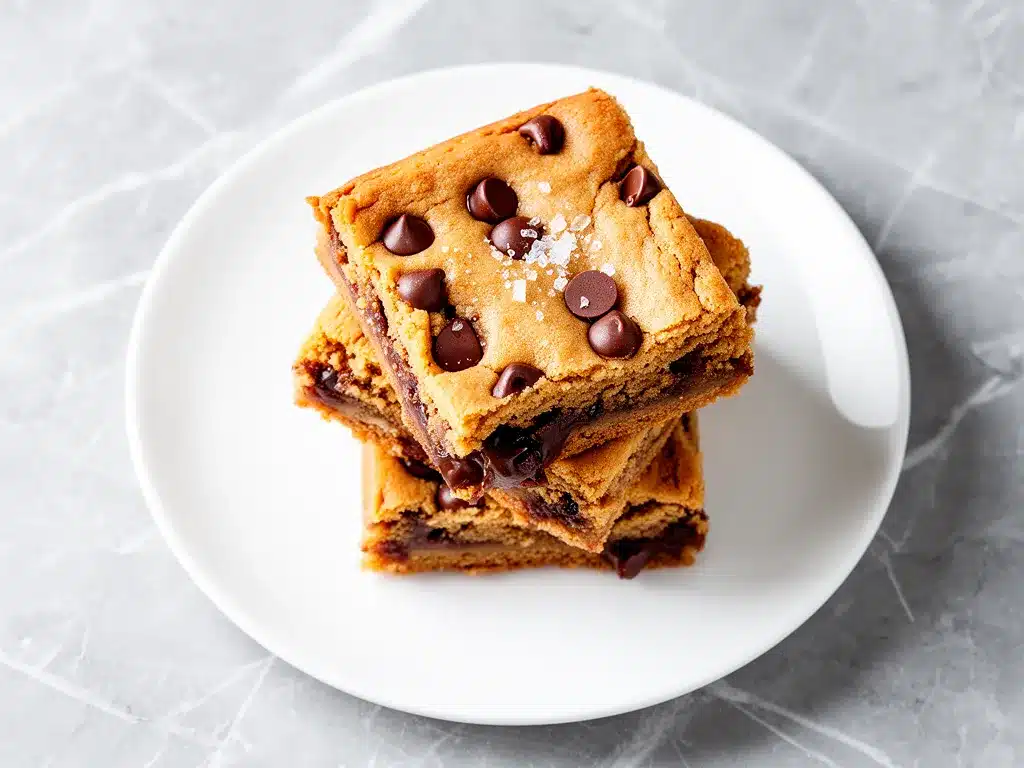
- Texture Perfection — These aren’t dry, cakey bars. They’re gooey in the center, chewy on the edges, and studded with melty chocolate chips. I’ve tried every variation, and this ratio is the sweet spot (pun intended). They stay moist for days.
- Crowd-Pleaser — I’ve served these to my gluten-free neighbor (using a GF flour blend), my nut-allergic friend (subbed with sunflower butter), and my dad who thinks “healthy” means “no sugar.” Everyone found a way to love them. It’s a versatile recipe that adapts to your life.
- Budget-Smart — Feeds 9-12 people for under $10. That’s cheaper than a box of cookies from the store, and infinitely better tasting. I make a double batch when they’re on sale because they freeze so well.
This is my go-to when I need dessert to just work. No complicated techniques, no weird ingredients, just reliable, delicious food that makes everyone happy. It’s the kind of recipe that makes you feel like a hero in your own kitchen.
Ingredients You’ll Need
Here’s the best part: you probably have most of this already. I’m particular about three ingredients here, and I’ll tell you exactly why. This looks like a short list, but each one plays a huge role in the final texture and flavor.
For the Base
Unsalted butter (1/2 cup / 113g) — I use unsalted so I can control the saltiness. Melt it in the microwave or on the stove. Don’t burn it! If you only have salted butter, reduce the added salt in the recipe by half. I always keep butter in the fridge, but for this, I let it soften slightly so it mixes easier.
Creamy peanut butter (1 cup / 250g) — This is non-negotiable. Use regular Jif or Skippy. Natural peanut butter (the kind that separates) is too oily and will make these greasy. I want that smooth, sugary, processed peanut butter taste. It’s the key to the gooey texture. If you’re nut-allergic, sunflower seed butter works, but the flavor changes.
Granulated sugar (1 cup / 200g) — This gives them their chew. Brown sugar adds moisture, but I find the combo of white and brown (if you have it) is best. For this recipe, I use all white sugar for that crisp edge and chewy center. If you want a softer blondie, swap half for brown sugar.
Light brown sugar (1/2 cup / 100g) — Optional, but highly recommended. It adds a hint of molasses flavor and keeps them moist. If you don’t have it, just use 1.5 cups of white sugar. It’s fine. I won’t judge.
Large egg (1 large) — Room temperature is best. It helps bind everything together. If you’re in a rush, just crack it into a small bowl and microwave for 10 seconds. Don’t cook it, just warm it up.
Vanilla extract (1 teaspoon) — Pure vanilla, please. The fake stuff tastes chemical and clashes with the peanut butter. I use the cheap bottle from the grocery store for baking because I don’t want to waste the good stuff on cookies.
For the Structure
All-purpose flour (1 1/2 cups / 190g) — Don’t overmeasure! Spoon it into the cup and level it off. Packing it down makes dense, hard blondies. I use Gold Medal or King Arthur. If you’re gluten-free, use a 1:1 gluten-free flour blend. It works perfectly here.
Baking powder (1/2 teaspoon) — Just a little bit. We don’t want them to rise too much. We want them dense and fudgy.
Salt (1/2 teaspoon) — Essential. Salt makes peanut butter taste like peanut butter. Don’t skip it. If your butter was salted, reduce this to 1/4 teaspoon.
For the Magic
Semi-sweet chocolate chips (1 cup / 170g) — I use Ghirardelli or Nestle Toll House. They melt perfectly. Dark chocolate chips work too if you want less sweetness, but the semi-sweet is the classic combo with peanut butter. You can also use peanut butter chips for a double-peanut punch, but I prefer the contrast.
Flaky sea salt (optional) — Sprinkle on top right after baking. It’s the restaurant-quality touch that makes people ask what’s in them. Maldon is my favorite, but any flaky salt works.
Equipment Needed
You don’t need fancy equipment for this. Here’s what I actually use.
9×9 inch baking pan — I use a glass Pyrex pan because it heats evenly. A metal pan works too, but watch the edges—they might brown faster. If you only have an 8×8, the batter will be thicker and they’ll take longer to bake. Keep an eye on them.
Microwave-safe bowl — For melting the butter. I use a large glass measuring cup because it’s easy to pour and stir. A small bowl works, but make sure it’s big enough so the butter doesn’t boil over.
Mixing bowl — A medium-sized bowl is perfect. Glass or ceramic is nice because you can see the batter mixing. I use a simple white bowl from IKEA.
Whisk or fork — I use a fork for this. It’s easier to clean, and you don’t need to overmix. A whisk works too, but a fork is faster.
Parchment paper — This is my secret weapon. Line the pan with parchment, leaving an overhang on the sides. It makes lifting the blondies out for slicing so much easier. Plus, no sticky pan to scrub. I buy rolls from the dollar store.
Wire cooling rack — Not strictly necessary, but it helps them cool evenly. If I’m in a rush, I just leave them in the pan on the counter. It’s fine.
Small spatula — For scraping the bowl. Don’t leave that batter in the bowl! I use a silicone spatula because it’s flexible and easy to clean.
Optional but nice:
- Microplane grater — For grating chocolate instead of using chips. It melts faster and distributes better.
- Kitchen scale — For precise measuring. I don’t use it for this recipe, but it’s great for baking in general.
How to Make It: Step-by-Step
Alright, let’s make this! I’m walking you through exactly how I do it, including the little tricks I’ve picked up. This is the easiest dessert you’ll ever make, but there are a few things to watch out for.
Step 1: Prep Your Pan and Oven (5 minutes)
Preheat your oven to 350°F (175°C). While it heats, line your 9×9 inch baking pan with parchment paper. Leave a little overhang on the sides so you can lift the blondies out later. Spray it with non-stick spray just to be safe. I know the parchment is enough, but I like insurance. It takes 30 seconds.
Step 2: Melt the Butter (2 minutes)
Melt the butter in a microwave-safe bowl. I zap it for 30-second intervals, stirring in between. You want it fully melted but not browned. If it starts to brown, it’ll taste nutty and bitter. Just warm and liquid is perfect. Set it aside to cool for a minute.
Step 3: Mix the Wet Ingredients (2 minutes)
To the melted butter, add the peanut butter, granulated sugar, brown sugar, egg, and vanilla. Whisk everything together vigorously. It will look weird at first—separated and grainy. Keep whisking! It’ll come together into a smooth, thick paste. This step is crucial. If you don’t mix it well, you’ll get pockets of dry flour later.
Step 4: Add the Dry Ingredients (2 minutes)
Add the flour, baking powder, and salt. Stir gently with a spatula or fork. Just until combined. Do not overmix! Overmixing makes them tough. You’ll see streaks of flour at first. That’s okay. Fold them in until the batter is uniform. It should be thick and sticky.
Step 5: Fold in the Chocolate Chips (1 minute)
Pour in the chocolate chips. Fold them in until they’re evenly distributed. I like to save a handful to sprinkle on top later. It looks pretty and ensures every bite has chocolate. The batter will be very thick. Don’t panic. That’s how it’s supposed to be.
Step 6: Bake (20-25 minutes)
Pour the batter into the prepared pan. Spread it out evenly with a spatula. It’s thick, so wet your spatula slightly to help it glide. Bake for 20-25 minutes. Here’s the trick: look for edges that are golden brown and set, but the center should still look slightly underdone. It will jiggle a little. If you wait until the center is firm, they’ll be dry. They continue to cook in the pan.
Step 7: Cool and Slice (10 minutes)
Let them cool in the pan for at least 10 minutes. This is the hardest part. I know you want to eat them now. But if you cut them hot, they’ll fall apart. After 10 minutes, lift them out using the parchment overhang. Sprinkle with flaky sea salt if you’re feeling fancy. Slice into squares. Enjoy warm or at room temperature.
Total Time: About 45 minutes (15 minutes active, 30 minutes baking and cooling)
Expert Tips & Tricks
Here’s everything I’ve learned from making this dozens of times. These tips will save you from my mistakes.
The Gooey Secret
The key to gooey peanut butter blondies with chocolate chips is underbaking. I know it sounds scary, but trust me. Pull them out when the center still looks soft. They’ll firm up as they cool. If you bake them until they’re firm in the pan, they’ll be cakey. I want fudgy. I want chewy. I want to sink my teeth into them.
Don’t Skimp on the Peanut Butter
Use creamy, processed peanut butter. Natural peanut butter has oil separation that makes the batter greasy. I’ve tried it, and it just doesn’t work. The sugar and emulsifiers in regular peanut butter are what give these their texture. It’s not a health food. It’s a treat.
Room Temperature Egg
Make sure your egg is room temperature. Cold egg can seize the melted butter, making lumpy batter. If you forget, just warm the egg in a bowl of warm water for a minute. It takes 30 seconds and saves you a headache.
Common Mistakes (and how to avoid them)
Mistake: Blondies are dry.
Fix: You overbaked them. Next time, pull them out 2-3 minutes earlier. They should look slightly underdone in the center.
Mistake: Blondies are dense and hard.
Fix: You overmixed the flour. Once you add the flour, mix until just combined. Don’t beat the batter.
Mistake: Blondies stuck to the pan.
Fix: You didn’t use parchment paper. Or you didn’t spray the parchment. Use both. It’s worth the extra second.
Pro Tricks I’ve Learned
For Extra Flavor
Add a pinch of cinnamon to the dry ingredients. It complements the peanut butter beautifully. It’s a subtle warmth that makes them taste like a peanut butter cup.
For Better Texture
Chop your chocolate chips instead of using chips. Larger chunks melt better and create pockets of chocolate. I use a knife to chop a bar of chocolate into uneven pieces.
Make-Ahead Strategy
Make the batter ahead and store it in the fridge for up to 24 hours. Bake straight from the fridge, adding 2-3 minutes to the bake time. It’s great for meal prepping desserts.
Variations & Substitutions
Once you’ve nailed the basic version, here’s how you can mix it up. I’ve tried all of these.
Double Chocolate Peanut Butter
Add 2 tablespoons of cocoa powder to the dry ingredients. It makes them taste like a peanut butter cup brownie. My kids love this version. It’s richer and more chocolate-forward.
Salted Caramel
Drizzle 1/4 cup of caramel sauce over the batter before baking. Then swirl it in with a knife. It creates beautiful ribbons of caramel. I use store-bought caramel for simplicity, but homemade is better if you have time.
Gluten-Free
Use a 1:1 gluten-free flour blend. Everything else stays the same. I use King Arthur Measure for Measure. It works perfectly. The texture is almost identical to the original.
Nut-Free
Substitute the peanut butter with sunflower seed butter or soy nut butter. It’s a bit more expensive, but it works. The flavor is different, but still delicious. Great for school events.
Protein-Packed
Add 2 scoops of vanilla protein powder to the dry ingredients. Add 1/4 cup extra milk or water to compensate for the dryness. It’s not as gooey, but it’s a decent post-workout snack.
Serving & Storage
These are best served warm, but they’re great at room temperature too. I usually serve them straight from the pan with a spoon, but for guests, I slice them into neat squares.
How to Store
Room Temperature: Store in an airtight container for up to 4 days. They stay moist and gooey. I keep them on the counter because my kids can reach them.
Refrigerator: Store in the fridge for up to a week. They’ll firm up a bit, so let them sit at room temperature for 10 minutes before eating. I don’t recommend this unless you’re meal prepping.
Freezer: Yes, they freeze well! Slice them, wrap each piece in plastic wrap, and put them in a freezer bag. They last for 3 months. Thaw at room temperature for 30 minutes. They taste almost as good as fresh.
Reheating
Microwave a square for 15-20 seconds. It melts the chocolate and makes the center gooey again. It’s like getting a fresh one. I do this all the time for late-night snacks.
Nutrition Information
I’m not a nutritionist, but here’s the breakdown if you’re tracking. Keep in mind, these are rich, sweet treats, so portion control is key.
Per Serving (based on 12 squares):
- Calories: 280
- Protein: 6g
- Carbs: 32g
- Fiber: 1g
- Sugar: 22g
- Fat: 15g
- Saturated Fat: 6g
- Cholesterol: 25mg
- Sodium: 180mg
Look, this is comfort food with peanut butter and chocolate. It’s not a diet recipe. But it’s way better than store-bought bars, costs less, and I know exactly what’s in it. When I want to make it lighter, I reduce the sugar by 1/4 cup, but it changes the texture. Usually, I just eat one square and enjoy it.
Final Thoughts
So that’s my go-to gooey peanut butter blondies with chocolate chips! I’ve probably talked your ear off at this point, but when you make a recipe this often, you have a lot to say about it. These have saved weeknight dinners more times than I can count. They’re my answer to “what’s for dessert” when I’m tired, don’t want to order out, and still want something that tastes really good.
Make it yours! Try different add-ins, swap in your favorite chocolate, or adjust the salt. The best recipes are the ones you adapt to your family’s tastes. If you make this, drop a comment and let me know what you think! I love hearing how recipes turn out in your kitchen. And if something doesn’t work, tell me that too—I’m here to help troubleshoot.
Happy baking! And I hope your kitchen smells half as good as mine does right now.
Frequently Asked Questions
Can I use natural peanut butter?
I don’t recommend it. Natural peanut butter separates and has a higher oil content, which makes the blondies greasy and dense. For this recipe, you want the emulsified, sugary creamy peanut butter like Jif or Skippy. It’s what gives them their signature texture.
Why did my blondies turn out dry?
Most likely, you overbaked them. Peanut butter blondies should be slightly underdone in the center when you take them out of the oven. They continue to cook as they cool in the pan. Next time, pull them out 2-3 minutes earlier. Also, make sure you didn’t pack the flour too tightly when measuring.
Can I make these ahead of time?
Yes! You can make the batter and refrigerate it for up to 24 hours. Just bake it straight from the fridge, adding 2-3 minutes to the bake time. You can also bake them ahead and store them in an airtight container at room temperature for up to 4 days, or freeze them for up to 3 months.
Can I use dark chocolate chips?
Absolutely. Dark chocolate chips will make them less sweet and more sophisticated. I like to use a mix of semi-sweet and dark chocolate for balance. If you’re a chocolate purist, go for 70% dark chocolate. It pairs beautifully with the salty peanut butter.
How do I store leftovers?
Store them in an airtight container at room temperature for up to 4 days. If your kitchen is very humid, keep them in the fridge. To restore their gooeyness, microwave a square for 15-20 seconds before eating. They freeze beautifully too—wrap individually and freeze for up to 3 months.
Can I double this recipe?
Yes, but you’ll need a larger pan. Double the ingredients and use a 9×13 inch baking pan. The bake time will increase to about 25-30 minutes. Check for doneness by looking for golden edges and a slightly jiggly center.
What if I don’t have a 9×9 pan?
You can use an 8×8 pan, but the blondies will be thicker and take longer to bake (about 30-35 minutes). Keep a close eye on them to avoid overbaking. Alternatively, you can use a square cake pan or even a loaf pan, but the texture and baking time will vary.
Pin This Recipe!
Gooey Peanut Butter Blondies with Chocolate Chips
- Total Time: 45 minutes
- Yield: 12 servings 1x
Description
A quick, one-bowl weeknight dessert that is gooey, chewy, and peanut-buttery. Perfect for busy evenings, this recipe requires minimal active time and uses pantry staples.
Ingredients
- 1/2 cup (113g) unsalted butter, melted
- 1 cup (250g) creamy peanut butter (e.g., Jif or Skippy)
- 1 cup (200g) granulated sugar
- 1/2 cup (100g) light brown sugar
- 1 large egg, room temperature
- 1 teaspoon vanilla extract
- 1 1/2 cups (190g) all-purpose flour
- 1/2 teaspoon baking powder
- 1/2 teaspoon salt
- 1 cup (170g) semi-sweet chocolate chips
- Flaky sea salt (optional, for topping)
Instructions
- Preheat oven to 350°F (175°C). Line a 9×9 inch baking pan with parchment paper, leaving an overhang on the sides, and spray with non-stick spray.
- Melt the butter in a microwave-safe bowl in 30-second intervals, stirring until fully melted but not browned. Let it cool slightly.
- In a mixing bowl, whisk together the melted butter, peanut butter, granulated sugar, brown sugar, egg, and vanilla until smooth and thick.
- Add the flour, baking powder, and salt. Stir gently with a spatula or fork until just combined. Do not overmix.
- Fold in the chocolate chips, reserving a handful to sprinkle on top if desired.
- Pour the thick batter into the prepared pan and spread evenly. Sprinkle reserved chocolate chips on top.
- Bake for 20-25 minutes. The edges should be golden brown and set, but the center should still look slightly underdone and jiggle.
- Let the blondies cool in the pan for at least 10 minutes before lifting them out using the parchment overhang.
- Sprinkle with flaky sea salt if using. Slice into squares and serve warm or at room temperature.
Notes
Use creamy, processed peanut butter for the best texture; natural peanut butter will make the blondies greasy. Do not overbake; the center should look slightly underdone as they continue to cook in the pan. For gluten-free, use a 1:1 gluten-free flour blend. For nut-free, substitute with sunflower seed butter.
- Prep Time: 15 minutes
- Cook Time: 20-25 minutes
- Category: Dessert
- Cuisine: American
Nutrition
- Serving Size: 1 square
- Calories: 280
- Sugar: 22
- Sodium: 180
- Fat: 15
- Saturated Fat: 6
- Carbohydrates: 32
- Fiber: 1
- Protein: 6
Keywords: peanut butter blondies, chocolate chip blondies, easy dessert, one bowl dessert, weeknight baking, gooey bars, peanut butter dessert


