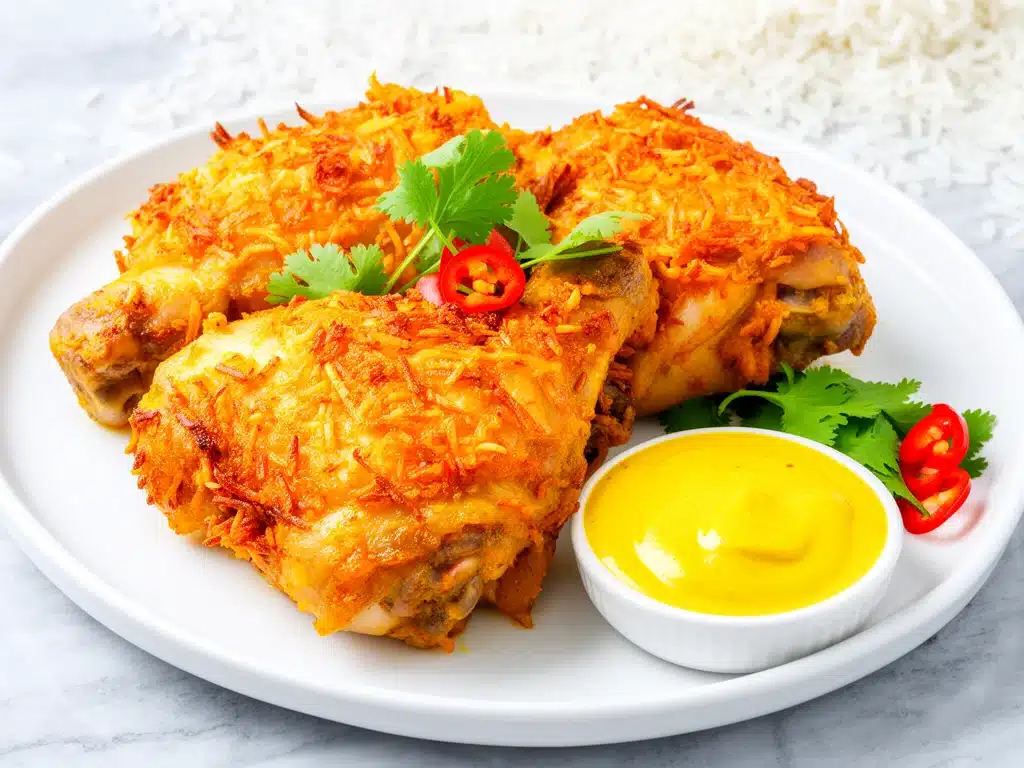
It was 7:30 PM on a Tuesday, and I was staring at my phone, thumb hovering over the delivery app. My husband had mentioned he was craving that sticky, sweet-savory coconut curry chicken from our favorite Thai spot. You know the kind—the one where the chicken is so tender it falls apart, the sauce is rich and golden, and you have to fight your kids for the last bit of sauce-soaked rice.
I ordered it. Thirty minutes later, the doorbell rang. I opened the bag, and what greeted me wasn’t the crispy, golden-brown chicken I expected. It was soggy. The breading had turned into a rubbery mess, the sauce was separated and oily, and it tasted like it had been sitting in a warm box for an hour. My husband took one bite and sighed. “It’s okay,” he said, but we both knew it wasn’t. It was just… sad.
That night, I went to bed with a grumbling stomach and a head full of frustration. I love Thai food. I love the complexity of curry, the creaminess of coconut milk, and the crunch of perfectly cooked chicken. But the takeout version? It never quite delivers on the texture. It’s always either too soft or too dry. Never crispy. Never bright. Never good.
So, I decided to fix it. I spent the next week experimenting in my kitchen, trying to recreate that crave-worthy flavor without the soggy disappointment. I tried marinades. I tried different coatings. I tried baking at low temps (soggy) and high temps (burnt). I even tried frying (too messy, too greasy).
Then, I hit on the sweet spot. A simple cornstarch and panko crust that stays crunchy even under the heavy sauce. A curry paste that’s bold but not overwhelming. And a baking method that uses a wire rack to let the heat circulate, giving you that restaurant-quality crisp without the oil bath. The result? Crispy Baked Coconut Curry Chicken Thighs that are honestly better than takeout. Better. Than. Takeout.
I made this for a casual dinner party last weekend, and my friend—who is a self-proclaimed Thai food snob—asked for the recipe before she even finished her second plate. She said, “This tastes like it came from a street stall in Bangkok, not your oven.” I’ll take that compliment any day.
If you’re tired of soggy delivery and want a weeknight dinner that feels special, exciting, and genuinely delicious, this is the one. It’s ready in about 30 minutes, it’s forgiving, and it smells incredible while it cooks. Let me show you how to make it.
Why You’ll Love This Coconut Curry Chicken Recipe
There are about ten reasons I keep making this, but here are the big ones. This isn’t just another chicken recipe. It’s a game-changer for how you think about weeknight dinners.
Stupid Simple Crispy Coating — Seriously, if you can mix cornstarch and panko, you can make this. I’ve walked my teenage son through it over FaceTime while I was at work. The secret is the cornstarch. It creates a micro-layer that crisps up beautifully in the oven and holds onto the sauce without getting mushy. I’ve tried flour (too heavy) and breadcrumbs alone (not crispy enough). This combo is the winner.
Lightning Fast from Fridge to Table — 30 minutes from start to finish, and only 10 of those are active cooking. I make this on weeknights when I get home at 7pm and I’m exhausted. The chicken thighs are forgiving—they don’t dry out like breasts do. You can chop, toss, bake, and sauce while you’re still unwinding from your day.
Pantry-Friendly Ingredients — You probably have most of this already. Curry paste (jarred is fine, I use Mae Pui), coconut milk (canned is best for richness), soy sauce, honey, and lime. If you have a jar of curry paste in the back of your fridge, you’re halfway there. I keep extra jars stocked just so I can make this on a whim when cravings hit.
Crowd-Pleaser Status — I’ve served this to my vegetarian sister (with tofu instead), my gluten-free neighbor (using tamari and rice flour), and my I-only-eat-chicken dad (who asked for extra sauce). Everyone loved it. It’s versatile enough to adapt to dietary needs without losing its soul.
Makes Amazing Leftovers — Actually tastes better the next day. The flavors meld together overnight, and the chicken stays juicy. I deliberately make extra for lunch throughout the week. It reheats beautifully in the microwave, though I always add a splash of water to keep it moist.
Budget-Smart — Feeds 4-6 people for under $20. Chicken thighs are cheaper than breasts, and coconut curry is inexpensive to make at home compared to takeout prices. That’s less than one meal at a fast-food place, but with way more flavor and satisfaction.
This is my go-to when I need dinner to just work. No complicated techniques, no weird ingredients, just reliable, delicious food that makes everyone happy. And honestly? It’s fun to make. There’s something satisfying about watching those golden-brown chicken thighs come out of the oven, steam rising, smelling like a Thai restaurant.
Ingredients You’ll Need
Here’s the best part: you probably have most of this already. I’m particular about three ingredients here—the curry paste, the coconut milk, and the coating—and I’ll tell you exactly why.
For the Chicken Coating
Chicken thighs (2.5 lbs / 1.1 kg, boneless, skinless) — I always use thighs. They have more fat, which means they stay juicy even when baked at high heat. Breasts will dry out. If you must use breasts, reduce the cook time by 5 minutes and keep a close eye on them. Look for thighs that are relatively uniform in size so they cook evenly.
Cornstarch (½ cup / 60g) — This is the secret weapon. Cornstarch creates a light, airy crunch that flour can’t match. It also helps the sauce cling to the chicken. Don’t skip this for flour. I’ve tested it both ways, and cornstarch is superior for this specific crispy texture.
Panko breadcrumbs (1 cup / 80g) — Panko is lighter and crispier than regular breadcrumbs. Japanese-style panko is best, but any panko works. If you can’t find it, regular breadcrumbs mixed with a little extra cornstarch will work, but the texture won’t be as shatteringly crisp.
Garlic powder (1 teaspoon) — Adds a subtle savory depth to the crust. Fresh garlic can burn in the oven, so powder is safer here.
Smoked paprika (½ teaspoon) — This adds a hint of smokiness that mimics the char from a wok. It’s optional but highly recommended for that “takeout” flavor profile.
Salt and black pepper (to taste) — Season the chicken well before coating. I use about 1 teaspoon of kosher salt.
For the Coconut Curry Sauce
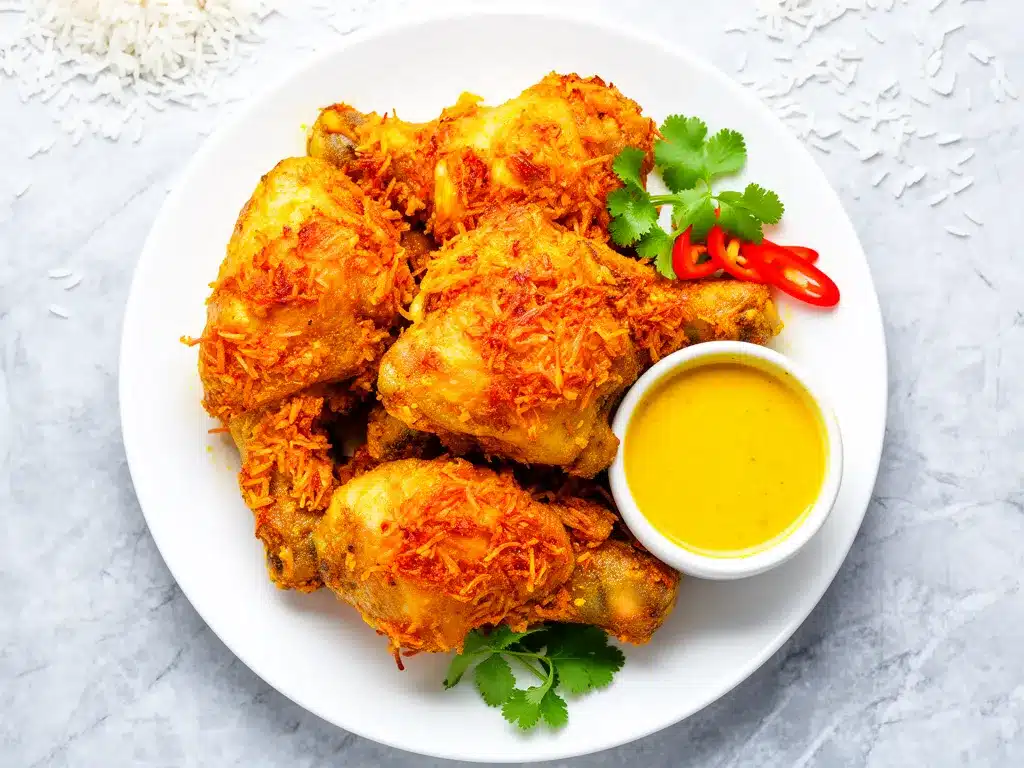
Red curry paste (3-4 tablespoons / 45-60g) — This is the heart of the dish. I use Mae Pui brand because it’s consistent and not too spicy. If you like heat, add an extra tablespoon. If you’re sensitive to spice, start with 2 tablespoons. Look for a paste that contains lemongrass, galangal, and kaffir lime leaves for authentic flavor.
Coconut milk (1 can / 13.5 oz / 400ml) — Use full-fat, canned coconut milk. The carton stuff is too thin and lacks the richness. Shake the can well before opening. The cream should be thick and white. This provides the luxurious base for the sauce.
Soy sauce (2 tablespoons / 30ml) — Adds saltiness and umami. Use regular soy sauce or tamari for gluten-free. Don’t use low-sodium unless you plan to add extra salt later.
Honey (2 tablespoons / 30ml) — Balances the saltiness of the curry paste and soy sauce with sweetness. Brown sugar works too, but honey dissolves easier in the cold sauce.
Lime juice (2 tablespoons / 30ml, about 1 lime) — Brightens the heavy sauce. Fresh lime juice is non-negotiable. Bottled juice tastes flat and artificial.
Fish sauce (1 tablespoon / 15ml) — This is the secret umami bomb. It doesn’t taste fishy in the sauce; it just adds depth. If you don’t have it, use extra soy sauce or a dash of Worcestershire.
Vegetable oil (1 tablespoon) — For sautéing the curry paste. Coconut oil works too, but vegetable oil has a higher smoke point.
For Garnish and Serving
Green onions (2 stalks, sliced) — Adds fresh color and mild onion flavor.
Fresh cilantro (¼ cup, chopped) — Classic Thai garnish. Don’t skip it if you like it; it cuts through the richness.
Lime wedges — For squeezing over the top at the table. Adds a fresh kick.
Crushed peanuts (optional) — For extra crunch and nutty flavor. I like to sprinkle these on top right before serving.
Steamed jasmine rice — To serve alongside. The sauce is amazing over rice.
Equipment Needed
You don’t need fancy equipment for this. Here’s what I actually use.
Baking sheet — I use a standard half-sheet pan (18×13 inches). Make sure it’s large enough to fit the chicken in a single layer with space between pieces. Crowding leads to steaming, not crisping.
Wire rack — This is the most important tool. Placing the chicken on a wire rack set over the baking sheet allows air to circulate underneath, ensuring the bottom gets crispy too. I use a standard cooling rack. If you don’t have one, you can bake directly on the sheet, but you’ll need to flip halfway and the bottom won’t be as crisp. Worth the investment.
Small saucepan — For making the sauce. A 2-quart saucepan is perfect. I prefer stainless steel because it heats evenly, but non-stick works fine.
Whisk — For blending the sauce ingredients smoothly. A small balloon whisk is easiest.
Sharp knife — For slicing green onions and chopping cilantro. Dull knives make you cry more—learned this the hard way.
Cutting board — Any size works. I use plastic for easier cleanup.
Measuring cups and spoons — Pretty standard stuff. Dollar store versions work fine.
Tongs — For flipping the chicken. Metal tongs work well.
Parchment paper — Optional but nice. Lines the baking sheet for easy cleanup. I use it because I hate scrubbing baked-on sauce off my pans.
How to Make It: Step-by-Step
Alright, let’s make this! I’m walking you through exactly how I do it, including the little tricks I’ve picked up.
Step 1: Prep the Chicken (5 minutes)
Pat the chicken thighs completely dry with paper towels. This is crucial. Moisture is the enemy of crispiness. If the chicken is wet, it will steam instead of bake. Trim any excess fat. If the thighs are very thick, you can pound them slightly to even out the thickness, but it’s not strictly necessary. Season both sides generously with salt and pepper.
Step 2: Set Up the Coating Station (2 minutes)
Preheat your oven to 400°F (200°C). Line a baking sheet with parchment paper and place a wire rack on top. In a shallow bowl or pie dish, mix together the cornstarch, panko breadcrumbs, garlic powder, smoked paprika, and a pinch of salt. Whisk it all together so the spices are evenly distributed.
Step 3: Coat the Chicken (3 minutes)
Dip each chicken thigh into the cornstarch mixture, pressing gently to ensure the coating adheres. Shake off any excess. Place the coated chicken on the wire rack, leaving space between each piece. You want air circulation, so don’t crowd the pan. If you have a large pan, you can fit all 6-8 thighs. If not, bake in two batches.
Step 4: Bake Until Crispy (20 minutes)
Place the baking sheet in the oven and bake for 20 minutes. The chicken should be golden brown and crispy on top. Halfway through (at 10 minutes), rotate the pan for even browning. If you want extra crispiness, you can broil for the last 2 minutes, but watch it closely—it burns fast.
Step 5: Make the Sauce (10 minutes)
While the chicken bakes, make the sauce. In a small saucepan over medium heat, warm the vegetable oil. Add the red curry paste and stir constantly for 1 minute to “bloom” the spices. This releases their flavor. Pour in the coconut milk, soy sauce, honey, fish sauce, and half of the lime juice. Whisk until smooth and combined. Bring to a gentle simmer. Let it cook for 5-7 minutes, stirring occasionally, until it thickens slightly. It should coat the back of a spoon. Remove from heat and stir in the remaining lime juice.
Step 6: Combine and Serve (2 minutes)
Remove the chicken from the oven. Drizzle or spoon the warm coconut curry sauce over the crispy chicken. Garnish with sliced green onions, fresh cilantro, and crushed peanuts if using. Serve immediately with steamed jasmine rice.
Total Time: About 30 minutes (10 minutes active, 20 minutes baking)
Built-in Troubleshooting:
- Chicken not crispy? Make sure you patted it dry and used a wire rack. Also, ensure your oven is fully preheated.
- Sauce too thin? Let it simmer longer. It will thicken as it cools slightly.
- Sauce too thick? Add a splash of water or more coconut milk to thin it out.
Expert Tips & Tricks
Here’s everything I’ve learned from making this dozens of times. These tips will save you from my mistakes.
Don’t Skip the Wire Rack
This is the #1 tip. Without the rack, the bottom of the chicken sits in its own juices and gets soggy. The rack lets the heat hit all sides. I forgot it once and the result was mediocre. Now I always set it up before I start.
Pat Dry, Pat Dry, Pat Dry
I cannot stress this enough. Wet chicken = soggy chicken. Use paper towels. Be aggressive. Dry it until it feels almost tacky.
Bloom the Curry Paste
Cooking the paste in oil for a minute before adding liquid unlocks its full flavor. Raw curry paste tastes flat and dusty. Bloomed paste tastes fragrant and complex. It’s a 60-second step that makes a huge difference.
Use Full-Fat Coconut Milk
Light coconut milk will make a watery, thin sauce. You want the richness and body that full-fat provides. Shake the can well before opening to mix the cream and liquid.
Balance Your Acid
Taste the sauce before serving. If it feels heavy, add more lime juice. If it’s too sour, add a bit more honey. The balance of sweet, salty, sour, and spicy is what makes Thai food addictive.
Make-Ahead Sauce
The sauce can be made up to 3 days ahead and stored in the fridge. Reheat gently on the stove. The flavors actually improve overnight.
Variations & Substitutions
Once you’ve nailed the basic version, here’s how you can mix it up. I’ve tried all of these.
Green Curry Version
Swap red curry paste for green curry paste. It’s spicier and fresher. Add some Thai basil leaves at the end for an authentic touch. My daughter prefers green curry because it’s brighter.
Yellow Curry Version
Use yellow curry paste for a milder, turmeric-forward flavor. It’s great for kids or those who don’t like heat. Add a pinch of garam masala for extra warmth.
Spicy Level Up
Add 1 teaspoon of chili flakes to the sauce, or use a spicy red curry paste. Serve with sliced fresh jalapeños on top.
Vegetable Add-ins
Toss in sliced bell peppers, snap peas, or broccoli florets with the chicken in the last 5 minutes of baking. They’ll roast nicely alongside the chicken.
Gluten-Free
Use tamari instead of soy sauce and fish sauce (check label for gluten). Ensure your curry paste is gluten-free (most are, but check). Use cornstarch and gluten-free panko.
Dairy-Free
This recipe is naturally dairy-free. Just ensure your curry paste doesn’t contain dairy (some brands add milk powder, so check labels).
Vegan
Replace chicken with extra-firm tofu (pressed and cubed) or seitan. Use vegetable broth instead of fish sauce if needed. The sauce is already vegan.
Serving & Storage
How to Serve:
I usually serve this straight from the skillet at the dinner table—it looks rustic and stays warm. But here are other ways I’ve enjoyed it:
Side Dishes:
– Steamed jasmine rice (essential for soaking up sauce)
– Coconut rice (for extra richness)
– Simple cucumber salad with rice vinegar
– Steamed broccoli or green beans
– Thai cucumber salad (with chili and lime)
Toppings Bar:
When I have guests, I put out: crushed peanuts, fresh cilantro, green onions, lime wedges, chili flakes. Everyone customizes their bowl.
Wine Pairing:
Not a wine expert, but my wine-snob friend says Riesling or Gewürztraminer works great with this. The sweetness balances the spice.
Storage Instructions:
Refrigerator:
Store in an airtight container for up to 4 days. The chicken will lose some crispiness, but the flavor remains excellent.
Reheating:
Best method: Reheat in a skillet over medium heat with a splash of water or coconut milk to restore moisture. Or reheat in the oven at 350°F for 10 minutes to recrisp the coating.
Microwave method: Heat in 30-second intervals, stirring between. Add a splash of water to prevent drying out.
Never works: Trying to reheat in the air fryer at high heat—it can burn the sauce. Low and slow is better.
Freezing:
Honestly, the coated chicken doesn’t freeze well because the coating gets soggy. The sauce freezes well for up to 3 months. Thaw sauce in fridge, reheat, and serve over freshly cooked rice or freshly baked chicken.
Nutrition Information
I’m not a nutritionist, but here’s the breakdown if you’re tracking.
Per Serving (based on 6 servings with rice):
– Calories: 450
– Protein: 28g
– Carbs: 35g
– Fiber: 2g
– Sugar: 8g
– Fat: 22g
– Saturated Fat: 12g
– Cholesterol: 85mg
– Sodium: 650mg
What’s Good:
– High protein from chicken thighs
– Healthy fats from coconut milk
– Rich in flavor without excessive sugar
What to Know:
– Higher in calories due to coconut milk and oil
– Contains sodium from soy sauce and fish sauce
– Gluten-free option available
My Take:
“Look, this is comfort food with coconut milk. It’s not a diet recipe. But it’s way better than takeout, costs less, and I know exactly what’s in it. When I want to make it lighter, I use less coconut milk and more vegetables. But usually? I just eat a reasonable portion and enjoy it.”
Final Thoughts
So that’s my go-to crispy baked coconut curry chicken! I’ve probably talked your ear off at this point, but when you make a recipe this often, you have a lot to say about it.
This has saved weeknight dinners more times than I can count. It’s my answer to ‘what’s for dinner’ when I’m tired, don’t want takeout, and still want something that tastes really good. My kids are happy, my husband’s happy, and I’m happy because I’m not stressed about cooking.
Make it yours! Try different curry pastes, swap in your favorite vegetables, adjust the spice level. The best recipes are the ones you adapt to your family’s tastes. And if you’re looking for other easy weeknight wins, check out my creamy sun-dried tomato spinach chicken skillet for another no-fuss dinner idea.
If you make this, drop a comment and let me know what you think! I love hearing how recipes turn out in your kitchen. And if something doesn’t work, tell me that too—I’m here to help troubleshoot.
Happy cooking! And I hope your kitchen smells half as good as mine does right now.
Frequently Asked Questions
Q: Can I use chicken breasts instead of thighs?
A: You can, but they will dry out faster. If you use breasts, reduce the bake time to 15-18 minutes and check the internal temperature (165°F). Thighs are more forgiving and stay juicier.
Q: Is red curry paste spicy?
A: It varies by brand. Mae Pui is medium heat. If you want mild, use less paste or switch to yellow curry paste. If you want hot, add chili flakes or use a spicy brand like Maesri.
Q: Can I make this in an air fryer?
A: Yes! Cook at 375°F for 12-15 minutes, shaking the basket halfway. The sauce should be added after cooking to keep the coating crispy.
Q: Why did my sauce separate?
A: High heat can cause coconut milk to separate. Keep the sauce at a gentle simmer, not a rolling boil. If it separates, whisk in a splash of water to bring it back together.
Q: Can I freeze this?
A: The sauce freezes well. The chicken does not. Freeze the sauce for up to 3 months, thaw, reheat, and serve over fresh rice and chicken.
Q: What’s the best rice to serve with this?
A: Jasmine rice is traditional and perfect. Basmati rice also works well. For a twist, try coconut rice by cooking jasmine rice with coconut milk and a pinch of salt.
Pin This Recipe!
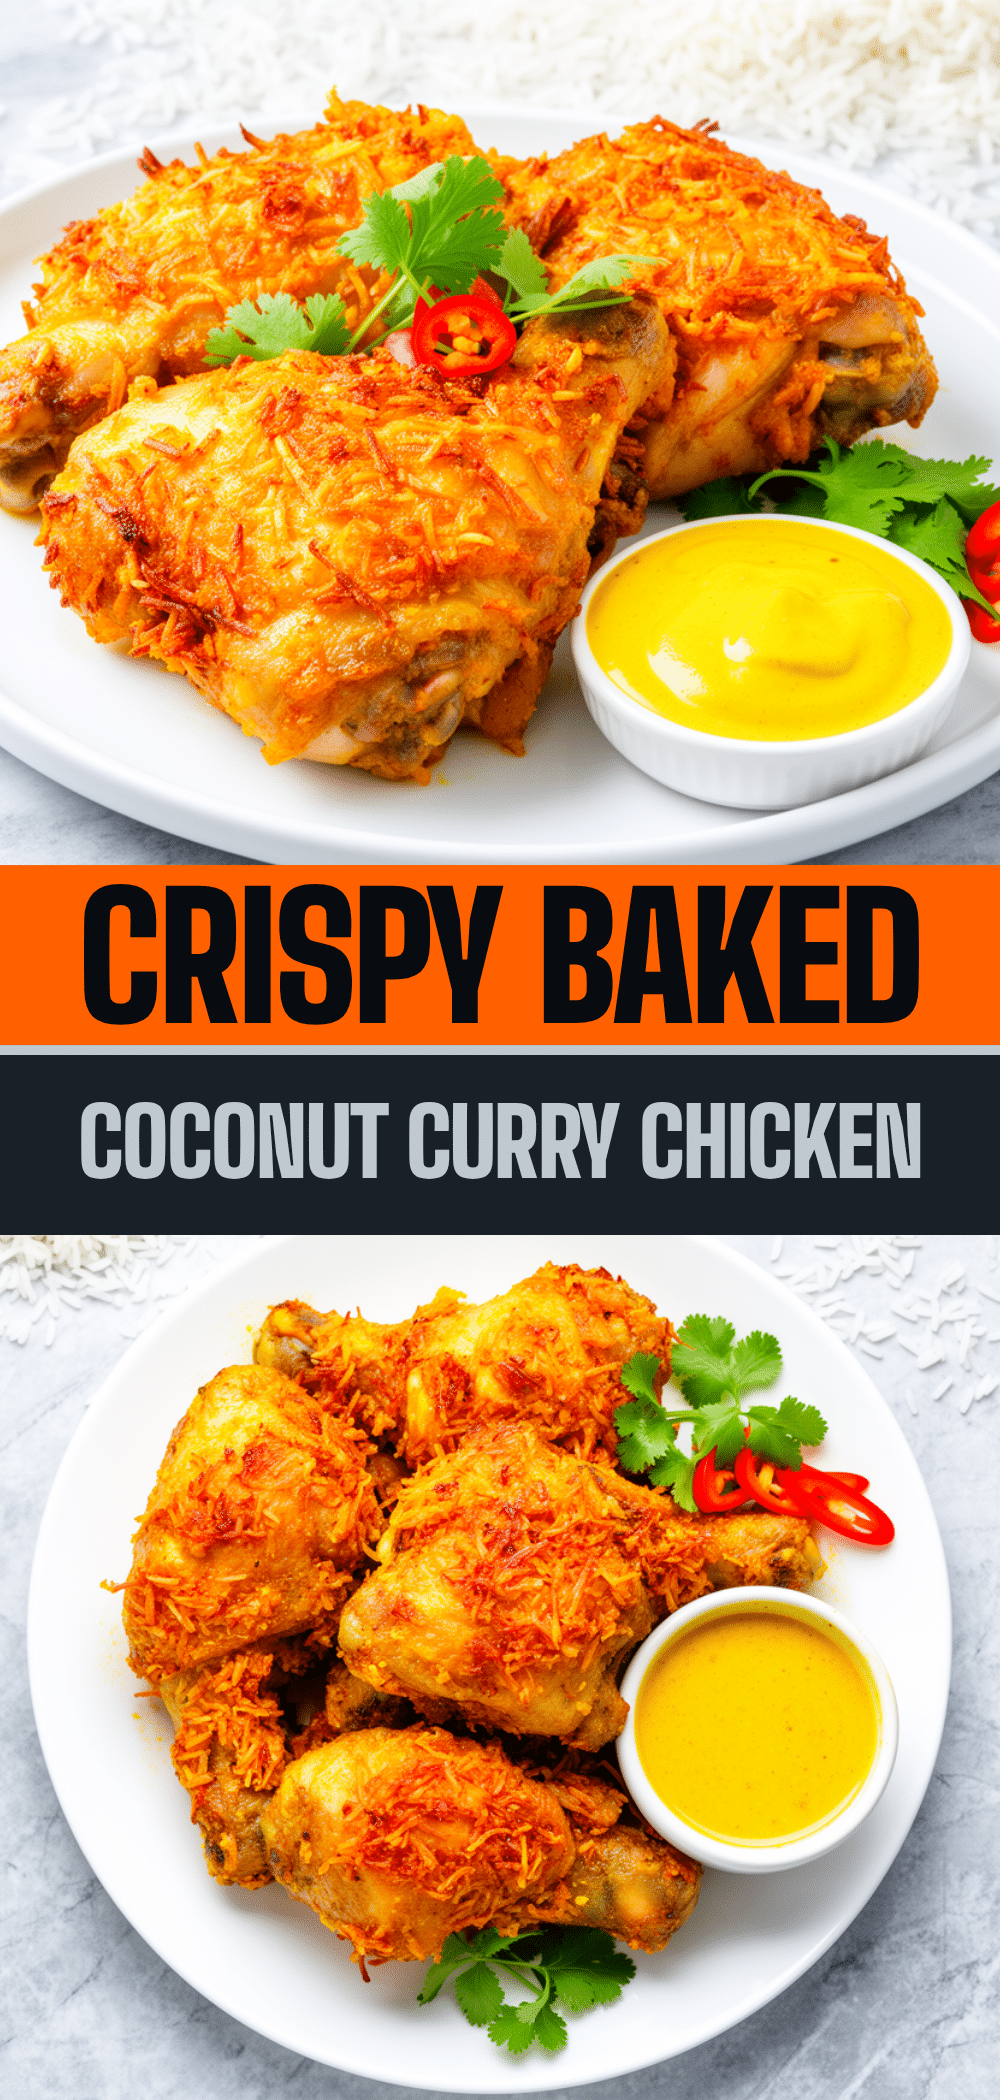
Crispy Baked Coconut Curry Chicken Thighs: 30-Min Easy Dinner
- Total Time: 30 minutes
- Yield: 4-6 servings 1x
Description
A quick and easy weeknight dinner featuring crispy baked chicken thighs coated in cornstarch and panko, served with a rich, creamy coconut curry sauce. Better than takeout and ready in 30 minutes.
Ingredients
- 2.5 lbs boneless, skinless chicken thighs
- 1 tsp kosher salt
- 1 tsp black pepper
- 1/2 cup cornstarch
- 1 cup panko breadcrumbs
- 1 tsp garlic powder
- 1/2 tsp smoked paprika
- 1 tbsp vegetable oil
- 3–4 tbsp red curry paste
- 1 can (13.5 oz) full-fat coconut milk
- 2 tbsp soy sauce
- 2 tbsp honey
- 1 tbsp fish sauce
- 2 tbsp lime juice (divided)
- 2 stalks green onions, sliced
- 1/4 cup fresh cilantro, chopped
- Crushed peanuts (optional)
- Steamed jasmine rice (for serving)
Instructions
- Preheat oven to 400°F (200°C). Line a baking sheet with parchment paper and place a wire rack on top.
- Pat chicken thighs completely dry with paper towels. Season both sides generously with salt and pepper.
- In a shallow bowl, mix cornstarch, panko, garlic powder, smoked paprika, and a pinch of salt.
- Dip each chicken thigh into the coating mixture, pressing gently to adhere. Shake off excess and place on the wire rack, ensuring space between pieces for air circulation.
- Bake for 20 minutes, rotating the pan halfway through, until golden brown and crispy. Optionally broil for the last 2 minutes for extra crispiness.
- While chicken bakes, heat vegetable oil in a small saucepan over medium heat. Add red curry paste and stir for 1 minute to bloom spices.
- Whisk in coconut milk, soy sauce, honey, fish sauce, and half of the lime juice. Bring to a gentle simmer and cook for 5-7 minutes until slightly thickened.
- Remove sauce from heat and stir in remaining lime juice.
- Drizzle warm sauce over the crispy chicken. Garnish with green onions, cilantro, and crushed peanuts. Serve immediately with steamed jasmine rice.
Notes
Patting the chicken dry is crucial for crispiness. Use a wire rack to allow air circulation underneath the chicken. Bloom the curry paste in oil to unlock full flavor. The sauce can be made ahead and stored in the fridge for up to 3 days. Chicken does not freeze well due to coating texture, but the sauce freezes well for up to 3 months.
- Prep Time: 10 minutes
- Cook Time: 20 minutes
- Category: Main Course
- Cuisine: Thai
Nutrition
- Serving Size: 1 chicken thigh with
- Calories: 450
- Sugar: 8
- Sodium: 650
- Fat: 22
- Saturated Fat: 12
- Carbohydrates: 35
- Fiber: 2
- Protein: 28
Keywords: coconut curry chicken, crispy baked chicken, thai food, weeknight dinner, easy recipe, gluten-free option, dairy-free


