
Last Tuesday, I pulled a batch of cookies out of the oven at 8 PM on a Sunday night, fully expecting them to be just another decent dessert. I had a few guests over for a casual movie night, and I needed something sweet that didn’t require a last-minute trip to the store. I grabbed the usual suspects: flour, sugar, chocolate chips, and a jar of salted caramel sauce I’d been hoarding in the pantry for months. I didn’t think much of it. I just mixed, scooped, and baked.
What happened next changed my baking game. When the first guest took a bite, they stopped mid-chew. Then another person stopped. Then someone actually asked for the recipe before the movie even started. It wasn’t just good. It was the kind of cookie that makes people close their eyes and sigh. The center was warm, gooey, and slightly salty, while the edges were crisp and chewy. It was chaos. Delicious, chocolatey, caramel-filled chaos.
That was the moment I realized I had found the Molten Salted Caramel Chocolate Cookies that everyone always asks for. Not because they’re complicated, but because they hit every single one of my comfort food triggers at once. I’ve made this batch about a dozen times since that random Tuesday. I’ve tweaked the caramel ratio, tested different chocolates, and even tried freezing the dough to see if it made a difference. The result? A cookie that is equal parts elegant and indulgent, easy enough for a weeknight but fancy enough for a dinner party centerpiece.
If you’ve ever been intimidated by “molten” cookies, thinking they require some complicated pastry technique, let me stop you right now. They don’t. They require patience, good chocolate, and a willingness to wait five minutes for them to cool so the center doesn’t spill everywhere. But the payoff? It’s worth every second of that anticipation. This is the recipe I keep coming back to, the one that disappears fastest from the cooling rack, and the one I’m finally sharing with you.
Why You’ll Love This Recipe
There are a lot of chocolate cookie recipes out there. I have a whole shelf of cookbooks dedicated to them. But this specific combination of textures and flavors is what keeps me coming back. Here’s why these cookies have taken over my kitchen (and my friends’ dinner plans):
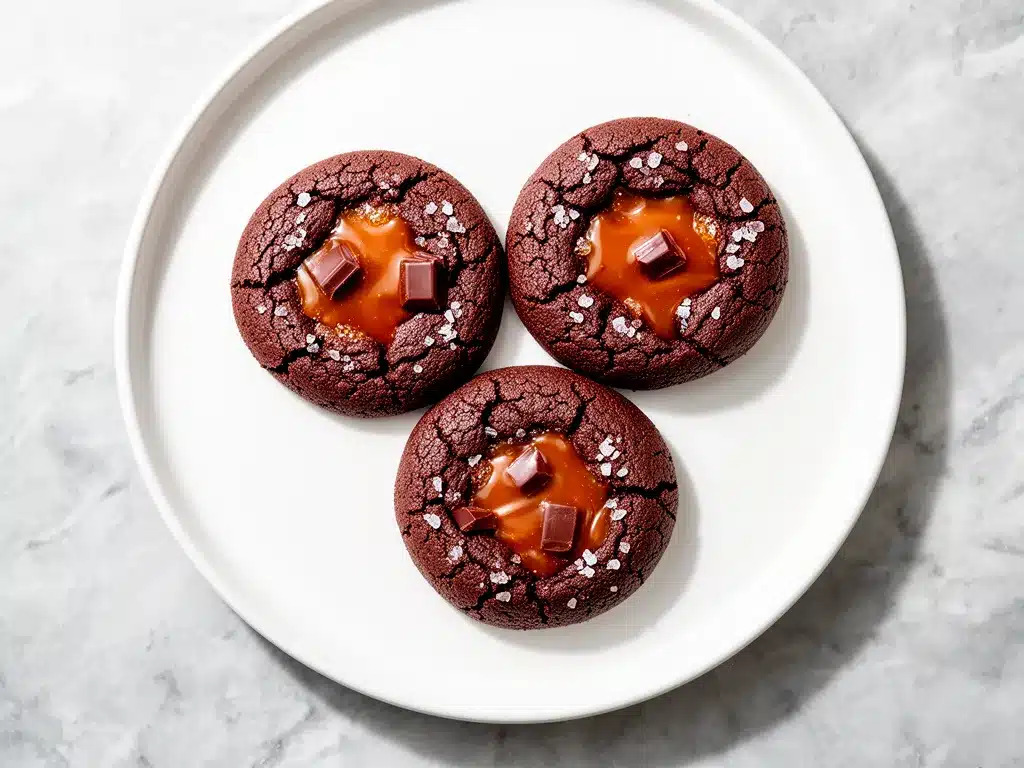
- The Gooey Factor is Real — Seriously, if you like a soft, chewy center, this is it. I call them “molten” because when you break one open, the caramel and chocolate melt together into this warm, liquid gold. It’s not runny like soup, but it’s definitely not a solid disk. It’s that perfect middle ground that feels luxurious.
- Sweet and Salty Perfection — I’m a huge fan of the sweet-salty combo (think ants on a log but make it dessert). The salted caramel cuts through the richness of the dark chocolate, keeping the flavor from becoming too heavy or cloying. It’s sophisticated but tastes like a cheat day.
- Zero Fancy Equipment Needed — You don’t need a stand mixer if you don’t want one. A large bowl and a wooden spoon (or your hands) work just fine. I’ve made these when I was tired, when I was distracted, and when I was trying to bake while helping my kid with homework. They work every time.
- Make-Ahead Friendly — One of my favorite things about these cookies is that the dough actually gets better after sitting in the fridge for 24 hours. The flavors meld together, and the texture becomes chewier. I often make the dough on Sunday and bake them Wednesday night for a fresh-baked treat in the middle of the week.
- Impressive but Simple — When I serve these, people assume I bought them from a high-end bakery. They look rustic and professional, especially when you serve them warm with a scoop of vanilla ice cream. But the effort? Minimal. It’s the ultimate “I made this myself” flex.
This recipe has completely changed our dessert routine. Instead of reaching for store-bought ice cream or simple toast, we now look forward to these cookies. They’re comforting, they’re shareable, and they always make everyone happy. Whether you’re baking for a crowd or just treating yourself, these cookies deliver.
Ingredients You’ll Need
Here’s the best part: you probably have most of this already. This isn’t a recipe that requires a special trip to a specialty store, although I do have a few strong opinions on which brands to grab.
For the Dough
Unsalted butter (1 cup / 226g) — You want this softened to room temperature. Not melted! Melted butter changes the texture of the cookie, making it cakey instead of chewy. If you’re in a rush, cut it into cubes and let it sit for 20 minutes.
Granulated sugar (½ cup / 100g) — This helps create those crispy edges. Don’t skip it or try to substitute it entirely with brown sugar, or you’ll lose that textural contrast.
Brown sugar (1 cup / 200g, packed) — This is the star for chewiness. Dark brown sugar has more molasses and gives a deeper, toffee-like flavor that pairs beautifully with the caramel. Light brown sugar works, but dark is better here.
Eggs (2 large) — Room temperature eggs incorporate better into the butter mixture. I usually take them out of the fridge when I start melting the butter (if I’m rushing) so they’re ready to go.
Vanilla extract (2 teaspoons) — Use the real stuff. The cheap imitation vanilla tastes artificial and clashes with the caramel. It’s the one place where I won’t compromise.
For the Dry Ingredients
All-purpose flour (2 cups / 250g) — Spoon it into the measuring cup and level it off. Don’t scoop directly from the bag, or you’ll pack it down and end up with dry cookies.
Baking soda (1 teaspoon) — This helps the cookies spread and brown. Make sure it’s not expired; old baking soda makes cookies dense.
Kosher salt (1 teaspoon) — I use kosher salt because the flakes are easier to measure evenly. If you use table salt, reduce it to ¾ teaspoon.
The Good Stuff (Inclusions)
Dark chocolate chunks (2 cups / 340g) — I prefer 60% to 70% dark chocolate. It’s not too sweet and holds its shape better than milk chocolate. I buy a bar and chop it myself with a chef’s knife. Bagged chocolate chips have wax coatings that prevent them from melting smoothly, which is exactly what we want for that molten center.
Salted caramel sauce (1 cup / 240ml) — This is the key ingredient. You can buy high-quality jarred caramel (like Smucker’s or store-brand gourmet brands), but if you have time, homemade is amazing. Look for a sauce that is thick and viscous, not thin and syrupy. Thin caramel will leak out too much during baking.
Flaky sea salt (for topping) — Maldon salt is my go-to. Sprinkling a pinch on top right after baking adds a gorgeous crunch and boosts the salty flavor.
Equipment Needed
You don’t need fancy gadgets for this. Here’s what I actually use:
Large mixing bowl — I use a 4-quart glass or ceramic bowl. It needs to be big enough to mix everything without splattering.
Hand mixer or wooden spoon — I actually prefer a wooden spoon for this. It gives you more control over the mixing, and you can feel when the butter and sugar are creamed properly. A stand mixer works too, but you have to be careful not to overmix.
Baking sheets — I use two half-sheet pans. Light-colored aluminum pans are best because they distribute heat evenly. Dark non-stick pans can cause the bottoms to burn.
Parchment paper — Line your baking sheets. Trust me, these cookies are sticky. Cleanup will be so much easier.
Cookie scoop — A 2-tablespoon scoop ensures uniform size. Uniform size means even baking. No more half-baked centers and burnt edges.
Wire cooling rack — Essential for letting the cookies set slightly so you can handle them without breaking them.
How to Make It: Step-by-Step
Alright, let’s make these! I’m walking you through exactly how I do it, including the little tricks I’ve picked up to ensure that perfect molten center.
Step 1: Cream the Butter and Sugars (5 minutes)
In your large bowl, combine the softened unsalted butter, granulated sugar, and brown sugar. Using a hand mixer on medium speed or a sturdy wooden spoon, beat this mixture until it’s light, fluffy, and pale in color. This usually takes about 2-3 minutes. This step incorporates air into the dough, which helps the cookies rise slightly and get that chewy texture. If you skip this, your cookies will be dense and flat.
Step 2: Add Wet Ingredients (2 minutes)
Beat in the eggs one at a time, making sure each is fully incorporated before adding the next. Then add the vanilla extract. Mix until just combined. Don’t overmix here. The mixture should look smooth and glossy. If it looks curdled, it’s probably just cold eggs. Give it a few more seconds, and it should come together.
Step 3: Mix Dry Ingredients (1 minute)
In a separate medium bowl, whisk together the flour, baking soda, and kosher salt. Then, gradually add the dry ingredients to the wet mixture. Mix on low speed or stir gently with a spoon until you *just* see no more streaks of flour. Stop mixing as soon as the dough comes together. Overmixing develops gluten, which makes cookies tough. We want tender, chewy cookies.
Step 4: Fold in Chocolate and Caramel (3 minutes)
This is the fun part. Gently fold in the chopped dark chocolate chunks. Now, for the caramel: I don’t mix the entire cup of caramel into the dough. Instead, I reserve about ¼ cup for drizzling on top later, and I fold in the rest. But here’s the secret: I also use a teaspoon to drop small dollops of caramel into the center of each cookie ball before baking. This ensures every single cookie has a molten center, not just the ones that got lucky with a caramel chunk.
Step 5: Scoop and Chill (30 minutes – 24 hours)
Scoop the dough onto parchment-lined baking sheets, spacing them about 2 inches apart. They will spread. At this point, you can bake them immediately, but I highly recommend chilling the dough for at least 30 minutes. Chilling solidifies the butter, which prevents the cookies from spreading too thin and losing their shape. If you have time, chill them for 24 hours. The flavors deepen, and the cookies become chewier. This is the difference between “good” and “amazing.”
Step 6: Bake (10-12 minutes)
Preheat your oven to 350°F (175°C). Bake the cookies for 10-12 minutes. Here’s the key: pull them out when the edges are set and golden, but the centers still look soft and slightly undercooked. They will continue to cook on the hot baking sheet after you take them out. If you wait until the centers look done in the oven, they’ll be dry by the time they cool.
Step 7: The Molten Finish (2 minutes)
Right out of the oven, while the cookies are still hot, drop a small spoonful of reserved caramel sauce onto the center of each cookie. Then, sprinkle with flaky sea salt. The heat from the cookie will melt the caramel slightly, creating that gooey, molten pool. Let them cool on the baking sheet for 5 minutes before transferring to a wire rack. This resting time is crucial for the structure to set.
Expert Tips & Tricks
Here’s everything I’ve learned from making these dozens of times. These tips will save you from my mistakes.
Chill Your Dough
I can’t stress this enough. Chilled dough = better texture. If you skip the chill, you risk flat, greasy cookies. If you’re short on time, put the scooped dough balls in the freezer for 15 minutes. It’s a quick hack that works almost as well as a full chill.
Don’t Overbake
This is the #1 mistake people make. These cookies look done when they’re still raw in the middle. Trust me. Pull them when the edges are golden. The residual heat will finish cooking the center, leaving you with that perfect soft, gooey texture.
Use Good Chocolate
Since chocolate is a main ingredient, quality matters. I use Ghirardelli 60% Cacao Bittersweet Chocolate Chips or bars. Avoid the cheapest baking chips; they taste waxy and artificial. The flavor of the chocolate shines through, so treat yourself to something nice.
Control the Caramel
If your caramel sauce is too thin, it will leak out completely and leave you with just a chocolate cookie. If it’s too thick, it won’t melt. Look for a “dipping” style caramel or warm it up slightly in the microwave (10 seconds) to make it easier to dollop. If it’s too thick, mix it with a teaspoon of heavy cream to loosen it up.
Room Temperature Ingredients
Make sure your butter, eggs, and vanilla are at room temperature. Cold ingredients don’t mix evenly, leading to pockets of flour or unmixed butter. This affects the texture and how the cookies spread.
Variations & Substitutions
Once you’ve nailed the basic version, here’s how you can mix it up. I’ve tried all of these.
White Chocolate Macadamia
Swap the dark chocolate for white chocolate chunks and add 1 cup of toasted macadamia nuts. The sweet, buttery nut pairs beautifully with the salted caramel. This is a crowd-pleaser for people who don’t like dark chocolate.
Peanut Butter Cup
Add 2 tablespoons of peanut butter to the dough mixture and use peanut butter chips instead of dark chocolate. Top with a drizzle of caramel. It’s like eating a Reese’s Cup in cookie form.
Vegan Version
Use vegan butter (like Earth Balance), flax eggs (1 tablespoon ground flaxseed + 3 tablespoons water per egg), and vegan dark chocolate chunks. For the caramel, use a vegan-certified brand like Taza or make your own with coconut milk and brown sugar. The texture might be slightly different, but it’s still delicious.
Gluten-Free
Use a 1:1 gluten-free flour blend (like Bob’s Red Mill or King Arthur). Make sure your baking soda and chocolate are certified gluten-free. The texture will be slightly more tender, which works well with the molten center.
Mini Cookies
Use a 1-tablespoon scoop instead of 2-tablespoon. Bake for 7-8 minutes. These are perfect for party platters or gift boxes. Just remember, they’ll bake faster, so keep an eye on them.
Serving & Storage
How to serve these bad boys? Here’s what works best.
How to Serve
I serve these warm, right out of the oven (or reheated). They look rustic and inviting on a wooden board or a simple white plate. Pair them with a cold glass of milk, a scoop of vanilla bean ice cream, or a cup of strong coffee. The contrast of hot cookie and cold ice cream is divine. I also like to serve them with a side of salted caramel sauce for dipping.
Storage Instructions
Room Temperature: Store in an airtight container at room temperature for up to 3 days. Place a slice of bread in the container with the cookies; the bread will keep them soft and chewy.
Refrigerator: Not recommended for long-term storage, as the fridge can dry out cookies. If you must refrigerate, store in an airtight container for up to 5 days.
Freezing Dough: You can freeze the dough balls on a baking sheet, then transfer to a freezer bag. Bake straight from frozen, adding 1-2 minutes to the bake time.
Freezing Baked Cookies: Yes, you can freeze baked cookies for up to 2 months. Thaw at room temperature. Reheat in the microwave for 10-15 seconds to restore the molten texture.
Reheating
If your cookies have cooled and firmed up, don’t despair. Microwave for 10-15 seconds, or bake at 350°F for 3-4 minutes. This re-liquefies the caramel and chocolate, bringing back that molten goodness.
Nutrition Information
I’m not a nutritionist, but here’s the breakdown if you’re tracking. Keep in mind that these are rich, indulgent cookies, so portion control is key.
Per Cookie (approx. 2-inch cookie, 1/24th of recipe):
- Calories: 280
- Protein: 3g
- Carbs: 38g
- Fiber: 2g
- Sugar: 24g
- Fat: 14g
- Saturated Fat: 8g
These cookies are high in sugar and fat, but they’re also satisfying. One or two cookies with a cup of tea or coffee is a perfect treat. If you’re watching your sugar, consider using a sugar-free caramel sauce or reducing the sugar in the dough slightly (though it may affect texture).
Final Thoughts
So that’s my go-to Molten Salted Caramel Chocolate Cookies recipe! I’ve probably talked your ear off at this point, but when you make a recipe this often, you have a lot to say about it.
This has saved dessert nights more times than I can count. It’s my answer to “what’s for dessert?” when I want something special but don’t want to spend hours in the kitchen. My family loves them, my friends beg for the recipe, and I love that they’re so forgiving. You can’t mess them up. You can underbake them, overbake them, use different chocolate, skip the chill—and they’ll still be delicious.
Make it yours! Try different chocolates, add nuts, or drizzle extra caramel on top. The best recipes are the ones you adapt to your tastes. And if you make these, drop a comment and let me know what you think! I love hearing how recipes turn out in your kitchen. And if something doesn’t work, tell me that too—I’m here to help troubleshoot.
Happy baking! I hope your kitchen smells half as good as mine does right now.
Frequently Asked Questions
Can I use milk chocolate instead of dark chocolate?
You can, but the cookies will be much sweeter. Dark chocolate (60-70%) provides a nice bitterness that balances the sweet caramel and brown sugar. If you prefer milk chocolate, I recommend reducing the granulated sugar in the dough by ¼ cup to keep the sweetness in check. Also, milk chocolate chips melt faster, so watch the bake time closely to prevent burning.
Why did my caramel leak out completely?
This usually happens if the caramel sauce is too thin or if you used too much. If the caramel is runny, it will leak through the dough during baking. Try using a thicker caramel or chilling the dough balls longer before baking to help them hold their shape. Also, make sure you’re not using too much caramel per cookie. A teaspoon is enough for a molten center.
Can I make the dough ahead of time?
Yes! In fact, I recommend it. You can store the dough in the refrigerator for up to 3 days. For longer storage, freeze the dough balls on a baking sheet, then transfer to a freezer bag. They’ll keep for up to 3 months. Bake straight from frozen, adding 1-2 minutes to the bake time. This is perfect for meal prepping desserts.
Can I use salted butter instead of unsalted?
You can, but you’ll need to reduce the added salt in the recipe. Salted butter varies in salt content, so start by reducing the kosher salt to ½ teaspoon. Taste the dough (if you’re brave enough) or just go by feel. Unsalted butter is preferred because it gives you more control over the saltiness, especially when paired with salted caramel.
How do I get that molten center?
The key is underbaking. Pull the cookies out when the edges are set but the centers still look soft and slightly undercooked. They will continue to cook on the hot baking sheet. Also, using a thick caramel sauce and chilling the dough helps keep the center intact. If you bake them until they look fully done in the oven, the center will be solid, not molten.
Can I freeze these cookies?
Absolutely. You can freeze the baked cookies for up to 2 months. Let them cool completely, then store in an airtight container with parchment paper between layers. To serve, thaw at room temperature and microwave for 10-15 seconds to re-melt the caramel. You can also freeze the dough balls for up to 3 months.
What if I don’t have a cookie scoop?
No problem. Use two tablespoons to scoop the dough, or just use your hands to roll them into balls. Just make sure they’re roughly the same size so they bake evenly. If they’re too big, they might spread too much and lose their shape. Aim for 2-inch balls for the best result.
Pin This Recipe!
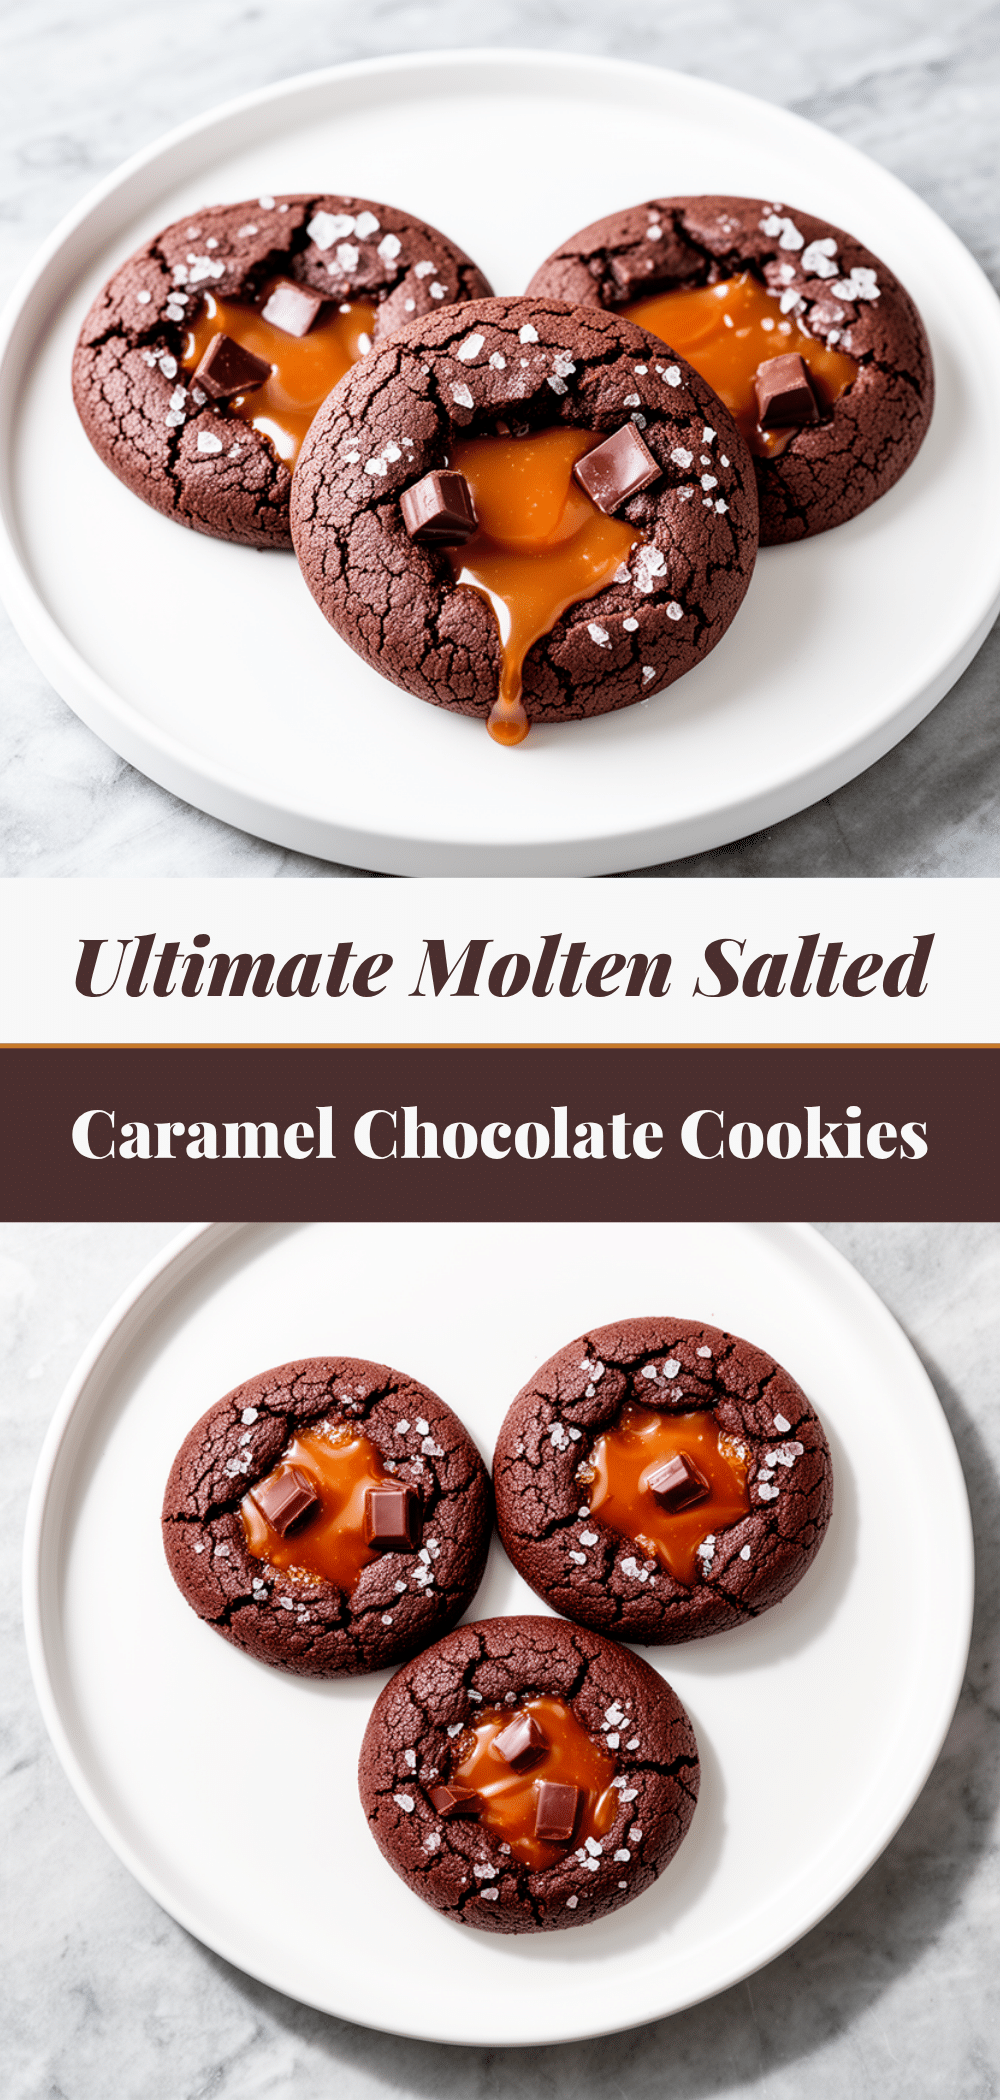

Molten Salted Caramel Chocolate Cookies
- Total Time: 45 minutes
- Yield: 24 cookies 1x
Description
These cookies feature a crisp, chewy edge and a warm, gooey center filled with melted dark chocolate and salted caramel sauce. They are easy to make, make-ahead friendly, and offer the perfect sweet-salty indulgence.
Ingredients
- 1 cup (226g) unsalted butter, softened to room temperature
- ½ cup (100g) granulated sugar
- 1 cup (200g) packed dark brown sugar
- 2 large eggs, room temperature
- 2 teaspoons vanilla extract
- 2 cups (250g) all-purpose flour
- 1 teaspoon baking soda
- 1 teaspoon kosher salt
- 2 cups (340g) dark chocolate chunks (60-70% cacao)
- 1 cup (240ml) thick salted caramel sauce
- Flaky sea salt (for topping)
Instructions
- Preheat oven to 350°F (175°C) and line two half-sheet baking pans with parchment paper.
- In a large bowl, cream together the softened butter, granulated sugar, and brown sugar until light, fluffy, and pale in color (about 2-3 minutes).
- Beat in the eggs one at a time, ensuring each is fully incorporated before adding the next. Mix in the vanilla extract until smooth.
- In a separate medium bowl, whisk together the flour, baking soda, and kosher salt.
- Gradually add the dry ingredients to the wet mixture, mixing on low speed or stirring gently until just combined. Do not overmix.
- Gently fold in the dark chocolate chunks. Reserve about ¼ cup of the caramel sauce for topping; fold the remaining caramel into the dough.
- Scoop the dough onto the prepared baking sheets, spacing them about 2 inches apart. For each cookie, drop a small teaspoon of reserved caramel sauce into the center of the dough ball.
- Chill the dough on the baking sheets for at least 30 minutes (or up to 24 hours) to prevent excessive spreading.
- Bake for 10-12 minutes, or until the edges are set and golden but the centers still look soft and slightly undercooked.
- Remove from the oven and immediately drop a small spoonful of reserved caramel sauce onto the center of each hot cookie. Sprinkle with flaky sea salt.
- Let cookies cool on the baking sheet for 5 minutes to set before transferring to a wire rack.
Notes
Chilling the dough is crucial for texture and preventing flat cookies. For a molten center, do not overbake; the cookies will continue to cook on the hot pan. Use thick caramel sauce to prevent leaking. Dough can be frozen for up to 3 months.
- Prep Time: 30 minutes
- Cook Time: 10-12 minutes
- Category: Dessert
- Cuisine: American
Nutrition
- Serving Size: 1 cookie (approx. 2-
- Calories: 280
- Sugar: 24
- Sodium: 250
- Fat: 14
- Saturated Fat: 8
- Carbohydrates: 38
- Fiber: 2
- Protein: 3
Keywords: molten cookies, salted caramel cookies, chocolate cookies, gooey cookies, homemade dessert, sweet and salty


