It was 5:45 PM on a Tuesday, and the house was already in chaos. The kids were arguing over who got the last juice box, my husband was hunting for his keys, and I was staring into an open fridge that contained exactly three sad spinach leaves, a half-used jar of pickles, and a bunch of bananas that were looking at me with judgment. They were black. Spotty. Too far gone for smoothies. Throwing them out felt like throwing away money, but eating them raw? Not happening.
I didn’t have time to bake cookies. I didn’t have energy to sauté vegetables. I just needed dinner. Something warm, something that smelled like home, and something that wouldn’t take an hour to clean up. So I did what I always do when I’m out of ideas: I raided the pantry.
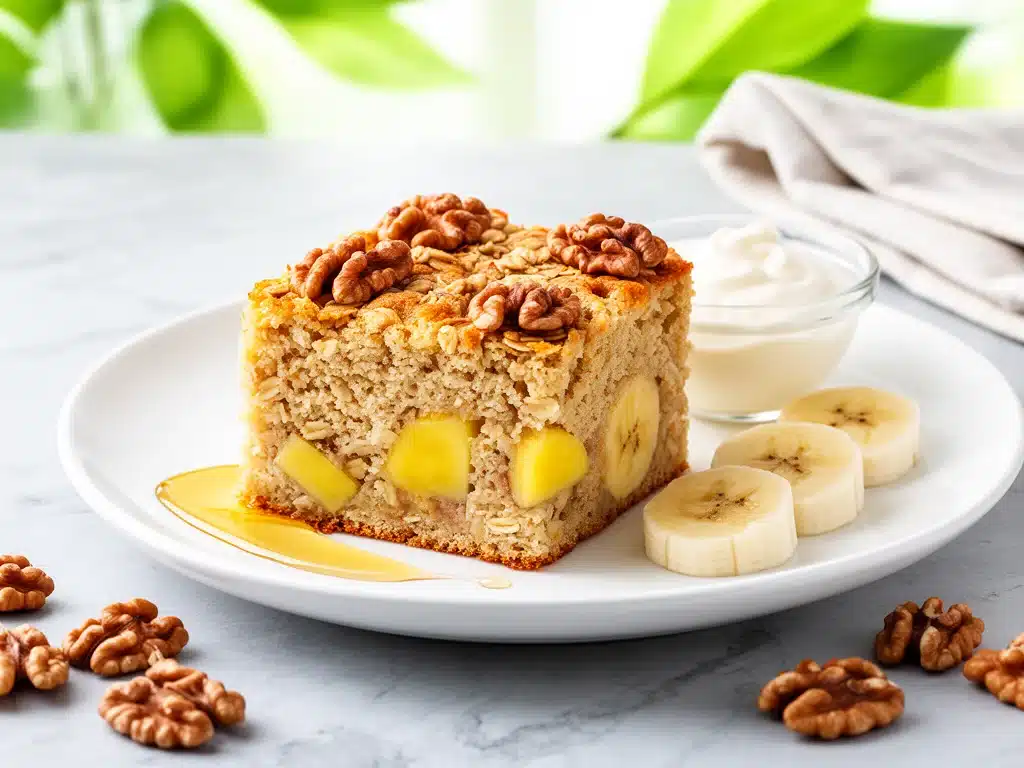
I found oats. I found milk. I found walnuts and honey. And somehow, those sad bananas became the star of fluffy banana nut baked oatmeal squares. I threw everything into a single dish, popped it in the oven, and went to help with homework. Twenty minutes later, the whole house smelled like a bakery. The kids stopped fighting. My husband paused before leaving. And I sat down for five minutes of peace while eating warm, soft oatmeal squares straight from the pan.
This recipe has saved me more times than I can count. It’s my answer to “what’s for dinner” when I’m tired, the pantry is empty, and I still want something that tastes comforting and homemade. It’s not fancy. It’s not complicated. But it’s reliable, delicious, and yes—perfect for busy weeknights.
I’ve tested this fluffy banana nut baked oatmeal squares recipe at least a dozen times now. Sometimes with pecans, sometimes with extra cinnamon, sometimes with yogurt instead of milk. But the core idea stays the same: simple ingredients, one dish, and zero stress. If you’ve ever stood in front of an open fridge at 6 PM wondering how to turn leftovers into dinner, this is your new best friend.
Why You’ll Love These Baked Oatmeal Squares
There are about ten reasons I keep coming back to this recipe, but here are the big ones that make it a weeknight staple in our house.
Stupid Simple — Seriously, if you can mash a banana and pour milk, you can make this. I’ve walked my teenage daughter through it over FaceTime while she was at college. No fancy techniques, no special skills required.
One Dish Magic — Mixing bowl, baking dish, done. No dirty pots, no dirty pans, no dirty measuring cups scattered across the counter. This is my kind of cooking. I’m not lying when I say this has reduced my weekly dishwashing load by at least two nights.
Lightning Fast (Once in the Oven) — It takes about 10 minutes of active work. The rest is hands-off baking time. I can start this, answer a phone call, check emails, or just sit quietly while it bakes. The oven does the heavy lifting.
Perfect for Meal Prep — These squares actually taste better the next day. The flavors meld, the texture gets even softer, and they’re perfect for grabbing on the go. I make a batch on Sunday and eat them for breakfast or lunch all week long. They travel well in a lunchbox, too.
Kid-Approved — My picky eater son, who usually turns his nose up at anything “healthy,” asks for these regularly. They’re sweet enough to feel like a treat but wholesome enough that I don’t feel guilty serving them for dinner. My daughter says they’re “like cake but better.”
Budget-Friendly — Oats, bananas, milk, nuts, honey. These are pantry staples. You probably have most of this already. Feeds a family of four for under $5. That’s cheaper than a box of cereal and way more satisfying.
This is my go-to when I need dinner (or breakfast, or a snack, or dessert) to just work. No complicated techniques, no weird ingredients, just reliable, delicious food that makes everyone happy. It’s comfort food without the fuss.
Ingredients You’ll Need
Here’s the best part: you probably have most of this already. This isn’t a recipe that requires a special trip to the store. It’s built on basics you likely already have in your kitchen.
For the Base
Old-fashioned rolled oats (3 cups / 270g) — Do not use quick oats or steel-cut oats. Quick oats turn mushy, and steel-cut oats won’t cook right in this time frame. I use Quaker Old-Fashioned because they hold their texture perfectly. Look for the big blue box at the grocery store.
Ripe bananas (3 large / about 350g mashed) — The riper, the better. Black-spotted bananas are sweeter and mash easier. If your bananas are still yellow, microwave them for 30 seconds to soften them up. You need about 1.5 cups of mashed banana.
Milk (1.5 cups / 360ml) — Any milk works. I use 2% dairy milk for richness, but almond milk, oat milk, or soy milk work just as well. I’ve made this with skim milk too—it’s just a bit less creamy. Don’t use water; it’ll be bland.
Eggs (2 large) — These bind everything together. Room temperature eggs mix in easier, but cold eggs work fine too. I don’t bother bringing them to room temperature unless I’m planning ahead.
Maple syrup or honey (¼ cup / 60ml) — I prefer maple syrup for that classic breakfast flavor, but honey works too if that’s what you have. Use real maple syrup, not pancake syrup. The difference is huge.
Melted butter or coconut oil (3 tablespoons / 45g) — Butter adds richness. Coconut oil adds a subtle tropical note and keeps it dairy-free. I use butter 90% of the time because it tastes better, but coconut oil is my go-to when I’m out.
For the Flavor
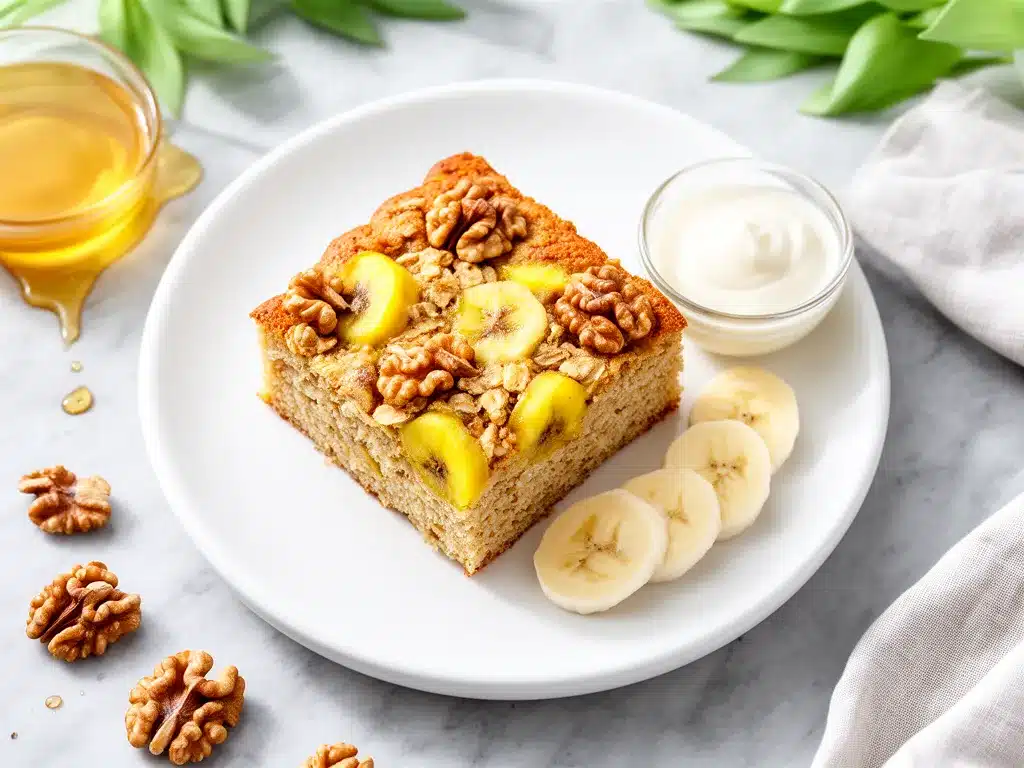
Ground cinnamon (1 teaspoon) — Don’t skimp. Cinnamon is what makes this taste like comfort. If your cinnamon is old and dusty, replace it. It won’t smell right, and the flavor will be weak.
Baking powder (1 teaspoon) — This is what makes the squares fluffy instead of dense. Make sure it’s not expired. I check my baking powder every few months because I forget it sits in the back of the cabinet until it’s dead.
Salt (½ teaspoon) — Just a pinch to balance the sweetness. Don’t skip it. Unsweetened oatmeal tastes flat without salt.
Vanilla extract (1 teaspoon) — Pure vanilla, not imitation. It adds depth that makes the whole dish taste more sophisticated than it actually is.
For the Crunch
Chopped walnuts or pecans (½ cup / 60g) — Walnuts are classic, but pecans are sweeter and richer. I alternate between them. If you’re allergic to nuts, you can skip this or use seeds. I’ve made this with pumpkin seeds before, and it’s still good.
Optional add-ins: I sometimes add ½ cup of chocolate chips for a dessert vibe, or ¼ cup of raisins for a trail-mix feel. Fresh blueberries work too, but they can make the batter wetter. If you use berries, reduce the milk by 2 tablespoons.
Equipment Needed
You don’t need fancy equipment for this. Here’s what I actually use.
8×8-inch baking dish — This is the perfect size for these squares. A 9×9 will work but the squares will be thinner. A 9×13 will make them too thin and dry. Stick with 8×8 if you can.
Medium mixing bowl — Any bowl that’s big enough to hold 3 cups of oats and a cup of milk. I use a glass Pyrex bowl because I can see the sides and make sure everything is mixed well.
Fork or potato masher — For mashing the bananas. A fork works fine. A potato masher is faster if you have one. I don’t bother with a hand mixer; this doesn’t need to be smooth.
Measuring cups and spoons — Pretty standard stuff. Dollar store versions work fine. I use the dry measuring cups for oats and the liquid measuring cup for milk.
Spatula — For scraping the bowl and spreading the batter. Silicone spatulas are best because they bend and get into the corners. I have a cheap one from Target that works perfectly.
Cooling rack — Optional but helpful. Letting the squares cool on a rack prevents the bottom from getting soggy. I usually just let them cool in the pan on the stovetop if I’m in a hurry.
Knife or pizza cutter — For slicing the squares. A knife works fine. A pizza cutter makes clean cuts without squishing the oatmeal. I love my pizza cutter for this.
How to Make It: Step-by-Step
Alright, let’s make this! I’m walking you through exactly how I do it, including the little tricks I’ve picked up over time.
Step 1: Prep Your Pan (2 minutes)
Preheat your oven to 350°F (175°C). Grease an 8×8-inch baking dish with butter or cooking spray. I usually butter the pan because it adds flavor, but spray works if you’re watching calories. Don’t skip this step. Oatmeal sticks like crazy if the pan isn’t greased properly.
Step 2: Mash the Bananas (2 minutes)
Peel your bananas and put them in a large mixing bowl. Mash them with a fork until there are no big chunks left. You want a mostly smooth puree with a few small lumps for texture. If the bananas are really ripe, they’ll mash easily. If they’re firm, microwave them for 30 seconds first.
Step 3: Mix Wet Ingredients (2 minutes)
Add the eggs, melted butter (or coconut oil), maple syrup, milk, and vanilla extract to the mashed bananas. Whisk everything together with a fork or whisk until it’s well combined. It doesn’t need to be perfectly smooth—just mixed. The mixture should look like a thin, fragrant banana shake.
Step 4: Add Dry Ingredients (2 minutes)
Add the rolled oats, baking powder, cinnamon, and salt to the wet mixture. Stir with a spatula until everything is evenly coated. The oats will start absorbing the liquid immediately, which is fine. Let it sit for 5 minutes while the oven finishes heating up. This step is crucial—it lets the oats soften so they bake evenly instead of staying crunchy.
Step 5: Fold in the Nuts (1 minute)
Stir in the chopped walnuts or pecans. Spread the batter evenly into your greased baking dish. Use the back of a spoon to smooth the top. It doesn’t need to be perfect, but try to make it even so the squares bake uniformly.
Step 6: Bake (25-30 minutes)
Put the dish in the preheated oven and bake for 25-30 minutes. You’ll know it’s done when the top is golden brown and a toothpick inserted into the center comes out clean or with just a few moist crumbs. The edges should be slightly crispy, and the center should be set but still soft. Don’t overbake it, or the squares will dry out.
Step 7: Cool and Slice (15 minutes)
Remove the dish from the oven and let it cool for at least 15 minutes before slicing. This is the hardest part, I know. But if you cut it hot, the squares will fall apart. Letting them cool lets them set. After 15 minutes, use a knife or pizza cutter to cut into 9 or 12 squares. Serve warm or at room temperature.
Visual cues: You’ll know the oatmeal is ready when the top has a matte, golden finish and the edges pull away slightly from the pan. The smell should be warm, sweet, and nutty. If it smells burnt, your oven is too hot or it’s been in too long.
Expert Tips & Tricks
Here’s everything I’ve learned from making this dozens of times. These tips will save you from my mistakes.
Let the Batter Rest — That 5-minute rest after mixing is non-negotiable. It lets the oats absorb the liquid and soften. If you skip this, the oatmeal will be chewy and uneven. I’ve made this mistake before, and the texture was terrible. Now I always wait.
Don’t Overmix — Once you add the oats, stir until just combined. Overmixing can make the oatmeal dense. You want fluffy, not tough. A gentle fold is all it needs.
Check Your Baking Powder — If your baking powder is old, your squares won’t rise. They’ll be flat and dense. I check mine every few months. If it doesn’t fizz when you drop it in vinegar, throw it out.
Room Temperature Eggs — Cold eggs can make the batter uneven. If you have time, let them sit out for 15 minutes. If you don’t, just mix them in thoroughly. It’s not a disaster, but room temp is better.
Storage Matters — These squares stay fresh in an airtight container at room temperature for 2 days. In the fridge, they last 5 days. In the freezer, they last 3 months. I usually freeze half the batch because they reheat so well.
Reheating Trick — To reheat, microwave for 30-60 seconds or warm in a 350°F oven for 10 minutes. They’re best warm. Cold oatmeal squares are fine, but warm ones are amazing.
Variations & Substitutions
Once you’ve nailed the basic version, here’s how you can mix it up. I’ve tried all of these.
Chocolate Chip Banana Oatmeal — Add ½ cup of chocolate chips before baking. This turns it into a dessert-like treat. My kids love this version. It’s basically oatmeal brownies.
Raisin Walnut — Swap the walnuts for raisins. Add ½ cup of raisins. This is more traditional and less sweet. Great for a classic breakfast vibe.
Pumpkin Spice — Swap the cinnamon for pumpkin pie spice. Add ¼ cup of pumpkin puree and reduce the milk by 2 tablespoons. This is perfect for fall.
Protein-Packed — Stir in 2 scoops of vanilla protein powder. You’ll need to add an extra ¼ cup of milk because protein powder absorbs liquid. This makes it more filling and great for post-workout.
Dairy-Free — Use coconut oil instead of butter and any plant-based milk. The result is nearly identical. I’ve made this for lactose-intolerant friends, and they couldn’t tell the difference.
Gluten-Free — Use certified gluten-free oats. Everything else is naturally gluten-free. I’ve used Bob’s Red Mill GF oats, and they work perfectly.
Nut-Free — Skip the nuts entirely or swap for seeds like pumpkin or sunflower seeds. The texture will be softer, but the flavor is still great.
Berry Blast — Add 1 cup of fresh or frozen berries. If using frozen, don’t thaw them first. Add them at the end and mix gently. Reduce milk by 2 tablespoons if the batter looks too wet.
Serving & Storage
These squares are incredibly versatile. Here’s how I serve and store them.
How to Serve
I usually serve these warm, straight from the pan, for breakfast or dinner. But they work for any meal. Here are other ways I’ve enjoyed them:
- With a dollop of Greek yogurt — Adds protein and tang. Great for breakfast.
- With a drizzle of peanut butter — Makes it richer and more satisfying. My husband’s favorite topping.
- With fresh fruit on top — Sliced strawberries or blueberries add brightness.
- With a side of bacon or sausage — Turns it into a full breakfast plate.
When I have guests, I cut them into smaller squares and serve them with a coffee bar. They’re perfect for brunch or potlucks because they’re easy to grab and eat.
Storage Instructions
Refrigerator: Store in an airtight container for up to 5 days. They’ll firm up in the fridge, which is normal. Let them come to room temperature or microwave before eating.
Freezer: These freeze beautifully. Wrap individual squares in plastic wrap and store in a freezer bag for up to 3 months. Thaw at room temperature or microwave for 30 seconds. I freeze half every time I make this.
Reheating: Microwave for 30-60 seconds or warm in a 350°F oven for 10 minutes. They’re best warm. Never eat them cold straight from the fridge unless you prefer that texture.
Pro tip: If they’re drying out, add a splash of milk when reheating. It brings back the moisture. I do this when I’m reheating squares that’ve been in the fridge for a few days.
Nutrition Information
I’m not a nutritionist, but here’s the breakdown if you’re tracking. This is per square (makes 9 squares).
| Nutrient | Per Square |
|---|---|
| Calories | 210 |
| Protein | 6g |
| Carbs | 32g |
| Fiber | 4g |
| Sugar | 12g |
| Fat | 8g |
| Saturated Fat | 2g |
| Cholesterol | 35mg |
| Sodium | 150mg |
What’s good: Decent fiber from oats, protein from eggs and nuts, and natural sugars from bananas. It’s a balanced meal that keeps you full.
What to know: Higher in carbs due to oats and bananas. Contains dairy and nuts. Moderate sodium. If you’re watching sugar, reduce the maple syrup or use unsweetened applesauce as part of the sweetener.
My take: This is wholesome comfort food. It’s not a diet recipe, but it’s way better than store-bought breakfast bars. I know exactly what’s in it, and it’s made from real ingredients. When I want to make it lighter, I reduce the nuts and use less syrup. But usually? I just eat a square or two and enjoy it.
Final Thoughts
So that’s my go-to fluffy banana nut baked oatmeal squares! I’ve probably talked your ear off at this point, but when you make a recipe this often, you have a lot to say about it.
This has saved weeknight dinners more times than I can count. It’s my answer to “what’s for dinner” when I’m tired, don’t want takeout, and still want something that tastes really good. The kids are happy, the house smells amazing, and I’m happy because I’m not stressed about cooking. It’s simple, reliable, and delicious.
Make it yours! Try different add-ins, swap in your favorite nuts, adjust the sweetness to your taste. The best recipes are the ones you adapt to your family’s tastes. If you run out of bananas, try ants on a log for a quick snack while you wait for the next grocery trip. Or if you love baked oatmeal, check out my make-ahead blueberry baked oatmeal cups for a different twist.
If you make this, drop a comment and let me know what you think! I love hearing how recipes turn out in your kitchen. And if something doesn’t work, tell me that too—I’m here to help troubleshoot.
Happy cooking! And I hope your kitchen smells half as good as mine does right now.
Frequently Asked Questions
Can I use quick oats instead of old-fashioned oats?
You can, but the texture will be different. Quick oats are finer and will make the squares denser and mushier. Old-fashioned oats give that chewy, fluffy texture that I love. If you must use quick oats, reduce the baking time by 5 minutes and check early. Steel-cut oats will not work—they won’t cook through in this recipe.
Why did my oatmeal squares turn out dry?
Usually means they were overbaked. Oatmeal continues to cook even after you take it out of the oven because of the residual heat. Remove it when the center still looks slightly soft. Also, make sure you’re using ripe bananas—they add moisture. If your bananas were underripe, the squares will be drier.
Can I make this gluten-free?
Yes! Just use certified gluten-free rolled oats. Everything else in the recipe is naturally gluten-free. I’ve used Bob’s Red Mill gluten-free oats, and they work perfectly. The texture might be slightly softer, but the flavor is the same.
How do I store leftovers?
Store in an airtight container at room temperature for 2 days, in the fridge for 5 days, or in the freezer for 3 months. They reheat well in the microwave for 30-60 seconds. I usually freeze half the batch because they’re great for grab-and-go breakfasts.
Can I add protein powder?
Yes, but you’ll need to adjust the liquid. Add 2 scoops of protein powder and an extra ¼ cup of milk. Mix well and check the batter consistency—it should be thick but spreadable. The squares will be more filling and higher in protein, which is great for post-workout meals.
What’s the best way to reheat these?
Microwave for 30-60 seconds or warm in a 350°F oven for 10 minutes. They’re best warm. Cold squares are fine, but warm ones are much better. If they’re dry after reheating, add a splash of milk before heating to restore moisture.
Can I use honey instead of maple syrup?
Yes, honey works great. It’s slightly sweeter than maple syrup, so you might want to use a bit less. The flavor will be different but still delicious. I’ve used both interchangeably, and both work well. Maple syrup gives that classic breakfast flavor, while honey adds a floral note.
Do I have to let them cool before slicing?
It’s highly recommended. If you cut them hot, they’ll fall apart because the structure hasn’t set yet. Let them cool for at least 15 minutes. This is the hardest part, I know, but it’s worth the wait. Hot oatmeal squares are messy and disappointing.
Pin This Recipe!
Fluffy Banana Nut Baked Oatmeal Squares
- Total Time: 35-40 minutes
- Yield: 9 servings 1x
Description
A simple, one-dish baked oatmeal recipe that turns overripe bananas into fluffy, comforting squares. Perfect for busy weeknights, meal prep, or a quick breakfast.
Ingredients
- 3 cups old-fashioned rolled oats
- 3 large ripe bananas (about 350g mashed)
- 1.5 cups milk (dairy or plant-based)
- 2 large eggs
- 1/4 cup maple syrup or honey
- 3 tablespoons melted butter or coconut oil
- 1 teaspoon ground cinnamon
- 1 teaspoon baking powder
- 1/2 teaspoon salt
- 1 teaspoon vanilla extract
- 1/2 cup chopped walnuts or pecans
Instructions
- Preheat oven to 350°F (175°C) and grease an 8×8-inch baking dish.
- Mash the bananas in a large mixing bowl until mostly smooth.
- Whisk in the eggs, melted butter (or coconut oil), maple syrup, milk, and vanilla extract until combined.
- Add the rolled oats, baking powder, cinnamon, and salt. Stir until evenly coated.
- Let the batter rest for 5 minutes to allow oats to soften.
- Fold in the chopped nuts and spread the batter evenly into the prepared baking dish.
- Bake for 25-30 minutes until the top is golden brown and a toothpick inserted in the center comes out clean.
- Cool in the pan for at least 15 minutes before slicing into squares.
Notes
Let the batter rest for 5 minutes before baking to ensure the oats soften properly. Do not overmix once oats are added to maintain a fluffy texture. Cool completely before slicing to prevent falling apart. Can be stored in the fridge for 5 days or frozen for 3 months.
- Prep Time: 10 minutes
- Cook Time: 25-30 minutes
- Category: Breakfast
- Cuisine: American
Nutrition
- Serving Size: 1 square
- Calories: 210
- Sugar: 12
- Sodium: 150
- Fat: 8
- Saturated Fat: 2
- Carbohydrates: 32
- Fiber: 4
- Protein: 6
Keywords: baked oatmeal, banana oatmeal, healthy breakfast, meal prep, one dish, easy recipe, gluten-free option, dairy-free option


