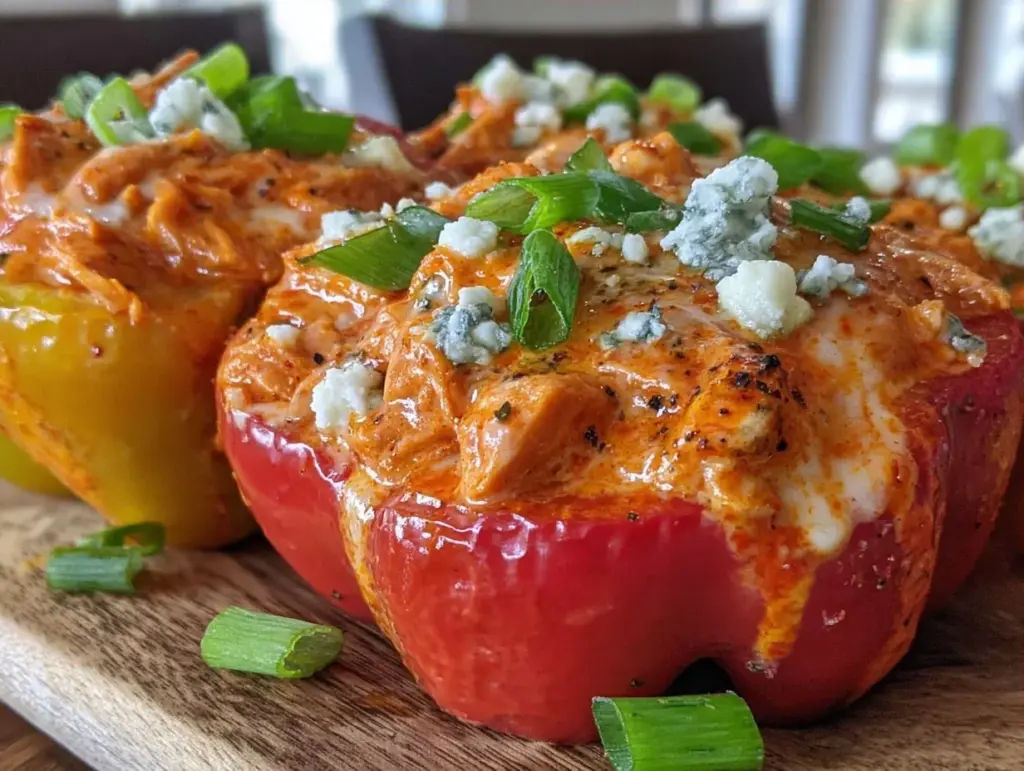
It was the fourth quarter of the big game, the house was loud, and I had exactly twelve minutes to figure out dinner. My kids were hovering near the fridge like hungry wolves, my husband was debating whether to order pizza (we’re not ordering pizza, but you know the threat is real), and I was staring at a bag of bell peppers I’d bought on sale three days ago, wondering if I could make them look like a real meal. That’s when I threw together these game day buffalo chicken stuffed peppers. I grabbed leftover rotisserie chicken, a bottle of hot sauce, some cream cheese, and shredded cheddar. I stuffed the peppers, popped them in the oven, and ten minutes later, the smell of spicy, cheesy comfort food filled the kitchen. The kids stopped complaining. The husband put down the remote. And honestly? It tasted like something I’d spent an hour on, even though it took about fifteen minutes of active work.
That night changed my weeknight game plan. I realized I didn’t need to be a gourmet chef to feed a family of four something exciting. I just needed a good strategy. These game day buffalo chicken stuffed peppers have become my secret weapon. They’re spicy, they’re creamy, they’re budget-friendly, and they’re surprisingly healthy because you’re eating a whole vegetable as your plate. Plus, they look impressive enough for a party but are simple enough for a Tuesday night when you’re exhausted. I’ve made this recipe at least a dozen times since that chaotic Sunday, tweaking the spice level and the cheese ratio until it was perfect. If you’re looking for a 5-ingredient family dinner that actually tastes good, this is it.
Why You’ll Love This Recipe
There are about ten reasons I keep making this, but here are the big ones. This isn’t just another stuffed pepper recipe. It’s the one that gets asked for repeatedly because it hits that perfect sweet spot between snack and main course.
Stupid Simple — Seriously, if you can scoop out a pepper and mix ingredients in a bowl, you can make this. I’ve walked my teenage son through it over FaceTime while I was at work. There’s no chopping onions, no sautéing garlic, no complicated techniques. Just mix, stuff, bake.
Lightning Fast — 30 minutes from start to finish, and only 10 of those are active. The oven does the heavy lifting. I make this on weeknights when I get home at 7pm and my energy is at zero. It feels like a win.
Pantry-Friendly — You probably have 80% of these ingredients already. I keep cream cheese, hot sauce, and shredded cheese stocked just so I can make this on a whim. The peppers are the only fresh thing you really need, and they’re cheap.
Crowd-Pleaser — I’ve served this to my vegetarian sister (just swap the chicken for extra cheese or beans), my spicy-food-loving dad, and my picky eater kid (who insists on mild sauce). Everyone loves it. It’s like a deconstructed chicken wing in a healthy package.
Budget-Smart — Feeds 4-6 people for under $15. That’s less than one meal at a fast-food drive-thru. If you buy peppers on sale and use rotisserie chicken, you’re eating like royalty on a student budget.
This is my go-to when I need dinner to just work. No complicated techniques, no weird ingredients, just reliable, delicious food that makes everyone happy. And if you have leftovers? They taste even better the next day as a cold snack or reheated lunch.
Ingredients You’ll Need
Here’s the best part: you probably have most of this already. I’m particular about three ingredients here, and I’ll tell you exactly why. This recipe relies on quality hot sauce and good melting cheese. Don’t skimp there.
Large bell peppers (4 medium, any color) — I use red and yellow for sweetness, but green works if you want a sharper bite. Look for firm peppers that stand up straight. If they’re wrinkly, skip them. You’ll need to cut the tops off and scoop out the seeds. Save the tops if you want to chop them up and mix into the filling later—I do that for extra flavor.
Shredded cheddar cheese (2 cups / 200g) — Sharp cheddar gives the best flavor. I buy the block and shred it myself because pre-shredded cheese has anti-caking agents that make it grainy. If you’re in a rush, pre-shredded works, but the texture won’t be as smooth. Colby jack is a good alternative if you want milder flavor.
Rotisserie chicken (2 cups / 225g, shredded) — Leftover chicken is perfect. If you don’t have leftovers, buy one. It’s cheaper than buying raw chicken and cooking it yourself, and it saves time. You can also use canned chicken (drained well) or even cooked ground turkey. Just make sure it’s shredded or chopped small so it mixes easily.
Hot sauce (½ cup / 120ml) — This is the star. I use Frank’s RedHot because it’s the classic buffalo sauce base. Crystal or Texas Pete work too. If you want it spicier, add a dash of cayenne or use a hotter brand like Cholula. If you have kids, use a mild version or reduce to ¼ cup. The hot sauce provides the tang and heat.
Cream cheese (8 oz / 225g, softened) — This is what makes the filling creamy and binds everything together. It needs to be softened at room temperature for about 15 minutes, or microwave it for 10 seconds to soften it up. If it’s cold and hard, it won’t mix well with the chicken and cheese. Use full-fat cream cheese for the best texture. Low-fat versions can make the filling watery.
Optional Add-ins:
- Garlic powder (1 teaspoon) — Adds depth without needing fresh garlic.
- Ranch seasoning packet (1 packet) — For that classic buffalo wing dip flavor. I love this trick.
- Green onions (2 stalks, chopped) — For garnish and fresh crunch.
- Celery (1 stalk, finely diced) — Classic buffalo wing ingredient. Adds crunch.
Personal Tips:
- Brand recommendations: I always use Frank’s RedHot Original. It’s the standard for a reason. For cream cheese, Philadelphia is my go-to—consistent texture every time.
- Shopping shortcuts: Buy pre-shredded cheese if you’re lazy, but know it won’t melt as beautifully. Buy rotisserie chicken to save time.
- Substitutions: No hot sauce? Use buffalo wing sauce (which is usually just hot sauce + butter). No cream cheese? Use Greek yogurt for a lighter version, but it will be tangier and less creamy.
Equipment Needed
You don’t need fancy equipment for this. Here’s what I actually use.
Baking dish — A 9×13 inch casserole dish works best. It needs to be deep enough to hold the peppers without the filling spilling over. I use a ceramic dish because it heats evenly. Glass works too.
Large bowl — For mixing the chicken, cheese, cream cheese, and hot sauce. Any size works, just make sure it’s big enough to mix comfortably.
Knife and cutting board — For cutting the tops off the peppers and scooping out seeds. A sharp knife makes this easier and safer.
Measuring cups and spoons — Standard stuff. Dollar store versions work fine.
Large spoon or spatula — For mixing the filling and stuffing the peppers. A spatula is better for scraping the bowl clean.
Optional but nice:
- Vegetable peeler or spoon — For scooping out seeds. A spoon works well, but a peeler can help remove the white ribs for less heat.
- Parchment paper — Lines the baking dish to make cleanup easier. I don’t always use it, but it helps if you’re lazy.
Tool Tips:
- Don’t have a 9×13 dish? Use two smaller baking dishes or a large skillet. Just adjust baking time slightly.
- I’m obsessed with my ceramic baking dish—it’s like $10 at Target and lasts forever. No more scrubbing baked-on cheese!
How to Make It: Step-by-Step
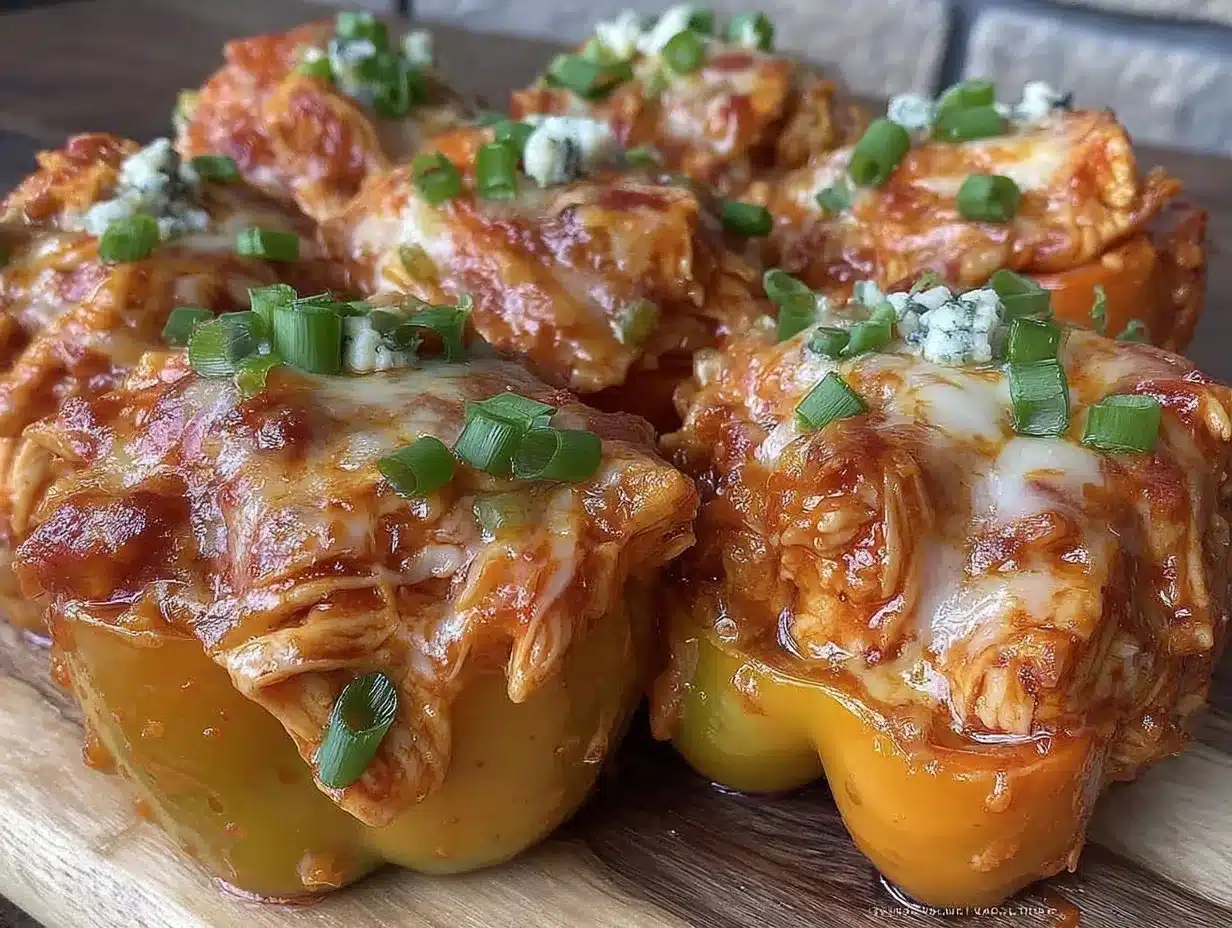
Alright, let’s make this! I’m walking you through exactly how I do it, including the little tricks I’ve picked up.
Step 1: Prep the Peppers (5 minutes)
Preheat your oven to 375°F (190°C). Wash the bell peppers and pat them dry. Using a sharp knife, cut off the top inch of each pepper (keep the stem attached if possible, or remove it). Scoop out the seeds and white ribs with a spoon. If you want milder peppers, remove as many ribs as possible. Place the hollowed peppers upright in your baking dish. If they wobble, trim a tiny bit off the bottom so they sit flat. This keeps them from tipping over in the oven.
Step 2: Make the Filling (5 minutes)
In a large bowl, combine the softened cream cheese, shredded cheddar, shredded chicken, and hot sauce. Mix until well combined. The mixture should be creamy and chunky. If it’s too dry, add a splash more hot sauce or a tablespoon of milk. If it’s too wet, add a bit more cheese or chicken. Taste it now—if you want more spice, add more hot sauce. This is your chance to adjust flavors before baking.
Step 3: Stuff the Peppers (5 minutes)
Using a large spoon or your hands, pack the filling firmly into each pepper. Don’t be shy—stuff them full! The filling will shrink slightly as it bakes, so you want it packed tight. If you have leftover filling, just spoon it on top. You can also chop the pepper tops you cut off earlier and mix them into the filling for extra veggies.
Step 4: Bake (20 minutes)
Place the baking dish in the preheated oven. Bake for 20 minutes, or until the peppers are tender and the filling is bubbly and golden. If you want a crispy top, broil for the last 2 minutes, but watch it closely—it burns fast. The peppers should be fork-tender but not mushy. If they’re still hard, give them 5 more minutes.
Step 5: Serve
Let the peppers cool for 5 minutes before serving. This helps the filling set slightly so it doesn’t slide out. Garnish with chopped green onions or a drizzle of ranch dressing if you like. Serve hot. These are amazing on their own, but I also like to serve them with celery sticks on the side for dipping.
Total Time: About 30 minutes (10 minutes active, 20 minutes baking)
Built-in Troubleshooting:
- Peppers are too hard: Bake longer. Some peppers take 25-30 minutes depending on size.
- Filling is too runny: You used too much hot sauce or watery chicken. Next time, reduce the sauce or drain the chicken better.
- Filling is dry: Add a splash of milk or more cream cheese next time.
Expert Tips & Tricks
Here’s everything I’ve learned from making this dozens of times. These tips will save you from my mistakes.
Soften That Cream Cheese
This is the #1 tip. Cold cream cheese is a nightmare to mix. I leave it on the counter for 15 minutes before starting. If I forget, I microwave it for 10 seconds. It needs to be soft enough to blend smoothly with the chicken and cheese. If it’s lumpy, your filling will be lumpy.
Don’t Skimp on the Hot Sauce
The hot sauce provides the flavor and moisture. If you use too little, the filling will taste bland and dry. I use ½ cup as a baseline, but adjust to your heat tolerance. Remember, the heat mellows slightly as it bakes, so don’t be afraid to add a bit more.
Use Leftover Chicken
Rotisserie chicken is perfect because it’s already cooked and seasoned. If you’re using raw chicken, cook it first (boil, bake, or grill) and shred it. Canned chicken works too, but drain it well to avoid watery peppers.
Prevent Spilling
Stuff the peppers firmly! If you just spoon the filling in loosely, it might fall out during baking. Pack it in. If you have extra filling, put it on top. It’ll bake into a cheesy crust.
Common Mistakes (and how to avoid them):
- Mistake: Peppers are mushy
Fix: Don’t overbake. Check at 20 minutes. They should be tender, not falling apart. - Mistake: Filling is watery
Fix: Use full-fat cream cheese and drain your chicken well. Avoid adding extra liquid. - Mistake: Peppers tip over
Fix> Trim the bottom slightly so they sit flat in the dish.
Pro Tricks I’ve Learned:
- For Extra Flavor: Add a packet of ranch seasoning to the filling. It adds a creamy, tangy boost that pairs perfectly with the hot sauce.
- For Better Texture: Mix in some diced celery or green onions. Adds crunch and freshness.
- Make-Ahead Strategy: Prep the peppers and filling up to 24 hours ahead. Store in the fridge. Bake when ready. Just add 5-10 minutes to baking time if cold.
Variations & Substitutions
Once you’ve nailed the basic version, here’s how you can mix it up. I’ve tried all of these.
Chicken Nugget Version
Use chopped chicken nuggets instead of shredded chicken. Adds a fun, crispy texture. Kids love this version.
Veggie-Loaded
Add 1 cup of diced broccoli or spinach to the filling. It wilts in the oven and adds nutrients. I do this when I want to sneak veggies into my kids’ diet.
Spicy Jalapeño
Add 1 diced jalapeño to the filling. For extra heat, use a hotter hot sauce like Buffalo Wild Wings’ Hot or Extreme Hot.
Lighter Version
Use fat-free cream cheese and reduced-fat cheddar. It’s lighter but still tasty. I make this when I’m trying to be “healthy.”
Buffalo Dip Style
Skip the peppers entirely and just bake the filling in a casserole dish. Serve with crackers or celery sticks. It’s basically hot chicken dip in a new form.
Dietary Modifications:
- Gluten-Free: This recipe is naturally gluten-free. Just check your hot sauce label (most are GF).
- Dairy-Free: Use dairy-free cream cheese and cheddar. It works, but the texture might be slightly different. Nutritional yeast can add a cheesy flavor.
- Lower-Carb: Use lettuce leaves instead of peppers (wrap the filling in lettuce). Or use zucchini boats instead of peppers.
Different Proteins:
- Shredded beef: Use leftover roast beef. Tastes like a buffalo beef wrap.
- Turkey: Use shredded turkey breast. Leaner option.
- Plant-based: Use shredded jackfruit or plant-based chicken alternative. Works well with buffalo sauce.
Serving & Storage
I usually serve these straight from the baking dish at the dinner table—it looks rustic and stays warm. But here are other ways I’ve enjoyed it:
Side Dishes:
- Celery sticks and carrot sticks (classic buffalo wing sides)
- Cool ranch dressing or blue cheese dressing for dipping
- Simple green salad with vinaigrette
- Garlic bread (obviously)
Toppings Bar:
When I have guests, I put out: extra hot sauce, ranch dressing, blue cheese crumbles, green onions. Everyone customizes their bowl.
Storage Instructions:
Refrigerator: Store leftovers in an airtight container for up to 4 days. The peppers will soften, but they’re still good.
Reheating: Best method: Reheat in the oven at 350°F for 10-15 minutes. This keeps the peppers from getting soggy. Microwave method: Heat in 30-second intervals, stirring if possible. It works, but the texture might be softer.
Freezing: Honestly, these don’t freeze well. The peppers get mushy when thawed, and the cheese can separate. Make it fresh or store in the fridge for up to 4 days.
Meal Prep:
Prep the peppers and filling on Sunday. Store in the fridge. Bake on weeknights. Takes 5 minutes of active work. I do this to save time during the week.
Nutrition Information
I’m not a nutritionist, but here’s the breakdown if you’re tracking. This is per serving (based on 4 peppers).
Per Serving:
- Calories: 320
- Protein: 28g
- Carbs: 12g
- Fiber: 3g
- Sugar: 6g
- Fat: 18g
- Saturated Fat: 10g
- Cholesterol: 85mg
- Sodium: 650mg
What’s Good:
- High protein from chicken and cheese
- Low carb (if you count the peppers as veggies)
- Good source of Vitamin C from peppers
What to Know:
- Higher in sodium from hot sauce and cheese
- Contains dairy
- Can be made lighter with low-fat ingredients
My Take:
Look, this is comfort food with hot sauce and cheese. It’s not a diet recipe. But it’s way better than takeout, costs less, and I know exactly what’s in it. When I want to make it lighter, I use fat-free cream cheese and less cheese overall. But usually? I just eat a reasonable portion and enjoy it.
Final Thoughts
So that’s my go-to game day buffalo chicken stuffed peppers! I’ve probably talked your ear off at this point, but when you make a recipe this often, you have a lot to say about it. This has saved weeknight dinners more times than I can count. It’s my answer to “what’s for dinner” when I’m tired, don’t want takeout, and still want something that tastes really good. My kids are happy, my husband’s happy, and I’m happy because I’m not stressed about cooking.
Make it yours! Try different add-ins, swap in your favorite vegetables, adjust the hot sauce (though more is always better in my opinion). The best recipes are the ones you adapt to your family’s tastes. If you make this, drop a comment and let me know what you think! I love hearing how recipes turn out in your kitchen. And if something doesn’t work, tell me that too—I’m here to help troubleshoot.
Happy cooking! And I hope your kitchen smells half as good as mine does right now.
Frequently Asked Questions
Q: Can I use mild hot sauce instead of hot?
A: Absolutely. If you have kids or don’t like spice, use mild buffalo sauce or even just a little bit of hot sauce with more ranch seasoning. The flavor will be milder, but still delicious. I use a mix of hot and mild for my family.
Q: Why did my peppers fall over in the oven?
A: Trim a tiny slice off the bottom of each pepper so they sit flat. Or, build a “tent” around them with foil to hold them upright. This is a common issue, but easy to fix.
Q: Can I make this ahead of time?
A: Yes! Prep the peppers and filling up to 24 hours ahead. Store in the fridge. Bake when ready. Just add 5-10 minutes to baking time if the filling is cold. This is great for meal prep.
Q: Can I use raw chicken?
A: It’s not recommended. The peppers and chicken need to cook for the same amount of time. If you use raw chicken, it might not cook through before the peppers get mushy. Use pre-cooked chicken (rotisserie, canned, or boiled) for best results.
Q: How do I reheat leftovers?
A: Reheat in the oven at 350°F for 10-15 minutes. This keeps the texture best. Microwave works too, but the peppers might get softer. Add a splash of water if they look dry.
Q: Can I freeze these?
A: I don’t recommend it. The peppers get mushy when thawed, and the cheese can separate. It’s best to eat them fresh or store in the fridge for up to 4 days.
Q: What if I don’t have cream cheese?
A: You can use Greek yogurt for a lighter version, but it will be tangier and less creamy. Or use a thick sour cream. But cream cheese is key for the classic buffalo dip texture.
Pin This Recipe!
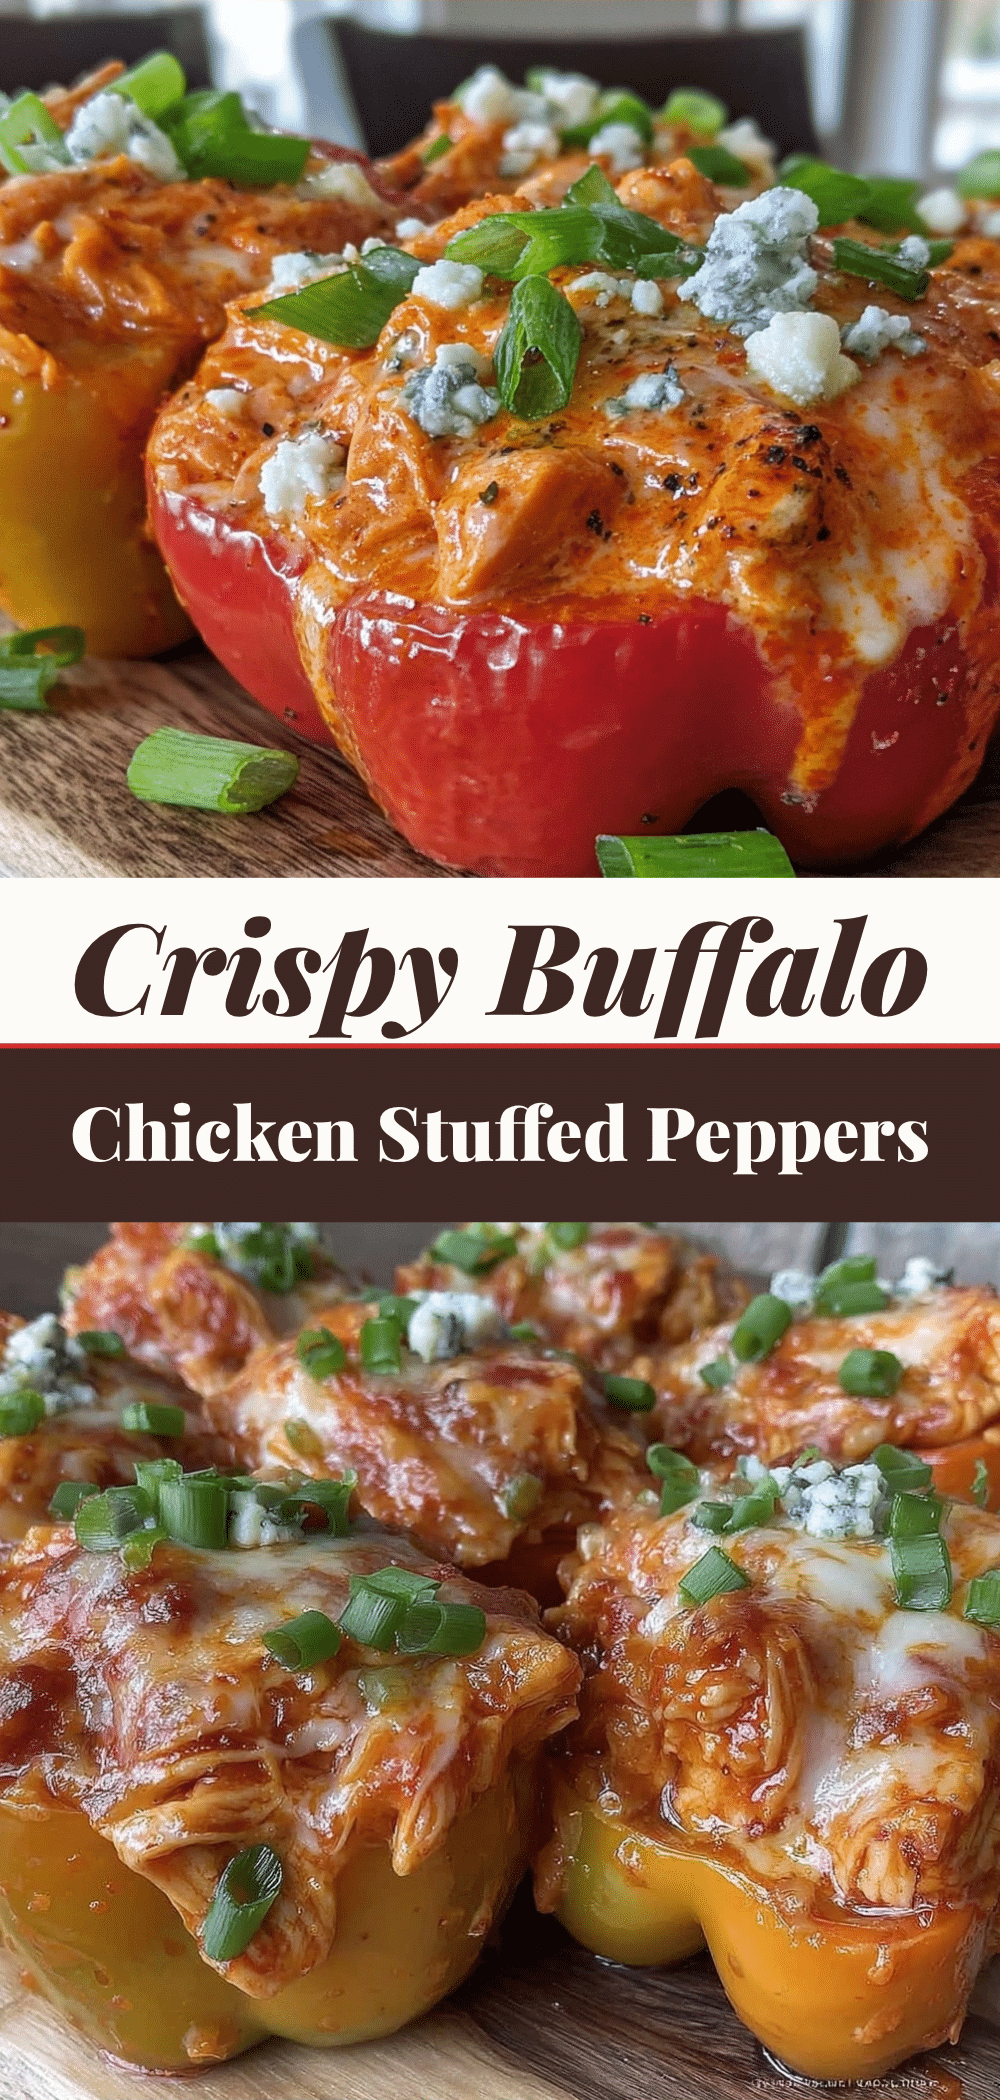

Game Day Buffalo Chicken Stuffed Peppers
- Total Time: 30 minutes
- Yield: 4 servings 1x
Description
A quick, 5-ingredient family dinner featuring bell peppers stuffed with a creamy, spicy mixture of rotisserie chicken, cheddar cheese, cream cheese, and hot sauce. Perfect for game days or busy weeknights.
Ingredients
- 4 large bell peppers (any color)
- 2 cups shredded cheddar cheese
- 2 cups shredded rotisserie chicken
- 1/2 cup hot sauce (e.g., Frank’s RedHot)
- 8 oz cream cheese, softened
- 1 teaspoon garlic powder (optional)
- 1 packet ranch seasoning (optional)
- 2 stalks green onions, chopped (optional)
- 1 stalk celery, finely diced (optional)
Instructions
- Preheat oven to 375°F (190°C).
- Wash and dry bell peppers. Cut off the top inch of each pepper and scoop out seeds and white ribs. Trim a small slice off the bottom if needed to help them stand upright.
- Place hollowed peppers upright in a 9×13 inch baking dish.
- In a large bowl, combine softened cream cheese, shredded cheddar, shredded chicken, and hot sauce. Mix until well combined. Adjust seasoning if desired.
- Pack the filling firmly into each pepper. Spoon any extra filling on top.
- Bake for 20 minutes, or until peppers are tender and filling is bubbly and golden. Optionally broil for 2 minutes for a crispy top.
- Let cool for 5 minutes before serving.
Notes
Ensure cream cheese is softened to room temperature for easy mixing. If peppers wobble, trim the bottom slightly. For a milder flavor, reduce hot sauce or use mild sauce. Leftovers can be stored in the refrigerator for up to 4 days.
- Prep Time: 10 minutes
- Cook Time: 20 minutes
- Category: Main Course
- Cuisine: American
Nutrition
- Serving Size: 1 stuffed pepper
- Calories: 320
- Sugar: 6
- Sodium: 650
- Fat: 18
- Saturated Fat: 10
- Carbohydrates: 12
- Fiber: 3
- Protein: 28
Keywords: buffalo chicken, stuffed peppers, game day food, quick dinner, 5-ingredient recipe, family dinner, spicy chicken, rotisserie chicken recipes


