There was a specific Tuesday last month when I walked into my local coffee shop, watched the barista shake a metal tin with intense, rhythmic energy, and handed me a drink that cost $7.50. I took one sip, looked at the receipt, and realized I was essentially paying $7.50 for ice, water, and a tiny bit of espresso. I left that coffee sitting on my dashboard, walked home, and decided right then: we were going to make our own. Better. Cheaper. And yes, we were going to let my seven-year-old help.
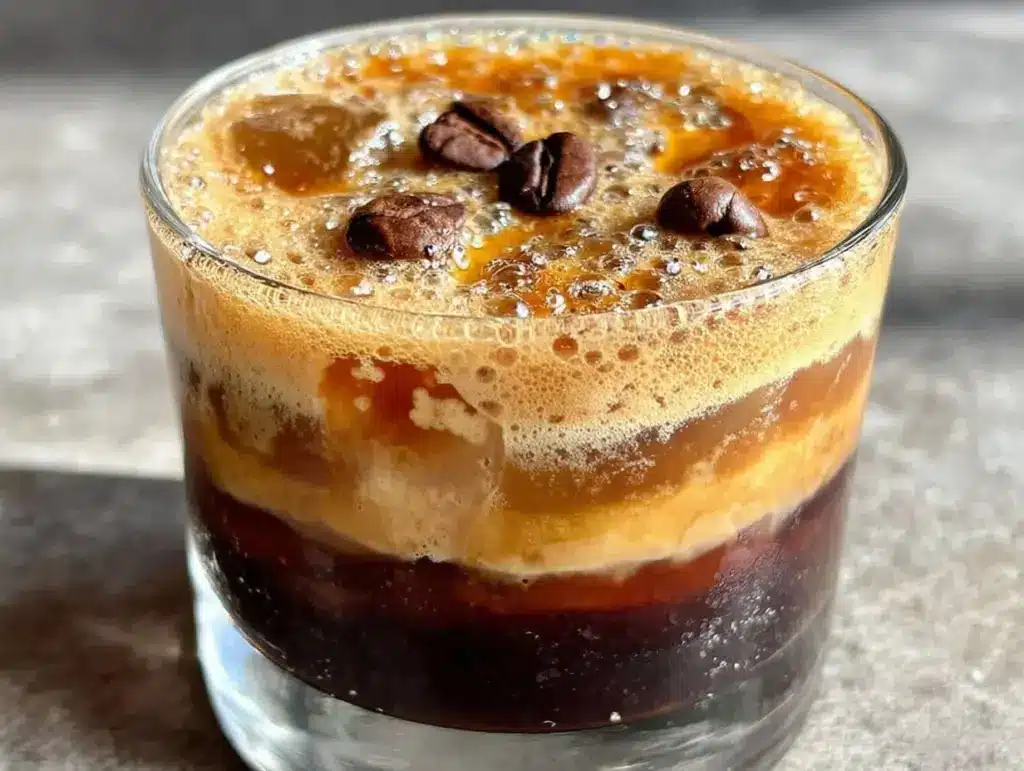
This isn’t just about saving money, though that’s a nice bonus. This is about the homemade brown sugar oat milk shaken espresso. It’s about the smell of caramelizing brown sugar filling the kitchen. It’s about the joy of shaking something vigorously (which kids love) and the pride of drinking something that tastes exactly like the expensive version but with actual ingredients you can pronounce. My kids have taken to making this every weekend now. It’s become our little ritual. And honestly? It’s better than takeout because it’s made with love, and maybe a little extra oat milk foam.
If you’ve been trying to cut back on caffeine or just want a treat that doesn’t feel like a guilty pleasure, this recipe is your answer. It’s sweet, it’s creamy, it’s cold, and it’s ridiculously easy to make. Plus, it’s a fantastic way to get your kids involved in the kitchen without the stress of cooking a full meal. Let’s get shaking.
Why You’ll Love Making This With Your Kids
There are about ten reasons I keep making this homemade brown sugar oat milk shaken espresso, but here are the big ones that keep us coming back to the kitchen counter:
- Kid-Approved Safety — Seriously, if your child can hold a spoon and shake a container, they can make this. The only “hot” part is boiling water, which I handle. They get to do all the fun stuff: measuring the brown sugar, pouring the milk, and the shaking. It’s perfect for little hands.
- Customizable Sweetness — My daughter likes it super sweet, my son likes it strong. With this recipe, we can adjust the brown sugar and espresso strength for each cup. It’s like having a mini coffee shop at home where everyone gets exactly what they want.
- Dairy-Free Friendly — We use oat milk, which is naturally dairy-free and creamy. If you have friends with allergies or just prefer plant-based options, this recipe works perfectly. It’s one of the easiest swaps to make without losing flavor.
- Less Mess Than a Smoothie — I know, smoothies are easy too, but they often require blending and result in sticky lids. Shaking is contained. You shake in a jar or tin, pour it out, and wipe the rim. It’s clean, quick, and satisfying.
- Instant Mood Booster — There is something deeply satisfying about watching the ice and espresso turn into a frothy, cold treat. It’s a small moment of joy in the morning routine. My kids love the “fizz” and the foam.
This has become our go-to weekend morning treat. It’s not just a drink; it’s a shared experience. We put on some music, measure the ingredients, and shake until we’re tired. It’s bonding time in a glass.
Ingredients You’ll Need
Here’s the best part: you probably have most of this already. I’m particular about the espresso and the brown sugar here, but the rest is simple pantry staples.
For the Espresso Base
Espresso beans or strong coffee (2 shots / 2 oz / 60ml) — I use a dark roast espresso blend because it stands up to the sweetness. If you don’t have an espresso machine, use a Moka pot or very strong brewed coffee in a French press. The key is intensity. You want that bold coffee flavor to cut through the sugar and milk. I keep a bag of dark roast coffee on hand specifically for this.
Brown sugar (2 tablespoons / 30g) — This is the star. Use dark brown sugar for that deep molasses flavor. It caramelizes slightly when mixed with the hot espresso, creating a little syrup. Light brown sugar works, but dark is better for that rich taste. I measure this with my kids—they love the sticky texture.
Hot water (2 tablespoons / 30ml) — Just enough to dissolve the brown sugar and brew the espresso if you’re using grounds. If you’re using pre-brewed espresso, skip this and just mix the sugar into the hot espresso.
For the Milk & Ice
Oat milk (1 cup / 240ml) — I always use barista-style oat milk if I can find it (like Oatly or Califia) because it froths better. Regular oat milk works fine too, just don’t expect as much foam. It’s creamy, neutral, and naturally sweet. This is a great way to introduce kids to plant-based milks since it’s naturally sweet and doesn’t taste “grassy” like some soy milks.
Ice cubes (1 cup / 100g) — Standard ice. Don’t use crushed ice unless you like your drink to get watery fast. Cubes keep it cold without diluting it too quickly.
Optional Toppings
Whipped cream — If you’re feeling fancy. I usually skip it, but my daughter insists on a dollop. It’s a great way to let kids decorate their own drinks.
Cinnamon dusting — A tiny pinch on top adds warmth. My son loves to sprinkle this on with his fingertips.
Vanilla extract — A few drops if you want a hint of vanilla. It’s optional, but it makes it taste like a latte.
Shopping Tips
I buy my oat milk in the larger cartons to save money, and I keep a bag of brown sugar in an airtight container so it doesn’t harden. If your brown sugar is rock hard, just microwave it for 10 seconds with a damp paper towel. It’ll soften right up. I also recommend getting a mason jar with a tight lid for shaking—it’s cheaper than a metal cocktail shaker and easier for kids to grip.
Equipment Needed
You don’t need fancy equipment for this. Here’s what I actually use:
Mason jar with lid — I use a 16oz mason jar. It’s wide enough for the ice and narrow enough to shake securely. I’ve tried wide-mouth jars, but they’re harder to seal. I have a set of these jars specifically for drinks. They’re durable and easy to clean.
Coffee maker or espresso machine — Obviously, you need coffee. I use a single-serve machine for speed, but any method works. If you’re making this for the whole family, a drip coffee maker is fine, just make it extra strong.
Measuring spoons — Standard set. I keep a set near the coffee station so my kids can measure without asking me. It builds their confidence.
Wooden spoon or stirrer — For mixing the brown sugar into the hot espresso. A small spoon works too. I let my kids stir—it’s therapeutic.
Strainer (optional) — If you’re using loose grounds in a Moka pot, you might want to strain it. But if you’re using filtered coffee or espresso, you don’t need it.
Cocktail shaker (alternative) — If you have a metal shaker, use it! It’s fun and professional-looking. But the mason jar is just as good and less likely to dent if dropped.
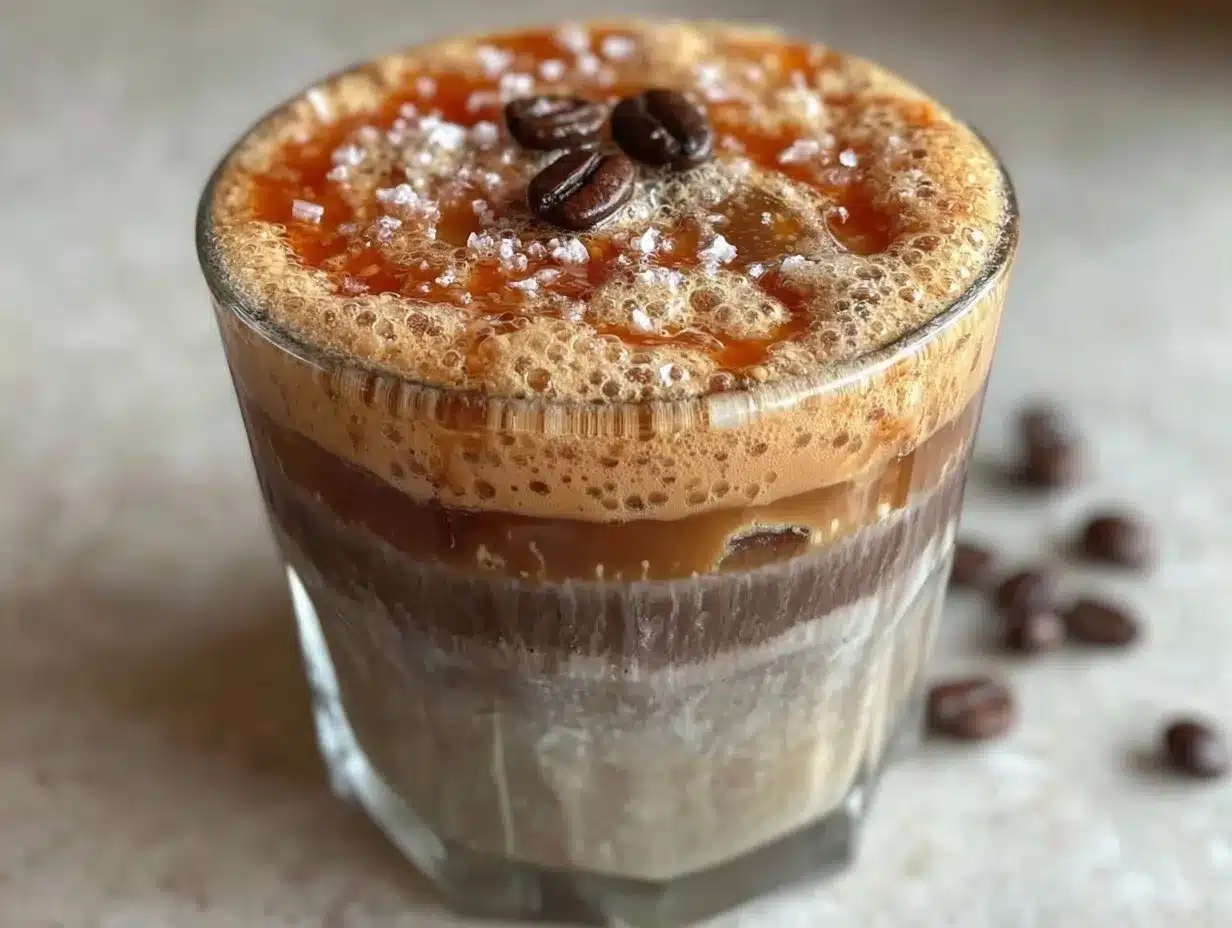
Cups — I use tall glasses because the foam looks pretty. Clear glasses are best so you can see the layers.
How to Make It: Step-by-Step
Alright, let’s make this! I’m walking you through exactly how I do it, including the little tricks I’ve picked up with my kids.
Step 1: Brew the Espresso (5 minutes)
Brew your espresso or strong coffee. If you’re using an espresso machine, pull two shots directly into a heat-safe mug. If you’re using a Moka pot or French press, brew it strong. The goal is about 2 ounces of concentrated coffee. While it’s brewing, have your kids get the mason jar ready. They can rinse it with cold water to chill it down.
Step 2: Make the Brown Sugar Syrup (2 minutes)
Immediately after brewing, while the coffee is still hot, add the brown sugar to the mug. Use 2 tablespoons for a standard sweet drink, or 1 tablespoon if you prefer it less sweet. Stir vigorously with a wooden spoon until the sugar is completely dissolved. This creates a quick syrup. If there are lumps, just stir longer or microwave for 5 seconds. I let my kids stir this part—they love watching the sugar disappear. The mixture should be dark and glossy.
Step 3: Cool the Base (1 minute)
Let the sweetened espresso cool for just a minute. You don’t want it boiling hot when you add the ice, or it’ll melt too fast. But don’t let it cool completely either. We want it warm enough to keep the drink from getting icy, but cold enough to not melt the ice instantly. A quick stir helps.
Step 4: Assemble the Jar (1 minute)
Add the ice cubes to the mason jar. Pour in the sweetened espresso mixture over the ice. Then, pour in the oat milk. You’ll see the milk swirl into the dark coffee—that’s the pretty part. My kids always point out the “clouds” in their drink. Fill the jar about ¾ full, leaving room for shaking.
Step 5: The Shake (1 minute)
Secure the lid tightly. This is the best part. Hold the jar with both hands (or have your kid hold it with supervision) and shake vigorously for 15-20 seconds. You want the ice to crush slightly and the milk to foam up. Shake until your arm feels tired! The sound of the ice crashing against the glass is so satisfying. Stop when the outside of the jar is frosted with cold.
Step 6: Pour and Serve
Remove the lid carefully (it might be cold). Pour the shaken espresso into your glass. The foam should rise to the top. If you’re adding whipped cream or cinnamon, do it now. Serve immediately. The drink will start to separate slightly as it sits, so enjoy it while it’s fresh and frothy.
Total Time: About 10 minutes (mostly active with kids).
Expert Tips & Tricks
Here’s everything I’ve learned from making this dozens of times with my kids. These tips will save you from my mistakes.
Use Barista-Style Oat Milk
If you can find it, buy oat milk labeled “barista.” It has added fats that help it foam and hold its texture. Regular oat milk works, but the foam might deflate faster. I’ve tried several brands, and Oatly Barista Edition is my favorite. It’s worth the extra dollar for the texture.
Don’t Skimp on the Sugar
The brown sugar isn’t just for sweetness; it’s for flavor. It adds a molasses note that complements the coffee. If you use white sugar, it’s just sweet. Brown sugar is complex. I’ve tried half brown, half white, and it’s not the same. Stick with brown.
Shake Harder
I know, shaking is tiring. But the more you shake, the creamier it gets. The ice chills the drink, and the agitation creates the foam. If you don’t shake enough, it’s just iced coffee with milk. Shake until you’re ready to stop, then shake a little more. It’s worth it.
Pre-Chill Your Glass
If you have time, put your serving glass in the freezer for 10 minutes before making the drink. It keeps the drink colder longer. My kids love the “frosty” glass effect. It feels fancy.
Adjust Sweetness for Kids
My daughter likes it very sweet, so she uses 3 tablespoons of sugar. My son prefers it less sweet, so he uses 1 tablespoon. Let each person adjust their own cup. It’s a great lesson in tasting and adjusting flavors.
Clean Up Hack
If the brown sugar sticks to the jar, just fill it with warm water and let it sit for 5 minutes. It’ll wash out easily. No scrubbing needed.
Variations & Substitutions
Once you’ve nailed the basic version, here’s how you can mix it up. I’ve tried all of these with my kids.
Vanilla Shaken Espresso
Add ½ teaspoon of vanilla extract to the oat milk before shaking. It adds a classic latte flavor. My kids love this version—it tastes like a dessert.
Caramel Shaken Espresso
Swap the brown sugar for caramel syrup. Drizzle some caramel on the inside of the glass before pouring. It’s sweeter and more indulgent. We make this for special weekends.
Decaf Version
Use decaf espresso or decaf coffee. This is great for after-dinner drinks or if your kids are sensitive to caffeine (though we usually keep it to weekends). It’s still delicious and foamy.
Coconut Milk Version
Swap oat milk for coconut milk. It adds a tropical flavor. Use full-fat coconut milk for creaminess. It’s a nice change from the usual oat milk.
Matcha Shaken Latte
Swap the espresso for matcha powder. Whisk the matcha with hot water and brown sugar, then shake with oat milk and ice. It’s green and earthy. My son thinks it looks like “alien juice” and loves it.
Chocolate Shaken Espresso
Add a tablespoon of cocoa powder to the brown sugar mixture. It’s like an iced mocha. My kids call it “coffee hot chocolate.”
Dietary Modifications
Sugar-Free: Use a sugar-free brown sugar alternative. It won’t caramelize the same way, but it’s still sweet. I’ve used Lakanto Brown Sugar, and it works okay.
Dairy-Free: This recipe is already dairy-free if you use oat milk. Just check your oat milk label to ensure it’s certified dairy-free.
Gluten-Free: This recipe is naturally gluten-free. Just ensure your oat milk and coffee are certified gluten-free if you have celiac disease.
Serving & Storage
How to Serve:
I usually serve this straight from the jar into a tall glass. It looks rustic and refreshing. We often have a “toppings bar” where we add whipped cream, cinnamon, or a drizzle of caramel. It’s fun for guests too.
Side Dishes:
This drink pairs well with breakfast pastries, like fluffy ricotta cinnamon roll pancakes, or savory items like crispy bacon and egg breakfast tacos. It’s a versatile drink for any time of day.
Storage Instructions:
Don’t store the shaken drink. It will separate and lose its foam. Make it fresh. If you want to prep ahead, brew the espresso and mix it with the brown sugar, then store that syrup in the fridge for up to 3 days. When you’re ready to drink, just add ice and oat milk and shake.
Reheating:
This is an iced drink, so no reheating. But if you want a hot version, skip the ice and shake, and just stir the sweetened espresso with hot oat milk. It’s a hot latte.
Pro Tip:
If you’re making this for a party, make a batch of the sweetened espresso syrup. Keep it in a pitcher in the fridge. Guests can add ice and oat milk themselves. It’s a great self-serve station.
Nutrition Information
I’m not a nutritionist, but here’s the breakdown if you’re tracking. This is per serving (one drink).
| Nutrient | Amount |
|---|---|
| Calories | 120 |
| Protein | 2g |
| Carbs | 18g |
| Fiber | 1g |
| Sugar | 16g |
| Fat | 4g |
| Caffeine | ~100mg |
What’s Good:
It’s relatively low in calories compared to coffee shop drinks, which can have 300+ calories. The oat milk provides some healthy fats. It’s a lighter treat.
What to Know:
It does contain sugar from the brown sugar. If you’re watching sugar intake, reduce the amount or use a sugar-free alternative. The caffeine content is moderate, similar to a cup of coffee.
My Take:
Look, this is a treat. It’s sweet and delicious. But it’s way better than a sugary syrup-heavy coffee shop drink. You control the sugar, and you know exactly what’s in it. I make it as a weekend treat, not a daily staple. Balance is key.
Final Thoughts
So that’s my go-to homemade brown sugar oat milk shaken espresso! I’ve probably talked your ear off at this point, but when you make a recipe this often, you have a lot to say about it.
This has saved our weekend mornings more times than I can count. It’s my answer to “what’s for a treat?” when I want something special but don’t want to leave the house. My kids are happy, I’m happy because we’re making something together, and we’re saving money. It’s a win-win-win.
Make it yours! Try different milks, adjust the sweetness, or add your favorite toppings. The best recipes are the ones you adapt to your family’s tastes. And don’t be afraid to let the kids take the lead. They’ll surprise you with how good they are at it.
If you make this, drop a comment and let me know what you think! I love hearing how recipes turn out in your kitchen. And if something doesn’t work, tell me that too—I’m here to help troubleshoot. Happy shaking!
Frequently Asked Questions
Can I use regular milk instead of oat milk?
You can, but oat milk is creamier and froths better. If you use regular dairy milk, the foam might not be as thick. Almond milk is too thin and won’t foam well. Oat milk is the best for this recipe. If you’re out of oat milk, try soy milk—it’s closer in texture.
Why did my drink not foam?
Usually, this means you didn’t shake it hard enough or long enough. The ice needs to crush and agitate the milk to create foam. Also, if your oat milk isn’t barista-style, it might not foam as much. Try shaking for 30 seconds next time.
Can I make this ahead of time?
Not really. The ice will melt and water it down. But you can prep the sweetened espresso syrup ahead. Mix the brown sugar and espresso, let it cool, and store it in the fridge for up to 3 days. Just add ice and milk when you’re ready to drink.
Is this drink too sweet?
It’s sweet, but the coffee balances it out. If you find it too sweet, reduce the brown sugar to 1 tablespoon. You can also add a splash of unsweetened almond milk to dilute the sweetness. Taste as you go.
Can I use cold brew instead of espresso?
Yes, but cold brew is less intense. You’ll need to use more of it or add less ice to keep the flavor strong. Espresso or strong brewed coffee is best for this recipe because the shaking dilutes it slightly.
How much caffeine is in this drink?
It depends on the coffee you use. Two shots of espresso have about 100-150mg of caffeine. If you use strong brewed coffee, it might be less. Decaf options are available if you want to avoid caffeine.
Can I use brown sugar substitute?
You can use a sugar-free brown sugar alternative. It won’t caramelize the same way, but it’s still sweet. I’ve used Lakanto Brown Sugar, and it works. Just adjust to your taste.
Pin This Recipe!

Homemade Brown Sugar Oat Milk Shaken Espresso
- Total Time: 10 minutes
- Yield: 1 serving 1x
Description
A kid-friendly, dairy-free shaken espresso made with brown sugar syrup and oat milk. This easy recipe creates a creamy, frothy iced coffee treat that is cheaper and healthier than coffee shop versions.
Ingredients
- 2 shots espresso (2 oz / 60ml) or strong brewed coffee
- 2 tablespoons dark brown sugar (30g)
- 2 tablespoons hot water (30ml) – optional if using pre-brewed espresso
- 1 cup oat milk (240ml), preferably barista-style
- 1 cup ice cubes (100g)
- Optional: Whipped cream, cinnamon dusting, vanilla extract
Instructions
- Brew espresso or strong coffee. If using grounds, brew about 2 ounces of concentrated coffee.
- While the coffee is hot, add brown sugar to the mug and stir vigorously with a wooden spoon until completely dissolved to create a syrup.
- Let the sweetened espresso cool for about one minute so it is warm but not boiling.
- Add ice cubes to a mason jar or cocktail shaker. Pour in the sweetened espresso mixture, then add the oat milk. Fill the jar about ¾ full.
- Secure the lid tightly and shake vigorously for 15-20 seconds until the outside of the jar is frosted and the milk is foamy.
- Remove the lid and pour the shaken espresso into a tall glass. Top with whipped cream or cinnamon if desired, and serve immediately.
Notes
Use barista-style oat milk for better foam. If brown sugar is hard, microwave it for 10 seconds with a damp paper towel to soften. The drink is best served fresh; do not store the shaken mixture as it will separate. You can prep the brown sugar espresso syrup ahead and store it in the fridge for up to 3 days.
- Prep Time: 5 minutes
- Cook Time: 5 minutes
- Category: Beverage
- Cuisine: American
Nutrition
- Serving Size: 1 tall glass
- Calories: 120
- Sugar: 16
- Fat: 4
- Carbohydrates: 18
- Fiber: 1
- Protein: 2
Keywords: shaken espresso, brown sugar latte, oat milk coffee, iced coffee recipe, kid-friendly drinks, dairy-free coffee, homemade espresso