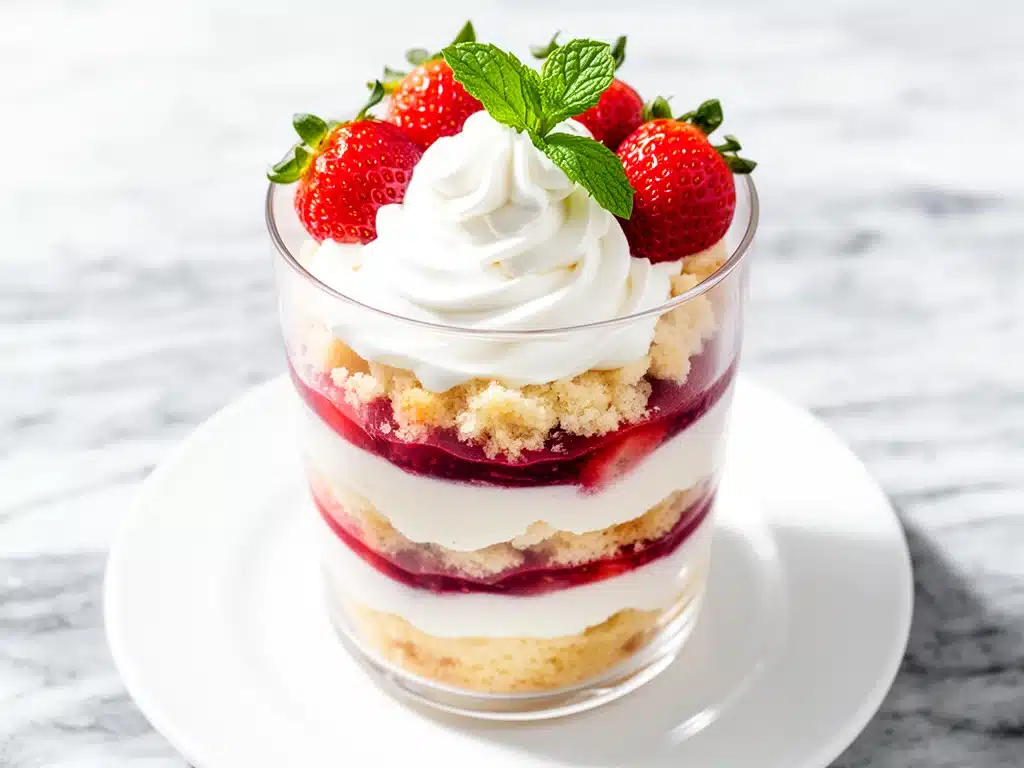
Last July, I was standing in my kitchen at 4 PM, sweating through my shirt, while my niece begged me to start setting up for the block party. I had zero time to bake. No oven space, no patience for cooling racks, and definitely no energy for intricate piping work. I needed something that looked like I’d spent all day in the kitchen but actually took twenty minutes to throw together. So, I grabbed a glass trifle bowl, some store-bought ladyfingers, a tub of cream cheese, and the first batch of strawberries from the farmer’s market.
I didn’t expect much. I expected a messy, somewhat soggy mess that would look cute in photos but taste like cardboard. Instead, what came out of that bowl was magic. The strawberries released their juices, creating a natural pink syrup that soaked into the cake layers. The cheesecake filling was tangy and sweet in equal measure. And the best part? It held up beautifully for hours on the hot patio table.
That accidental trifle became the star of the party. People were asking for the recipe before the burgers were even off the grill. Since then, I’ve made this fresh strawberry cheesecake trifle at least a dozen times. I’ve tweaked the ratios, tested different cake bases, and figured out exactly how to keep it from getting too soggy. It’s become my go-to for any summer gathering where I want to impress without burning out.
There’s something deeply satisfying about building a dessert in layers. It’s visual, it’s textural, and it’s forgiving. If you mess up the top layer, no one will know. If you make it too sweet, the tart strawberries balance it out. This isn’t just a dessert; it’s a strategy for stress-free entertaining. And once you try it, you’ll wonder why you ever bothered with complicated layered cakes that take three days to assemble.
Why You’ll Love This No-Bake Strawberry Trifle
I’ve said it before, and I’ll say it again: this recipe has completely changed how I handle summer desserts. Here’s why it keeps ending up on my menu:
Zero Baking Required — Seriously. If you can open a box of cookies and mix a bowl, you can make this. I’ve made this while multitasking with homework help and dinner prep. No oven, no mess, no waiting.
Make-Ahead Friendly — This is the ultimate hostess hack. You can assemble it the night before. In fact, it’s better the next day because the flavors have melded together. I usually make it on Saturday morning for a Sunday BBQ, and it sits in the fridge for hours looking gorgeous.
Visually Stunning — Using a clear glass bowl is non-negotiable. The layers of white cream, pink strawberry syrup, and golden cake create this beautiful gradient that looks like something from a high-end bakery. It’s basically free advertising for your cooking skills.
Customizable — Love nuts? Add crushed pistachios. Hate ladyfingers? Use pound cake or graham crackers. Want it boozy? Soak the cake in a little champagne or strawberry liqueur. It’s a blank canvas for your taste buds.
Feeds a Crowd — One trifle bowl serves 10-12 people easily. It’s cost-effective, too. Fresh strawberries can be pricey, but since we’re using them as a component rather than the main event, a few pounds go a long way. It’s cheaper than buying ten individual cheesecakes from the store.
This is my answer to “what’s for dessert?” when I’m tired. It’s reliable, delicious, and makes everyone happy. No weird techniques, no fancy equipment, just good food that looks impressive.
Ingredients You’ll Need
Here’s the best part: you probably have most of this already in your pantry or fridge. I’m particular about three ingredients here, and I’ll tell you exactly why they matter.
Full-Fat Cream Cheese (32 oz / 900g) — Do not buy light cream cheese. It won’t whip up properly, and the texture will be grainy. Let it sit out for 30 minutes before you start so it’s soft and easy to blend. I always use Philadelphia brand because it’s consistent, but any quality block works.
Heavy Cream (2 cups / 480ml) — Cold heavy cream is your friend here. It needs to whip into stiff peaks to give the trifle that light, airy texture. If you use whipping cream, make sure it’s at least 30% fat. Half-and-half won’t work; it’s too thin.
Fresh Strawberries (2 pounds / 900g) — Look for ripe, red strawberries. If they’re white at the tips, they’re not ready. You’ll use half for the filling and half for the top layer. I buy extra because you can never have too many berries in a trifle. Wash and hull them, but keep them whole for the top layer.
Ladyfingers (1 package / 7 ounces) — These are the traditional base. They’re dry and crisp, which is perfect for soaking up the strawberry juice. Don’t substitute with sponge cake unless you have to, because ladyfingers hold their structure better. I buy the plain ones, not the chocolate-covered kind.
Granulated Sugar (½ cup / 100g) — Sweetens the cream cheese filling. If you’re using very sweet strawberries, you can reduce this to ⅓ cup. Taste your berries first!
Vanilla Extract (2 teaspoons) — Pure vanilla, please. Artificial stuff tastes chemical in a delicate dessert like this. It adds that classic cheesecake flavor.
Strawberry Jam (½ cup / 120g) — This is the secret weapon. It adds intense strawberry flavor and helps thicken the syrup that soaks the cake. Use a high-quality seedless jam for a smoother look.
Milk (¼ cup / 60ml) — Just a splash to help thin the jam for soaking the ladyfingers. Whole milk works best.
Optional: Crushed Pistachios — For garnish. They add a nice crunch and a beautiful green contrast to the pink and white. I sprinkle these on right before serving.
Equipment Needed
You don’t need fancy equipment for this. Here’s what I actually use:
Large Glass Trifle Bowl — A 3-4 quart bowl is ideal. I have a vintage one from a thrift store that’s perfect. Any clear glass bowl works, but a wide bowl shows off the layers better than a tall, narrow one.
Electric Hand Mixer or Stand Mixer — You need to whip the cream and blend the cream cheese smoothly. Doing this by hand is possible but exhausting. I use my hand mixer because it’s quick and easy to clean.
Large Mixing Bowls — Two bowls. One for the cream cheese mixture, one for whipping the cream. Having two separate bowls prevents cross-contamination and makes folding easier.
Spatula — A rubber spatula is essential for folding the whipped cream into the cream cheese without deflating it. Silicone works too, but rubber scrapes the bowl cleaner.
Sharp Knife and Cutting Board — For slicing the strawberries. A serrated knife works best for berries to avoid squishing them.
Measuring Cups and Spoons — Standard stuff. Dollar store versions work fine for this.
Pastry Brush or Spoon — For brushing the strawberry syrup onto the ladyfingers. A spoon works if you don’t have a brush.
How to Make It: Step-by-Step
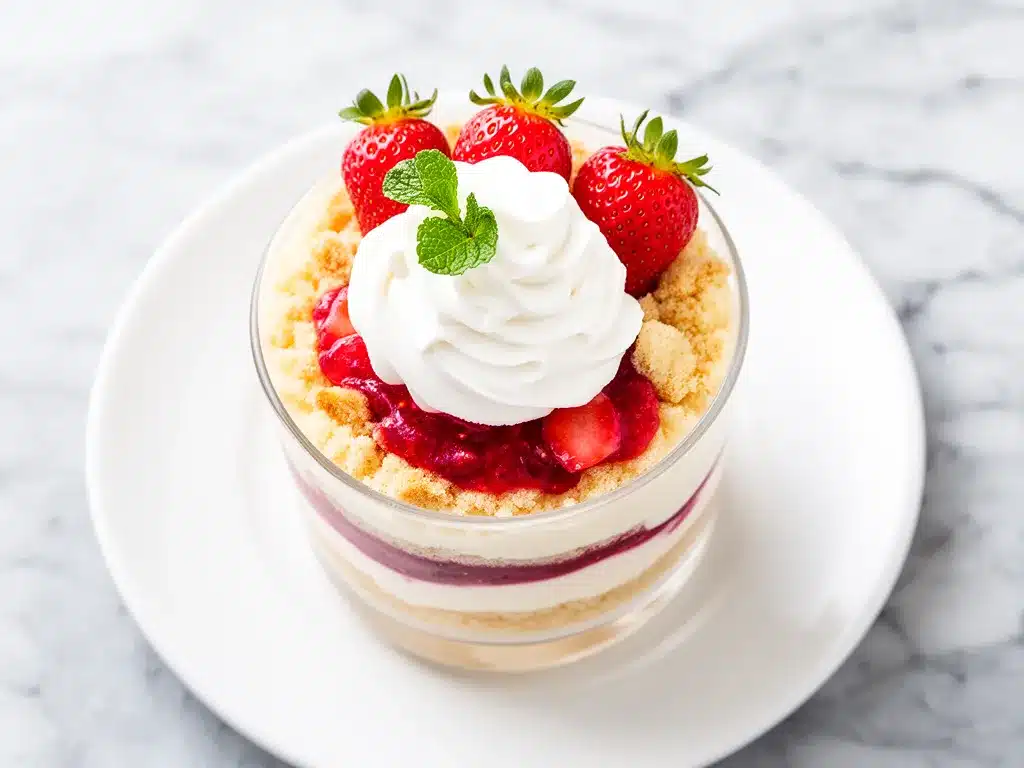
Alright, let’s make this! I’m walking you through exactly how I do it, including the little tricks I’ve picked up.
Step 1: Prep Your Strawberries (10 minutes)
Wash and hull your strawberries. Slice half of them into thin slices for the filling layers. Leave the other half whole for the top decoration. If your strawberries are very juicy, you might want to pat them dry with a paper towel so the trifle doesn’t get watery.
Step 2: Make the Strawberry Syrup (2 minutes)
In a small bowl, mix the strawberry jam with the milk until smooth. This creates a thin syrup. You don’t want it to be a thick paste; it needs to soak into the ladyfingers. Set this aside.
Step 3: Whip the Cream (3 minutes)
In a large, cold bowl, whip the heavy cream until stiff peaks form. This means when you lift the beaters, the cream stands up straight. Be careful not to over-whip it into butter. Once it’s stiff, set it aside in the fridge. Cold cream is key here.
Step 4: Make the Cheesecake Filling (5 minutes)
In another large bowl, beat the softened cream cheese, sugar, and vanilla extract until completely smooth and creamy. There should be no lumps. This takes about 2-3 minutes on medium speed. If you see lumps, keep beating; they’ll disappear.
Step 5: Fold the Cream Together (3 minutes)
Gently fold the whipped cream into the cream cheese mixture. Use a spatula and cut down the middle, then scoop up and over. Rotate the bowl and repeat. You want to keep as much air in the mixture as possible. It should look light and fluffy. Don’t overmix!
Step 6: Assemble the Layers (10 minutes)
Start with a layer of ladyfingers at the bottom of the trifle bowl. Brush them generously with the strawberry syrup. They should be moist but not falling apart. Add a layer of the sliced strawberries, then a thick layer of the cheesecake filling. Repeat: ladyfingers, syrup, strawberries, filling. Usually, three layers work perfectly.
Step 7: Decorate and Chill (30 minutes minimum)
Top with a final layer of cheesecake filling. Smooth it out. Arrange the whole strawberries on top, cut-side down so they stick. Sprinkle with crushed pistachios if using. Cover with plastic wrap and refrigerate for at least 30 minutes, but ideally 2-4 hours. This lets the flavors meld and the structure set.
Total Time: About 30-40 minutes active, plus chilling time.
Expert Tips & Tricks
Here’s everything I’ve learned from making this dozens of times. These tips will save you from my mistakes.
Keep Everything Cold — The cream needs to be ice-cold to whip properly. If your kitchen is hot, put your mixing bowls in the fridge for 15 minutes before starting. Warm cream = soup, not peaks.
Don’t Soak the Ladyfingers Too Much — Ladyfingers are like sponges. If you soak them for too long, they turn to mush. Just a quick brush of syrup is enough. They’ll continue to absorb moisture from the cream and strawberries as they sit.
Use Room Temperature Cream Cheese — Cold cream cheese creates lumps that are impossible to beat out. Take it out of the fridge 30 minutes before you start. If you’re in a rush, microwave it in 5-second bursts, stirring between each.
Choose the Right Strawberries — Ripe strawberries release more juice and flavor. If your berries are a bit underripe, add a teaspoon of lemon juice to the jam mixture to brighten the flavor.
Fold, Don’t Stir — When combining the cream cheese and whipped cream, gentle folding preserves the air. Stirring vigorously will deflate the mixture, resulting in a dense, heavy trifle.
Make Ahead is Best — I know it’s tempting to eat it immediately, but the trifle tastes better after sitting for a few hours. The ladyfingers soften slightly, and the flavors blend. Plan accordingly!
Variations & Substitutions
Once you’ve nailed the basic version, here’s how you can mix it up. I’ve tried all of these.
Chocolate Lover’s Trifle — Swap the strawberry jam for chocolate hazelnut spread. Use chocolate ladyfingers or chocolate sponge cake. Add chocolate shavings on top. It’s rich and indulgent.
Lemon Berry Trifle — Add the zest of one lemon to the cream cheese mixture. Use blueberries instead of strawberries. Top with a lemon curd drizzle. It’s bright and refreshing.
Peach Cobbler Style — Swap strawberries for sliced peaches. Use cinnamon in the cream cheese filling. Top with crushed graham crackers instead of ladyfingers for a cobbler vibe. This pairs well with my make-ahead blueberry baked oatmeal cups for a full summer breakfast-brunch spread.
Gluten-Free Option — Use gluten-free ladyfingers or gluten-free sponge cake. Everything else is naturally gluten-free. I’ve used gluten-free ladyfingers from the store, and they work just as well.
Dairy-Free Version — Use vegan cream cheese and coconut cream instead of heavy cream. It’s different but still creamy and delicious. My lactose-intolerant friend loves this version.
Boozy Twist — Replace the milk in the syrup with champagne or strawberry liqueur. Add a splash to the cream cheese mixture too. Perfect for adult gatherings.
Serving & Storage
I usually serve this straight from the bowl at the dinner table—it looks rustic and stays cool. But here are other ways I’ve enjoyed it:
Side Dishes — This dessert is rich, so pair it with something light. A simple green salad with balsamic vinaigrette works well. Or try my sparkling watermelon cucumber agua fresca to cut through the richness.
How to Serve — Use a large spoon to scoop from the top, getting some of each layer. It’s messy, but that’s part of the fun.
Refrigerator Storage — Store in an airtight container or covered with plastic wrap for up to 3 days. The ladyfingers will continue to soften, so it might get a bit mushier, but it still tastes great.
Reheating — Do not reheat this dessert. It’s meant to be served cold. If it’s too soft, put it in the fridge for an hour to firm up.
Freezing — I don’t recommend freezing this. The cream cheese filling can separate, and the ladyfingers become icy. Make it fresh or store in the fridge for up to 3 days.
Nutrition Information
I’m not a nutritionist, but here’s the breakdown if you’re tracking. This is a rich dessert, so portion control is key.
Per Serving (based on 12 servings):
- Calories: 380
- Protein: 6g
- Carbs: 42g
- Fiber: 1g
- Sugar: 28g
- Fat: 22g
- Saturated Fat: 13g
- Cholesterol: 65mg
- Sodium: 220mg
What’s Good:
- Calcium from the cream cheese
- Vitamin C from the strawberries
- Relatively low in sodium
What to Know:
- High in sugar and saturated fat due to cream cheese and cream
- Contains dairy and gluten
- Calorie-dense, so a small slice goes a long way
Look, this is a treat. It’s not a health food. But it’s homemade, so you know what’s in it. When I make it for kids, I sometimes reduce the sugar in the filling. But usually? I just enjoy a small slice and savor it.
Final Thoughts
So that’s my go-to fresh strawberry cheesecake trifle! I’ve probably talked your ear off at this point, but when you make a recipe this often, you have a lot to say about it.
This has saved summer dinners more times than I can count. It’s my answer to “what’s for dessert?” when I’m tired, don’t want takeout, and still want something that tastes really good. My kids are happy, my friends are happy, and I’m happy because I’m not stressed about cooking.
Make it yours! Try different berries, swap the cake base, or add a splash of booze. The best recipes are the ones you adapt to your family’s tastes. If you make this, drop a comment and let me know what you think! I love hearing how recipes turn out in your kitchen. And if something doesn’t work, tell me that too—I’m here to help troubleshoot.
Happy cooking! And I hope your kitchen smells half as good as mine does right now.
Frequently Asked Questions
Can I use frozen strawberries?
You can, but they’ll release a lot of water. Thaw them completely, then pat them dry with paper towels to remove excess moisture. If you use them frozen, the trifle might get watery. Fresh is best, but frozen works in a pinch.
Why did my trifle turn out watery?
This usually happens if the strawberries were too juicy or if you soaked the ladyfingers too much. Make sure to pat your strawberries dry, and only brush the ladyfingers lightly with syrup. Also, ensure your cream cheese was fully smooth before mixing.
Can I make this ahead for a dinner party?
Absolutely! This is actually better made ahead. Assemble it the night before and let it chill overnight. The flavors will meld, and the ladyfingers will soften perfectly. It’s one of the easiest make-ahead desserts you can find.
Can I use pound cake instead of ladyfingers?
Yes! Pound cake works great. Cube it into small pieces and soak it with the strawberry syrup. It’s a bit heartier than ladyfingers, so you might need less cake. I’ve used pound cake when I couldn’t find ladyfingers, and it was delicious.
How do I keep the layers distinct?
Use a clear glass bowl. Make sure each layer is thick enough to be visible. Don’t over-soak the cake, or it will blend into the cream. A sharp knife helps when cutting the strawberries for clean edges.
Can I double this recipe?
Yes! Just use a larger trifle bowl or two smaller bowls. The ratios stay the same. I often double this for large parties. Just make sure your mixing bowl is big enough for the cream and cream cheese.
What kind of strawberries work best?
Use ripe, red strawberries. They should be fragrant and sweet. If they’re hard or white at the tips, they’re not ready. Strawberries that are too tart will make the trifle too sour, so taste them first!
Pin This Recipe!
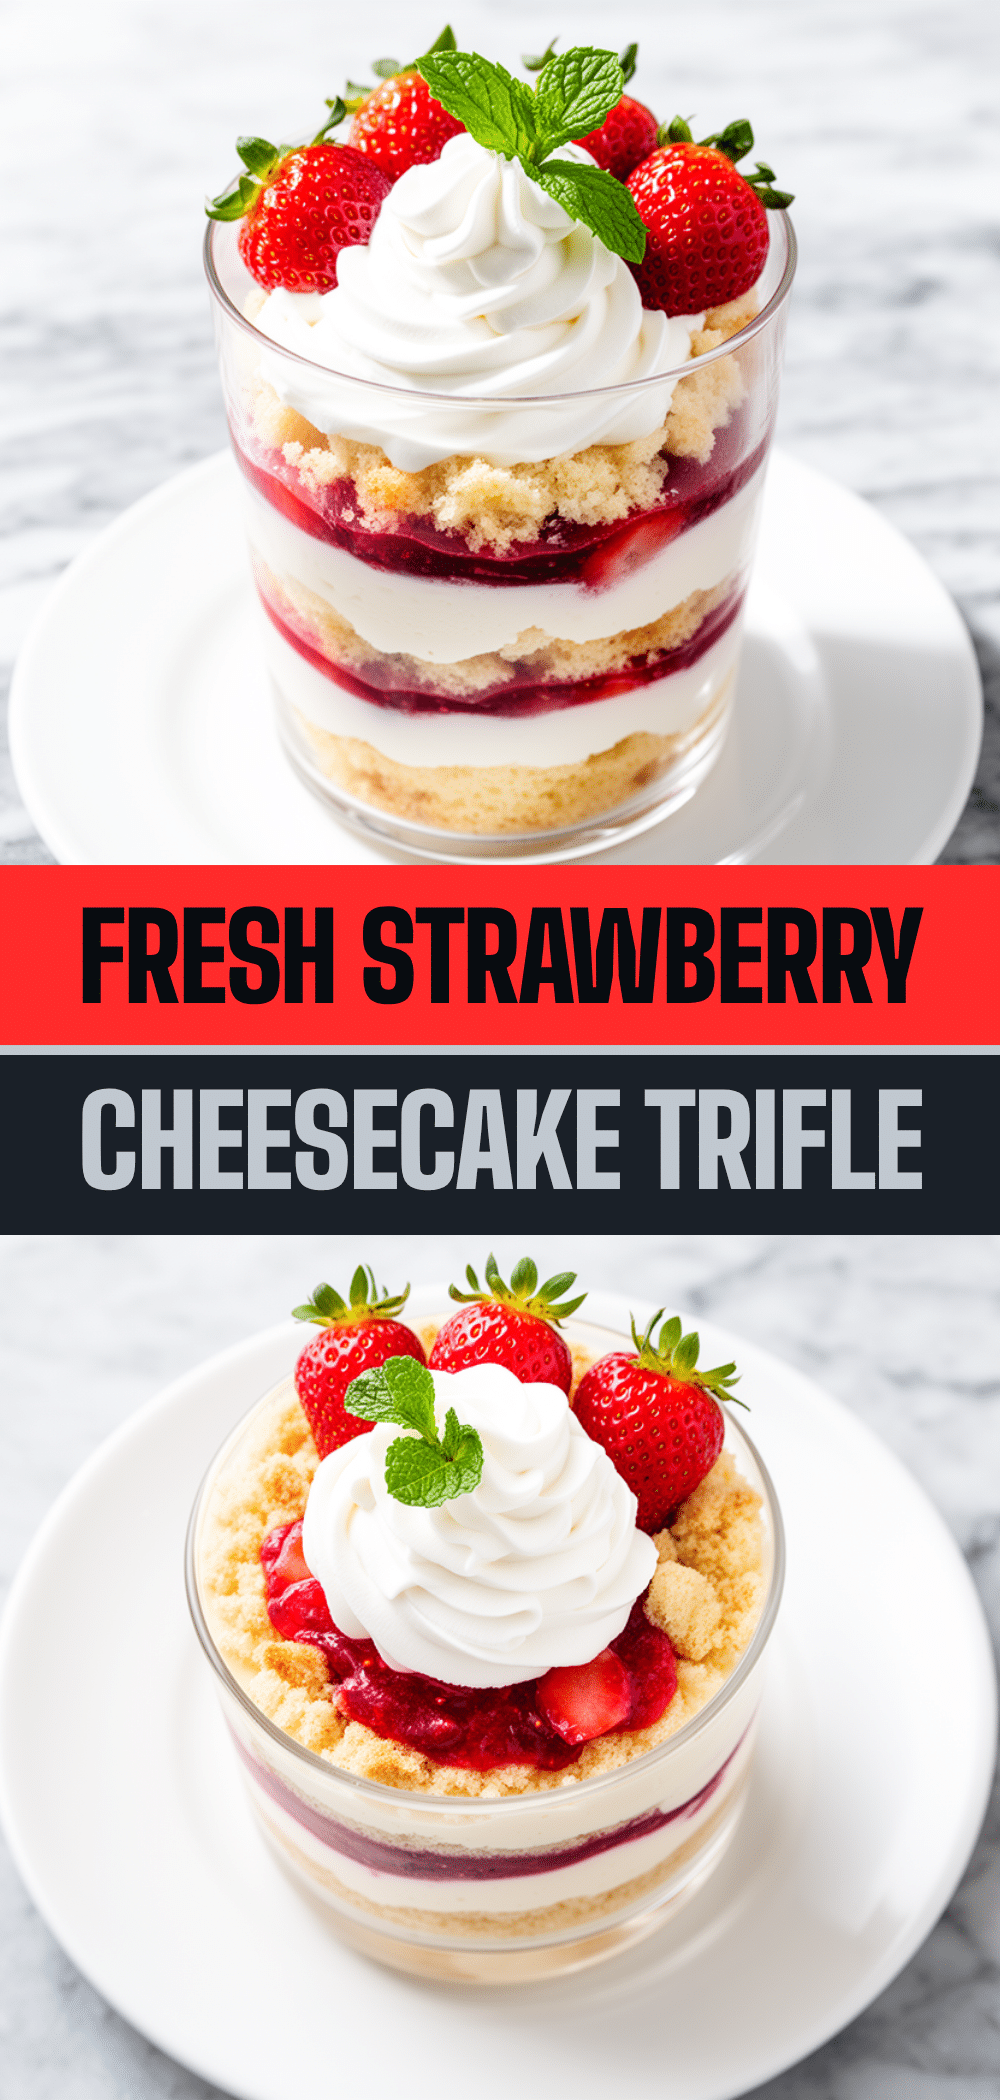
Fresh Strawberry Cheesecake Trifle: 5-Step No-Bake Dessert
- Total Time: 30-40 minutes active time plus chilling
- Yield: 10-12 servings 1x
Description
A stress-free, no-bake summer dessert that layers ladyfingers, fresh strawberries, and a tangy cream cheese filling. It looks impressive, feeds a crowd, and can be made ahead for easy entertaining.
Ingredients
- 32 oz (900g) full-fat cream cheese, softened
- 2 cups (480ml) heavy cream, cold
- 2 pounds (900g) fresh strawberries, hulled and sliced
- 1 package (7 oz) ladyfingers
- ½ cup (100g) granulated sugar
- 2 teaspoons vanilla extract
- ½ cup (120g) strawberry jam
- ¼ cup (60ml) milk
- Crushed pistachios (optional, for garnish)
Instructions
- Wash and hull strawberries. Slice half for the filling layers and leave the other half whole for decoration. Pat juicy berries dry with paper towels.
- In a small bowl, mix strawberry jam with milk until smooth to create a thin syrup. Set aside.
- In a large, cold bowl, whip heavy cream until stiff peaks form. Set aside in the fridge.
- In another large bowl, beat softened cream cheese, sugar, and vanilla extract until completely smooth and creamy.
- Gently fold the whipped cream into the cream cheese mixture using a spatula until light and fluffy. Avoid overmixing.
- Assemble the trifle: Place a layer of ladyfingers at the bottom of a large glass bowl and brush generously with strawberry syrup. Add a layer of sliced strawberries, then a thick layer of cheesecake filling. Repeat for three layers.
- Top with a final layer of cheesecake filling. Arrange whole strawberries cut-side down on top and sprinkle with crushed pistachios if using.
- Cover with plastic wrap and refrigerate for at least 30 minutes, ideally 2-4 hours, to allow flavors to meld and structure to set.
Notes
Keep all ingredients cold, especially the cream, to ensure proper whipping. Do not soak ladyfingers too much or they will turn to mush. Use room temperature cream cheese to avoid lumps. This dessert is best made ahead and stored in the refrigerator for up to 3 days. Do not freeze.
- Prep Time: 20 minutes
- Cook Time: 0 minutes
- Category: Dessert
- Cuisine: American
Nutrition
- Serving Size: 1 slice from a 12-se
- Calories: 380
- Sugar: 28
- Sodium: 220
- Fat: 22
- Saturated Fat: 13
- Carbohydrates: 42
- Fiber: 1
- Protein: 6
Keywords: strawberry trifle, no-bake dessert, cheesecake trifle, summer dessert, make-ahead dessert, easy party dessert, fresh strawberry recipe


