I have a confession to make. My best recipes don’t come from planned meal prep Sundays or carefully curated Pinterest boards. They come from desperate, 9 PM pantry raids when the kids are arguing over who gets the last slice of cheese and I just need something sweet to smooth things over.
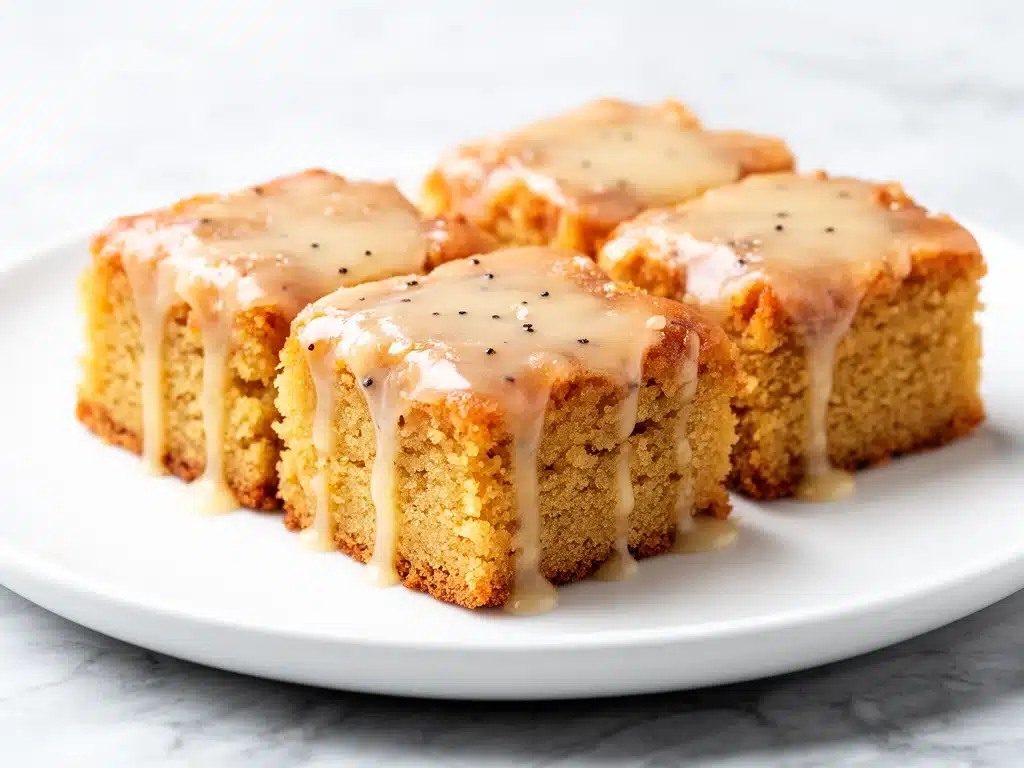
That’s exactly how I discovered the magic of Glazed Brown Butter Blondie Bars. It was one of those weeks where dinner was a rushed affair (the crockpot cheesy taco pasta was on the menu, but even that felt like too much effort) and I wanted to give the kids something special before bed. I didn’t have time to bake a cake, and I certainly didn’t have the energy to wash three bowls. But I had butter, brown sugar, and a bag of chocolate chips.
I melted the butter until it smelled like nuts. I mixed the batter in one bowl. I threw it in the oven and waited. When they came out, golden-brown and sticky, I drizzled them with a quick glaze. The kids went quiet. That’s the good kind of quiet. The kind where you know you’ve won the parenting game for the evening.
These bars are my secret weapon. They’re rich, chewy, and smell like a high-end bakery, but they take less time than it takes to order takeout. And that brown butter? It’s the game-changer. It adds this deep, toasty flavor that makes you feel like you’re a culinary genius, even if you’re wearing sweatpants and standing in front of an open oven at night.
Why You’ll Love These Glazed Brown Butter Blondie Bars
There are plenty of blondie recipes out there. But this one? This one has completely changed my after-dinner routine. I’ve made these for school bake sales, last-minute dinner guests, and just because I wanted a snack at midnight. Here’s why they keep coming back into my kitchen:
- Brown Butter is Flavor Gold — Seriously, if you haven’t browned your butter yet, you are missing out. It turns simple butter into a nutty, aromatic powerhouse. It adds a depth of flavor that regular melted butter just can’t compete with. It makes the bars taste sophisticated without any extra effort.
- One-Bowl Wonder — I love recipes that don’t require a mountain of dishes. You mix the batter in one large bowl. You melt the butter in the microwave. That’s it. No creaming, no folding, no fuss. It’s perfect for those nights when you’re exhausted and just want to eat.
- Perfectly Chewy Texture — I’ve tested this recipe dozens of times to get the texture just right. You want them cakey? No. You want them crispy on the edges and fudgy in the middle? Yes. The ratio of brown sugar to butter hits that sweet spot every single time.
- Make-Ahead Friendly — These bars actually taste better the next day. The flavors meld together, and the glaze sets into a perfect shell. I often make them on Sunday night, and they’re still fresh and delicious by Wednesday. They’re also fantastic for packing in lunchboxes (if you can keep them out of the kids’ hands).
- Versatile Toppings — While chocolate chips are classic, these bars are a blank canvas. I’ve added white chocolate chunks, chopped nuts, dried cranberries, and even a sprinkle of sea salt on top. They pair beautifully with a glass of cold milk or a warm cup of coffee.
These bars are my go-to when I need a win. They’re easy, they’re delicious, and they make my kitchen smell like heaven. Whether you’re a baking novice or a seasoned pro, you’ll love how simple these are to make.
Ingredients You’ll Need
Here’s the best part: you probably have most of this already. This isn’t a recipe that requires a special trip to the grocery store. It’s pantry-friendly, which is exactly what I need on a busy weeknight.
For the Blondie Base
Unsalted Butter (½ cup / 113g) — This is where the magic happens. You’re going to brown this butter. Use high-quality butter here; it makes a huge difference in the final flavor. I like to use European-style butter if I have it, but standard supermarket brands work fine too.
Light Brown Sugar (1 cup / 200g) — Light brown sugar gives a milder, caramel-like flavor. Dark brown sugar will make them more molasses-heavy. For these bars, I prefer light brown sugar for that classic blondie taste. Packed firmly into the cup.
Granulated Sugar (½ cup / 100g) — This balances the moisture from the brown sugar and helps create that chewy texture. Don’t skip it; it’s not just for sweetness.
Large Egg (1 large) — Room temperature is best. If you forget, just run it under warm water for a minute. It helps the batter emulsify properly.
Egg Yolk (1 large) — Yes, an extra yolk. This adds richness and contributes to that fudgy, chewy texture. It’s the secret ingredient that elevates these from good to amazing.
Vanilla Extract (2 teaspoons) — Use real vanilla, not imitation. It’s a subtle flavor, but it rounds out the brown butter beautifully. I keep a bottle of Nielsen-Massey in my pantry.
All-Purpose Flour (1 ½ cups / 190g) — Spoon and level your flour. Don’t scoop directly from the bag, or you’ll pack in too much and get dense bars. I like to fluff the flour with a spoon, scoop it gently, and level it off with a knife.
Baking Powder (½ teaspoon) — Just a little bit to give them a slight lift. Not too much, or they’ll be cakey.
Salt (½ teaspoon) — Essential for balancing the sweetness. Use fine sea salt or table salt.
Chocolate Chips (1 cup / 170g) — Semi-sweet or milk chocolate chips work great. I like to use a mix of both for variety. If you’re feeling fancy, chop up a chocolate bar for irregular chunks.
For the Vanilla Glaze
Powdered Sugar (1 cup / 120g) — Sifted, if possible, to avoid lumps. I usually just whisk it vigorously in the bowl, but if you’re particular, sift it.
Heavy Cream (2-3 tablespoons) — Add gradually. You want a drizzle-able consistency, not a thick paste. Whole milk works too, but heavy cream makes it richer.
Vanilla Extract (½ teaspoon) — For that extra vanilla punch in the glaze.
Equipment Needed
You don’t need fancy gadgets for this. Here’s what I actually use:
Microwave-Safe Bowl — For melting and browning the butter. I use a glass measuring cup with a spout; it’s easy to swirl and pour.
Large Mixing Bowl — A 4-quart bowl is perfect. Make sure it’s big enough to mix the batter comfortably without splattering.
Whisk — A standard balloon whisk works fine. You don’t need an electric mixer.
9×9 Inch Baking Pan — This is the standard size for blondies. Line it with parchment paper for easy removal. I leave an overhang on the sides so you can lift the whole block out once it’s cooled.
Parchment Paper — Non-negotiable. It prevents sticking and makes cleanup a breeze.
Small Saucepan or Bowl — For mixing the glaze. If you’re using powdered sugar, a small bowl is easier.
How to Make It: Step-by-Step
Alright, let’s make these! I’m walking you through exactly how I do it, including the little tricks I’ve picked up over the years.
Step 1: Prep Your Pan and Oven (5 minutes)
Preheat your oven to 350°F (175°C). Line your 9×9 inch baking pan with parchment paper, leaving an overhang on the sides. This is crucial for lifting the bars out later. Grease the parchment lightly with butter or cooking spray to ensure it stays in place.
Step 2: Brown the Butter (5 minutes)
This is the most important step. Melt the butter in a microwave-safe bowl or a small saucepan over medium heat. If using the microwave, heat in 30-second intervals, stirring in between, until fully melted. If using a saucepan, melt over medium heat, swirling occasionally.
Once melted, continue to cook, watching closely. The butter will foam up, then subside. You’ll hear a sizzling sound. Look for small brown specks at the bottom and smell that nutty, toasted aroma. This usually takes about 3-5 minutes. Be careful not to burn it—if it smells like burnt popcorn, you’ve gone too far. Pour the brown butter into your mixing bowl immediately to stop the cooking. Let it cool for 5 minutes.
Step 3: Mix the Wet Ingredients (2 minutes)
To the cooled brown butter, add the packed light brown sugar and granulated sugar. Whisk vigorously for about 2 minutes. You want the mixture to look smooth and slightly glossy. This step helps dissolve the sugar, which contributes to the chewy texture.
Add the egg and egg yolk. Whisk until fully combined. Stir in the vanilla extract. The mixture might look a bit separated at first; that’s okay. It will come together once you add the dry ingredients.
Step 4: Add the Dry Ingredients (2 minutes)
Sift the flour, baking powder, and salt directly into the wet mixture. If you don’t have a sifter, just whisk them together in a small bowl first. Gently fold the dry ingredients into the wet using a spatula. Mix until just combined. Do not overmix! You’ll see streaks of flour; that’s fine. Overmixing develops gluten and leads to tough bars.
Step 5: Fold in the Chocolate Chips (1 minute)
Stir in the chocolate chips. Use a spatula to fold them in gently. Make sure they’re evenly distributed, but again, don’t overwork the batter.
Step 6: Bake (25-30 minutes)
Pour the batter into the prepared pan. Spread it out evenly with the spatula. Bake for 25-30 minutes. The edges should be golden brown, and the center should be set but still slightly soft. A toothpick inserted into the center should come out with a few moist crumbs, not wet batter. If it comes out clean, they might be overbaked.
Let the bars cool in the pan on a wire rack for at least 20 minutes. They will continue to set as they cool.
Step 7: Make the Glaze (5 minutes)
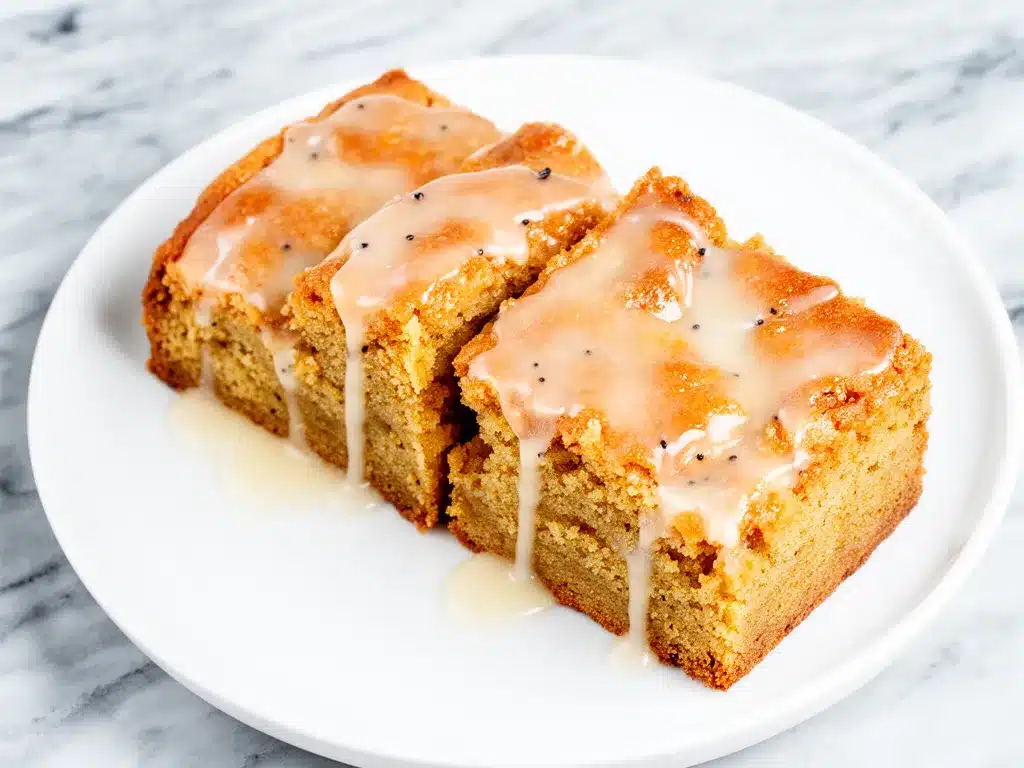
While the bars cool, whisk together the powdered sugar, vanilla extract, and heavy cream in a small bowl. Start with 2 tablespoons of cream and add more if needed. You want a thick but drizzle-able consistency. If it’s too thick, add more cream. If it’s too thin, add more powdered sugar.
Step 8: Glaze and Serve
Once the bars are completely cool, drizzle the glaze over the top. Use a spatula or spoon to spread it evenly, or just let it drip down the sides for a rustic look. Let the glaze set for 10 minutes before cutting.
Cut into squares or bars. Serve and enjoy!
Expert Tips & Tricks
Here’s everything I’ve learned from making these dozens of times. These tips will save you from my mistakes.
Don’t Rush the Brown Butter
This is where most people mess up. If you burn the butter, the whole batch tastes bitter. Take your time. Watch the color and smell the aroma. It’s ready when it’s the color of peanut butter and smells nutty. If you’re nervous, use a light-colored pan so you can see the specks clearly.
Cool Completely Before Glazing
I know it’s tempting to glaze them while they’re warm, but the heat will melt the glaze right into the bars. Wait until they’re completely cool. This ensures the glaze sets properly and creates that nice contrast between the soft bar and the crisp glaze.
Don’t Overbake
Blondies continue to cook in the hot pan after you take them out of the oven. Pull them out when the center still looks slightly underbaked. They will firm up as they cool. Overbaked blondies are dry and cakey, and nobody wants that.
Use Parchment Paper
I can’t stress this enough. Without parchment, you’ll be scraping bits of blondie out of the pan for hours. With it, you just lift the whole block out. It’s a game-changer for cleanup.
Customize Your Chocolate
While I love semi-sweet chips, try using white chocolate chips for a more classic blondie flavor. Or add chopped nuts like pecans or walnuts for crunch. The possibilities are endless.
Variations & Substitutions
Once you’ve nailed the basic version, here’s how you can mix it up. I’ve tried all of these.
White Chocolate Blondies
Swap the semi-sweet chips for white chocolate chips. This makes them sweeter and more traditional. I like to add a handful of macadamia nuts for extra luxury.
Red Velvet Blondies
Add 1 tablespoon of cocoa powder and 1 teaspoon of red food coloring to the batter. It gives them a beautiful pink hue and a subtle chocolate flavor.
Lemon Blueberry
Add the zest of one lemon to the batter and fold in 1 cup of fresh blueberries. Toss the berries in a teaspoon of flour first to prevent them from sinking. These are fantastic for spring.
Gluten-Free Option
Use a 1:1 gluten-free flour blend. Make sure it contains xanthan gum, or add ½ teaspoon if it doesn’t. The texture will be slightly different but still delicious.
Dairy-Free Option
Use dairy-free butter and dairy-free chocolate chips. The glaze can be made with coconut cream instead of heavy cream.
Serving & Storage
How to Serve:
I usually serve these straight from the pan, cut into squares. They’re perfect with a glass of cold milk or a cup of coffee. They also travel well for potlucks or bake sales. Just cut them into smaller squares if you’re sharing.
Storage Instructions:
Room Temperature: Store in an airtight container at room temperature for up to 5 days. They actually get chewier and more flavorful after a day or two.
Refrigerator: You can store them in the fridge for up to a week, but they’ll firm up. Let them come to room temperature before eating for the best texture.
Freezer: These freeze beautifully! Wrap individual bars in plastic wrap and then place them in a freezer bag. They’ll last for up to 3 months. Thaw at room temperature before eating.
Nutrition Information
I’m not a nutritionist, but here’s the breakdown if you’re tracking. Keep in mind that these are rich, indulgent bars, so portion control is key.
Per Serving (based on 16 bars):
- Calories: 220
- Protein: 2g
- Carbs: 32g
- Fiber: 1g
- Sugar: 24g
- Fat: 10g
- Saturated Fat: 6g
- Cholesterol: 25mg
- Sodium: 120mg
These bars are a treat, not a health food. But they’re made with simple, recognizable ingredients. If you want to lighten them up, you can reduce the sugar by ¼ cup, though they might be less chewy. Or swap half the chocolate chips for nuts or dried fruit.
Final Thoughts
So that’s my secret to the perfect Glazed Brown Butter Blondie Bars! I’ve probably talked your ear off at this point, but when you make a recipe this often, you have a lot to say about it.
These bars have saved me more times than I can count. They’re my answer to “what’s for dessert?” when I’m tired, don’t want to order out, and still want something that tastes really good. My kids are happy, my husband’s happy, and I’m happy because I’m not stressed about cooking.
Make them yours! Try different add-ins, swap in your favorite chocolate, or add a sprinkle of sea salt on top. The best recipes are the ones you adapt to your family’s tastes.
If you make this, drop a comment and let me know what you think! I love hearing how recipes turn out in your kitchen. And if something doesn’t work, tell me that too—I’m here to help troubleshoot.
Happy baking! And I hope your kitchen smells half as good as mine does right now.
Frequently Asked Questions
Can I use salted butter instead of unsalted?
You can, but you’ll need to reduce the added salt in the recipe. If you use salted butter, cut the ½ teaspoon of salt in the recipe to a quarter teaspoon. This gives you more control over the final saltiness.
Why did my blondies turn out cakey instead of chewy?
This usually happens if you overmix the batter or overbake them. Remember to mix just until the flour is combined, and pull them out of the oven when the center still looks slightly soft. Also, using too much flour can lead to a cakey texture. Make sure you’re spooning and leveling your flour, not scooping it directly from the bag.
Can I make these ahead of time?
Absolutely! These bars are actually better the next day. You can make them up to 2 days in advance and store them in an airtight container at room temperature. They also freeze well for up to 3 months.
Can I use dark brown sugar instead of light brown sugar?
You can, but the flavor will be more molasses-heavy. Light brown sugar gives a milder, caramel-like flavor that’s more traditional for blondies. If you only have dark brown sugar, it will still be delicious, just with a deeper flavor profile.
How do I store the glaze?
The glaze is best made fresh. If you need to make it ahead, store it in an airtight container in the fridge for up to 2 days. Let it come to room temperature and whisk in a little more cream if it thickens too much.
Can I double this recipe?
I wouldn’t recommend doubling it in a 9×9 pan, as the bars will be too thick and might not bake evenly. If you want to double the recipe, use two 9×9 pans or a 9×13 pan. Adjust the baking time accordingly, checking for doneness a few minutes earlier than the original recipe.
What if I don’t have a microwave?
You can brown the butter in a saucepan over medium heat. Just watch it closely and swirl it occasionally to prevent burning. It might take a minute longer than the microwave, but the result is the same.
Pin This Recipe!
Glazed Brown Butter Blondie Bars
- Total Time: 45 minutes
- Yield: 16 servings 1x
Description
Rich, chewy blondie bars made with nutty brown butter and topped with a sweet vanilla glaze. This one-bowl recipe is perfect for busy weeknights and yields a bakery-quality dessert.
Ingredients
- ½ cup (113g) unsalted butter
- 1 cup (200g) light brown sugar, packed
- ½ cup (100g) granulated sugar
- 1 large egg, room temperature
- 1 large egg yolk
- 2 teaspoons vanilla extract
- 1 ½ cups (190g) all-purpose flour
- ½ teaspoon baking powder
- ½ teaspoon salt
- 1 cup (170g) chocolate chips
- 1 cup (120g) powdered sugar, for glaze
- 2–3 tablespoons heavy cream, for glaze
- ½ teaspoon vanilla extract, for glaze
Instructions
- Preheat oven to 350°F (175°C). Line a 9×9 inch baking pan with parchment paper, leaving an overhang on the sides, and grease lightly.
- Melt the butter in a microwave-safe bowl or saucepan. Brown the butter until it smells nutty and has small brown specks (about 3-5 minutes). Pour into a mixing bowl and let cool for 5 minutes.
- Whisk the brown butter, light brown sugar, and granulated sugar vigorously for 2 minutes until smooth and glossy.
- Add the egg, egg yolk, and vanilla extract. Whisk until combined.
- Sift the flour, baking powder, and salt into the wet mixture. Gently fold with a spatula until just combined; do not overmix.
- Fold in the chocolate chips.
- Pour batter into the prepared pan and spread evenly.
- Bake for 25-30 minutes until edges are golden and center is set but slightly soft. A toothpick should come out with moist crumbs.
- Cool in the pan on a wire rack for at least 20 minutes.
- While bars cool, whisk powdered sugar, vanilla extract, and heavy cream to make a drizzle-able glaze.
- Once bars are completely cool, drizzle glaze over the top and let set for 10 minutes before cutting.
Notes
Do not rush the browning of the butter to avoid a bitter taste. Cool the bars completely before glazing to ensure the glaze sets properly. Do not overbake as blondies continue to cook in the hot pan. For gluten-free option, use a 1:1 gluten-free flour blend. For dairy-free, use dairy-free butter and chocolate chips, and coconut cream for the glaze.
- Prep Time: 15 minutes
- Cook Time: 30 minutes
- Category: Dessert
- Cuisine: American
Nutrition
- Serving Size: 1 bar
- Calories: 220
- Sugar: 24
- Sodium: 120
- Fat: 10
- Saturated Fat: 6
- Carbohydrates: 32
- Fiber: 1
- Protein: 2
Keywords: blondies, brown butter, dessert, easy recipe, one bowl, chocolate chip bars, vanilla glaze, baking


