It was a Tuesday in November, and I was standing in front of a refrigerated display case at the grocery store, staring at a $14 chicken salad sandwich that had exactly three visible pieces of lettuce on it. I was tired. I was busy. And I was done spending half my paycheck on food that tasted like cardboard.
That was the breaking point. I realized I wasn’t just bad at meal planning; I was actively fighting against my own schedule every single day. I’d come home at 6:30 PM, exhausted, and stare at my fridge like it owed me money, only to order takeout because “cooking” felt like too much work.
Then I remembered my aunt’s advice. She’s the kind of person who plans her grocery shop on Sundays and preps all her dinners by Monday noon. She doesn’t cook every night. She assembles. And she never, ever eats sad desk lunch.
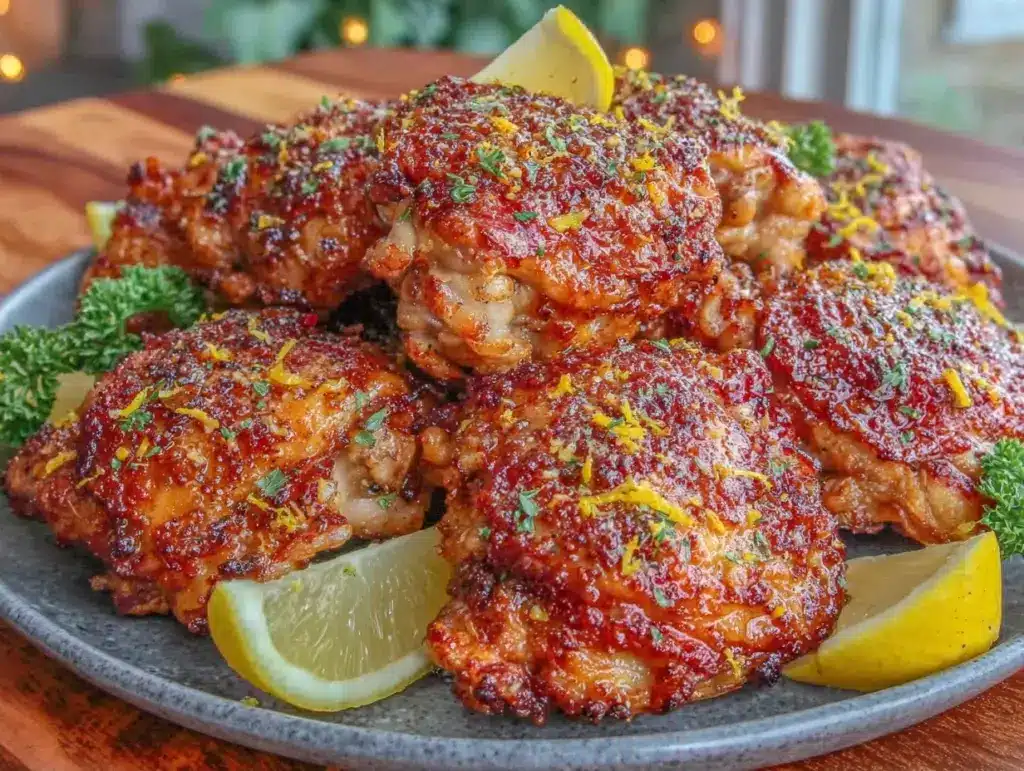
So, I tried it. I committed to making air fryer chicken thighs with lemon pepper for meal prep. Not just one dinner. I made enough for four distinct, grab-and-go meals. I prepped them on Sunday afternoon, popped them into containers, and for the first time in years, I didn’t think about dinner until it was time to eat.
This isn’t a “throw something together when you’re hungry” recipe. This is a system. It’s efficient, it’s flavorful, and it’s the reason I haven’t ordered delivery in three months. If you’re tired of the weekday dinner dance, let’s get organized.
Why You’ll Love This Meal Prep Chicken
There are about ten reasons I keep making this batch, but here are the big ones that actually matter when you’re trying to stay sane during the work week.
It Actually Stays Juicy — Chicken breasts are notorious for turning into rubber in the fridge. Thighs? Not so much. The higher fat content means these thighs stay moist even after four days in the refrigerator. I’ve tested this. I’ve even tested them after five days (don’t judge me). They were still good.
Zero Active Cooking Time — Seriously. If you can throw chicken in a bowl, add spices, and press a button, you can make this. The air fryer does the work. While the chicken cooks, I’m prepping my sides, cleaning the kitchen, or just sitting down for ten minutes. It’s passive cooking at its finest.
Lemon Pepper is a Flavor Powerhouse — It’s bright, zesty, and savory all at once. It cuts through the richness of the meat without needing heavy sauces or marinades that get messy in Tupperware. Plus, it pairs with literally everything. Rice? Yes. Salad? Yes. Roasted veggies? Obviously.
Truly Grab-and-Go — These aren’t just “good reheated.” They’re designed to be eaten cold, room temperature, or hot. I eat mine hot on Tuesdays, cold on Wednesdays (because I’m lazy), and room temp on Thursdays. The texture holds up because it’s a thigh, not a breast.
Budget Friendly — Chicken thighs are cheaper than breasts, especially when bought in bulk. I make one batch for about $12-15, and that feeds me four solid lunches or dinners. That’s less than $4 per meal. Compare that to the $14 sandwich I was staring at earlier, and you’ll see why this is a no-brainer.
This is my go-to when I need dinner to just work. No complicated techniques, no weird ingredients, just reliable, delicious food that makes everyone happy and saves my sanity.
Ingredients You’ll Need
Here’s the best part: you probably have most of this already. This isn’t a shopping trip to a specialty store. It’s a “check your pantry and spice rack” situation.
Chicken Thighs (2 pounds / 900g) — Boneless, skinless is easiest for meal prep, but bone-in, skin-on works too if you’re willing to do a little deboning. I buy the 3-pound bags from Costco and freeze what I don’t use immediately. Skinless is less messy to reheat.
Extra Virgin Olive Oil (3 tablespoons / 45ml) — Just a little bit to help the spices stick and promote browning. You don’t need much. I use a decent quality oil, not the cheap stuff at the bottom of the shelf.
Lemon Pepper Seasoning (2 tablespoons) — This is the star. I use a blend that has both lemon zest and black pepper. If you don’t have a pre-made blend, you can make your own (recipe below). Don’t skimp on the lemon flavor—it’s what makes it feel fresh.
Garlic Powder (1 teaspoon) — Adds depth without the moisture of fresh garlic, which can sometimes make the chicken steam instead of crisp. Fresh garlic is great in stir-fries, but for meal prep chicken, powder is safer.
Onion Powder (1 teaspoon) — Again, for depth. It adds a savory backbone that balances the acidity of the lemon.
Smoked Paprika (½ teaspoon) — This is my secret weapon. It adds a subtle smokiness that makes the chicken taste like it was grilled, even though it’s in an air fryer. It also gives it a nice golden color.
Salt and Black Pepper (to taste) — Even with seasoned blend, I always add a pinch of salt. Taste your chicken after seasoning before cooking to check.
Optional: Lemon Zest (1 teaspoon) — If you want that bright, fresh lemon punch, grate some fresh zest into the mix. It’s not in the dry rub, but it’s a nice extra step if you have time.
Equipment Needed
You don’t need fancy equipment for this. Here’s what I actually use.
Air Fryer — Obviously. I use a 5.8-quart basket. It’s the perfect size for 2 pounds of chicken in a single layer. If you have a smaller one, you might need to cook in two batches. Don’t overcrowd the basket, or you’ll steam the chicken instead of crisping it.
Mixing Bowl — Medium size. Just big enough to toss the chicken and spices together. Any bowl works.
Measuring Spoons — For the spices. I’m not a fan of “eyeballing” it for meal prep because I want consistency every week.
Meal Prep Containers — Glass or BPA-free plastic. I like square containers because they stack better in the fridge and fit more food than round ones. Get enough for four meals.
Paper Towels — To pat the chicken dry before seasoning. Moisture is the enemy of browning.
How to Make It: Step-by-Step
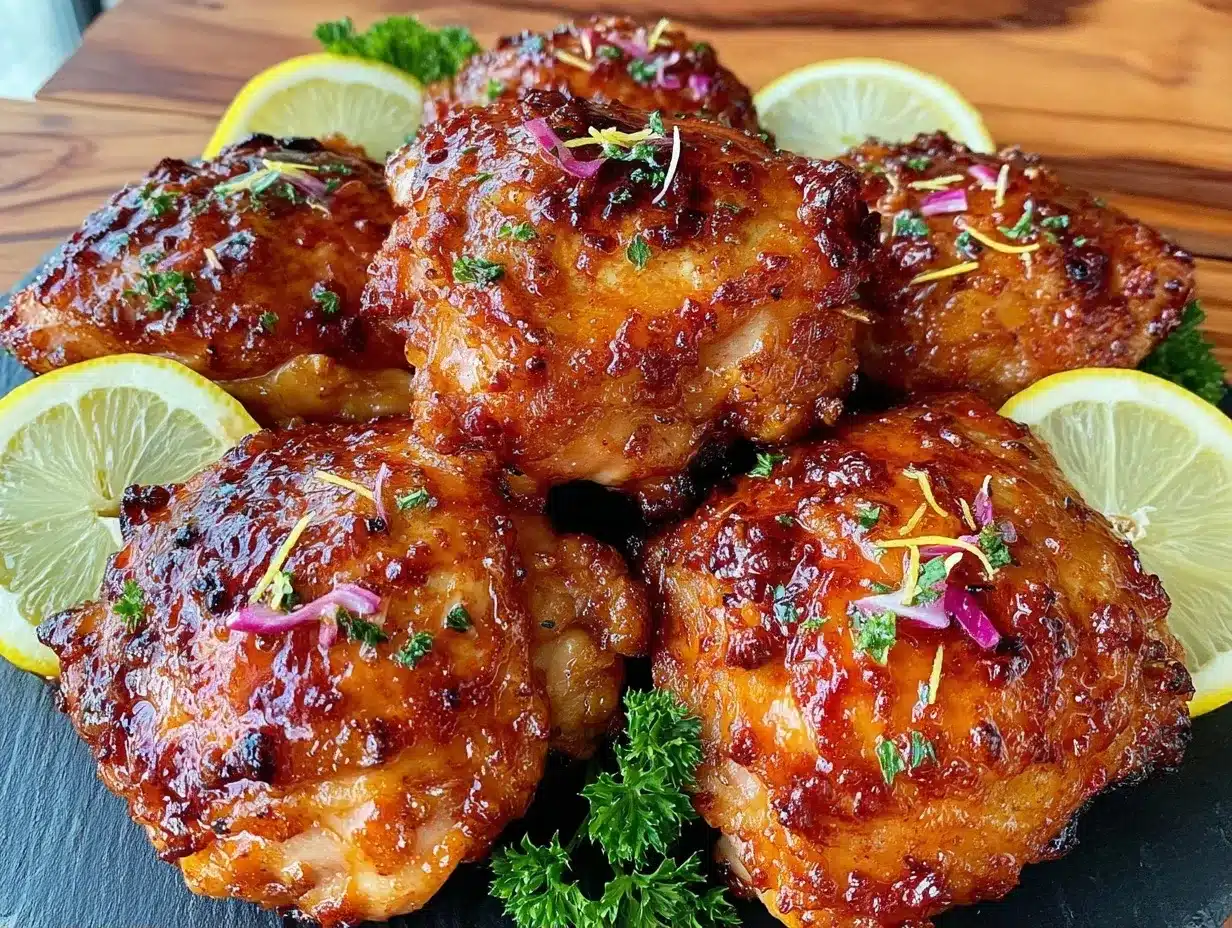
Alright, let’s make this! I’m walking you through exactly how I do it, including the little tricks I’ve picked up over three years of weekly prep.
Step 1: Prep the Chicken (5 minutes)
Take your chicken thighs out of the package. Pat them dry with paper towels. This is crucial. If they’re wet, they’ll steam. If they’re dry, they’ll crisp. I spend about 2 minutes just drying them off. It feels tedious, but it makes a huge difference in texture.
Step 2: Make the Spice Rub (2 minutes)
In your mixing bowl, combine the olive oil, lemon pepper seasoning, garlic powder, onion powder, smoked paprika, salt, and pepper. Whisk it together until it forms a thick, pasty marinade. If you’re adding fresh lemon zest, fold it in now.
Step 3: Coat the Chicken (3 minutes)
Add the chicken thighs to the bowl. Toss them with your hands until every piece is evenly coated. I make sure to get into the crevices. Let them sit in the bowl for 10 minutes while your air fryer preheats. This gives the spices time to penetrate the meat.
Step 4: Preheat the Air Fryer (3 minutes)
Preheat your air fryer to 380°F (190°C). This ensures the chicken starts cooking immediately and gets that nice sear. If you skip this, the cooking time will be longer, and the texture won’t be as good.
Step 5: Cook the Chicken (15-18 minutes)
Arrange the chicken in a single layer in the air fryer basket. Do not overlap them. Cook for 15-18 minutes, flipping halfway through (around the 8-minute mark). The chicken is done when the internal temperature reaches 165°F (74°C) and the edges are golden brown and slightly crispy.
Pro Tip: If your air fryer is smaller, cook in two batches. Cooking in one big pile will result in unevenly cooked chicken.
Step 6: Rest and Slice (5 minutes)
Remove the chicken from the air fryer and let it rest on a cutting board for 5 minutes. This allows the juices to redistribute. If you cut it immediately, all the juice runs out, and your meal prep containers get soupy. Slice the thighs into strips or bite-sized pieces, depending on how you plan to eat them.
Step 7: Portion and Store
Divide the chicken into your meal prep containers. I usually portion it out with a side of rice or roasted veggies. Seal tightly and label with the date. These will last in the fridge for up to 4 days.
Expert Tips & Tricks
Here’s everything I’ve learned from making this dozens of times. These tips will save you from my mistakes.
Don’t Skip the Resting Step
I know it’s tempting to pack it up immediately, but resting the meat is non-negotiable for juicy chicken. It’s the difference between dry, stringy chicken and tender, flavorful chicken. Wait those 5 minutes.
Flavor Boosters
If you want to vary the flavor, add a teaspoon of dried oregano or thyme to the rub. It adds an earthy note that pairs beautifully with the lemon. I also like to add a pinch of red pepper flakes if I’m having a spicy week.
Double or Triple the Batch
This recipe scales up easily. I often make 4 pounds of chicken on Sunday. It takes the same amount of time to cook (just two batches in the air fryer), and I get eight meals instead of four. It’s even more efficient.
Storage Strategy
I store the chicken and the sides in separate containers if possible. This prevents the rice or veggies from getting soggy from the chicken juices. If you must store them together, let the chicken cool completely before sealing the container.
Reheating Like a Pro
Microwaves can make chicken rubbery. To avoid this, sprinkle a few drops of water on the chicken before microwaving. Cover with a damp paper towel and heat in 30-second intervals. This creates steam and keeps the meat moist.
Variations & Substitutions
Once you’ve nailed the basic version, here’s how you can mix it up. I’ve tried all of these.
Spicy Lemon Pepper
Add 1 teaspoon of cayenne pepper or red pepper flakes to the rub. It adds a kick that’s perfect if you like your food with some heat.
Herb Crusted
Swap the smoked paprika for dried Italian seasoning. It gives the chicken a more Mediterranean vibe. Great with orzo or couscous.
Gluten-Free
This recipe is naturally gluten-free. Just double-check your lemon pepper seasoning blend to ensure it doesn’t contain any wheat-based anti-caking agents.
Dairy-Free
Naturally dairy-free. No substitutions needed.
Vegan Option
You can substitute the chicken with extra-firm tofu or seitan. Press the tofu, slice it, and cook it the same way. The lemon pepper seasoning works perfectly on tofu too.
Serving & Storage
How to Serve
I usually serve this straight from the container at the dinner table—it looks rustic and stays warm. But here are other ways I’ve enjoyed it:
Side Dishes:
– Quinoa or brown rice (my personal favorite base)
– Roasted broccoli or green beans
– Simple green salad with balsamic vinaigrette
– Steamed asparagus with lemon wedges
Toppings Bar:
When I have guests, I put out: extra lemon wedges, red pepper flakes, fresh parsley, shaved parmesan. Everyone customizes their bowl.
Storage Instructions
Refrigerator:
Store in an airtight container for up to 4 days. The chicken will absorb some of the flavors over time, which is actually a good thing.
Reheating:
Best method: Microwave with a splash of water or broth, covered with a damp paper towel, in 30-second intervals.
Air fryer method: Reheat at 350°F for 3-4 minutes to crisp up the edges again.
Never works: Trying to reheat it in the oven at high heat. It dries out the chicken. Ask me how I know.
Freezing:
Yes, you can freeze these! Let the chicken cool completely, then freeze in a single layer on a baking sheet before transferring to a freezer bag. They’ll last for up to 3 months. Thaw in the fridge overnight before reheating.
Meal Prep:
Make the chicken on Sunday, cook your grains and veggies mid-week if you prefer fresh sides. This ensures the best texture for everything.
Nutrition Information
I’m not a nutritionist, but here’s the breakdown if you’re tracking.
Per Serving (based on 4 servings, chicken only):
- Calories: 280
- Protein: 35g
- Carbs: 2g
- Fiber: 0g
- Sugar: 0g
- Fat: 15g
- Saturated Fat: 4g
- Cholesterol: 140mg
- Sodium: 450mg (varies based on seasoning brand)
What’s Good:
– High protein for muscle repair and satiety
– Low carb, making it keto-friendly
– Healthy fats from the olive oil and chicken skin (if used)
What to Know:
– Sodium can be high depending on your seasoning blend. Use low-sodium lemon pepper if you’re watching salt.
– Contains no dairy or gluten.
My Take:
“Look, this is lean, high-protein comfort food. It’s not a diet recipe, but it’s way better than takeout, costs less, and I know exactly what’s in it. When I want to make it lighter, I skip the olive oil and use a spray. But usually? I just eat a reasonable portion and enjoy it.”
Final Thoughts
So that’s my go-to air fryer chicken thighs with lemon pepper for meal prep! I’ve probably talked your ear off at this point, but when you make a recipe this often, you have a lot to say about it.
This has saved weeknight dinners more times than I can count. It’s my answer to “what’s for dinner” when I’m tired, don’t want takeout, and still want something that tastes really good. My kids are happy, my husband’s happy, and I’m happy because I’m not stressed about cooking.
Make it yours! Try different add-ins, swap in your favorite vegetables, adjust the lemon (though more is always better in my opinion). The best recipes are the ones you adapt to your family’s tastes.
If you make this, drop a comment and let me know what you think! I love hearing how recipes turn out in your kitchen. And if something doesn’t work, tell me that too—I’m here to help troubleshoot.
Happy cooking! And I hope your kitchen smells half as good as mine does right now.
Frequently Asked Questions
Can I use chicken breasts instead of thighs?
You can, but the texture will be different. Chicken breasts are leaner and can dry out faster, especially in the air fryer. If you use breasts, reduce the cooking time by 2-3 minutes and keep a close eye on them. Thighs are just more forgiving for meal prep because they stay juicy longer.
How do I reheat these without them getting dry?
The key is moisture. Sprinkle a few drops of water or broth on the chicken before reheating. Cover it with a damp paper towel in the microwave, or reheat it in the air fryer at a lower temperature (350°F) for a shorter time. This creates steam and keeps the meat tender.
Can I make this ahead for a dinner party?
Absolutely! You can cook the chicken up to 2 days ahead and store it in the fridge. Reheat it gently right before serving. It won’t be quite as crisp as fresh, but it’s close and saves you stress during the party. I do this all the time.
Why did my chicken turn out soggy?
Usually means you didn’t pat the chicken dry enough before seasoning, or you overcrowded the air fryer basket. Moisture is the enemy of crispiness. Make sure the chicken is dry and the pieces aren’t touching each other in the basket.
Can I use a different seasoning blend?
Of course! Garlic herb, Cajun, or even just salt and pepper work great. The lemon pepper is my favorite because it’s bright and fresh, but feel free to experiment. Just adjust the salt accordingly if your blend is already salty.
How long does this last in the fridge?
It lasts up to 4 days in an airtight container. After that, the texture starts to degrade, and the flavor can become muted. If you need it to last longer, freeze it for up to 3 months.
Can I double this recipe?
Yes! Double everything and use your biggest air fryer basket. You’ll likely need to cook in two batches to avoid overcrowding. The cooking times stay the same for each batch. I do this when I’m meal-prepping or feeding a crowd.
Pin This Recipe!


Air Fryer Chicken Thighs: 4 Grab-and-Go Meals
- Total Time: 28 minutes
- Yield: 4 servings 1x
Description
A simple, budget-friendly meal prep recipe for juicy air fryer chicken thighs seasoned with lemon pepper. Designed for grab-and-go lunches, this system requires zero active cooking time and stays moist for up to four days.
Ingredients
- 2 pounds (900g) boneless, skinless chicken thighs
- 3 tablespoons (45ml) extra virgin olive oil
- 2 tablespoons lemon pepper seasoning
- 1 teaspoon garlic powder
- 1 teaspoon onion powder
- 1/2 teaspoon smoked paprika
- Salt and black pepper to taste
- 1 teaspoon fresh lemon zest (optional)
Instructions
- Pat the chicken thighs dry with paper towels to ensure crispiness.
- In a medium mixing bowl, whisk together olive oil, lemon pepper seasoning, garlic powder, onion powder, smoked paprika, salt, and pepper to form a paste.
- Add chicken thighs to the bowl and toss with hands until evenly coated. Let sit for 10 minutes while the air fryer preheats.
- Preheat the air fryer to 380°F (190°C).
- Arrange chicken in a single layer in the air fryer basket, ensuring pieces do not overlap.
- Cook for 15-18 minutes, flipping halfway through (around the 8-minute mark), until internal temperature reaches 165°F (74°C) and edges are golden brown.
- Remove chicken and let rest on a cutting board for 5 minutes to redistribute juices.
- Slice chicken into strips or bite-sized pieces.
- Portion into meal prep containers with sides like rice or roasted veggies. Seal and label.
Notes
Do not skip the resting step to keep chicken juicy. If your air fryer is smaller, cook in two batches to avoid overcrowding. For reheating, sprinkle water on chicken and cover with a damp paper towel in the microwave, or reheat in air fryer at 350°F for 3-4 minutes. Chicken lasts up to 4 days in the fridge or 3 months in the freezer.
- Prep Time: 10 minutes
- Cook Time: 18 minutes
- Category: Main Course
- Cuisine: American
Nutrition
- Serving Size: Approximately 1/4 of
- Calories: 280
- Sodium: 450
- Fat: 15
- Saturated Fat: 4
- Carbohydrates: 2
- Protein: 35
Keywords: air fryer chicken, meal prep, lemon pepper chicken, healthy dinner, grab and go meals, chicken thighs recipe, high protein, keto friendly


