I’ve always believed that the best desserts aren’t made in the kitchen. They’re made outside, where the air smells like charcoal and the sun is still warm on your neck. For years, I tried to drag my baking indoors. I’d bake sponge cakes in the oven while my husband and kids were out tending the grill, feeling like I was missing out on the whole experience. But then I had a realization: why bake at all when you can build something that tastes like summer itself?
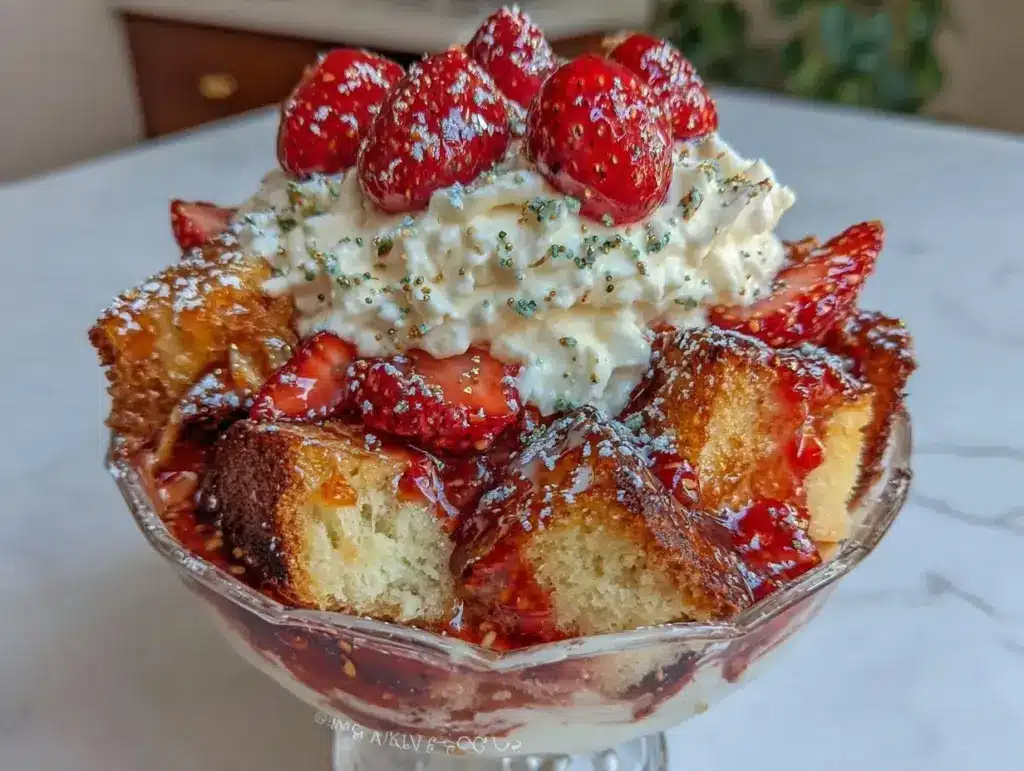
This Whipped Strawberry Shortcake Trifle with Vanilla Bean Cream is my answer to that problem. It requires zero oven time. It’s assembled in a glass bowl while the fire dies down to coals. It’s the kind of dessert that looks impressive enough to serve at a backyard wedding but easy enough to throw together after a long day of smoking brisket. The guests don’t just eat it; they stare at it. They want to know how it stays so fluffy. They want to know where I got the vanilla.
Here’s the truth: I’ve made this trifle at least twelve times this summer alone. Sometimes I use fresh berries from the farmer’s market. Sometimes I use frozen because the summer sale was too good to pass up. Sometimes I add a splash of Chambord because life is short. But the core recipe? It stays the same. It’s creamy, it’s fruity, it’s textural heaven, and it’s the perfect companion to a night spent around the fire pit. If you’re looking for a dessert that says “I planned this” without actually making you sweat over a hot stove, this is it. It’s hands-down the best outdoor dessert I’ve ever whipped up.
Why You’ll Love This Trifle
There are about ten reasons I keep making this Whipped Strawberry Shortcake Trifle with Vanilla Bean Cream, but let’s be real: it’s the convenience and the wow factor that keep me coming back. Here’s why this recipe has stolen the spotlight from my traditional baked goods:
Zero Baking Required — Seriously. I’m not exaggerating. You don’t need to preheat an oven. You don’t need to wait for cooling racks. If you can buy a pound cake or bake a quick sponge in a microwave mug (don’t judge me, it works), you can make this. I often use store-bought pound cake for speed, but if you have time, a quick bake on the grill grate adds a smoky depth that is incredible. Either way, no oven heat.
Make-Ahead Friendly — This is the holy grail of outdoor entertaining. I can assemble this trifle the night before. Actually, it’s *better* the next day because the cake soaks up the vanilla cream and the strawberries release their juices. I can spend my evening grilling burgers or tending the smoker, knowing the dessert is chilling in the cooler or fridge, ready to go. No last-minute panic.
Visual Drama — Glass bowls are your friend here. Layering bright red strawberries, white cream, and golden cake creates a striped effect that looks like a work of art. When I pull this out of the cooler, people stop talking. They lean in. It’s a conversation starter. It looks like something from a high-end patisserie, but it’s just cream, fruit, and cake.
Vanilla Bean Magic — Most whipped cream recipes use extract. This one uses real vanilla bean paste or scraped pods. The difference is night and day. You get those tiny black specks that look elegant and taste rich. It elevates the entire dish from “summer snack” to “special occasion dessert.” My friends think I’m a wizard. I’m just using good ingredients.
Perfect Portion Control — Trifles are great because they’re easy to serve. No cutting uneven slices like you do with a cake. You just scoop. Everyone gets a bit of everything in every bite. It’s consistent. It’s reliable. It’s foolproof.
This is my go-to when I need to impress without stress. It’s sweet, it’s refreshing, and it fits perfectly into the outdoor cooking lifestyle. No smoke, no fuss, just pure summer flavor.
Ingredients You’ll Need
I’m particular about three things here: the cream, the vanilla, and the fruit. Get those right, and you don’t need much else. Here’s what I keep stocked for this Whipped Strawberry Shortcake Trifle with Vanilla Bean Cream.
Heavy Whipping Cream (2 cups / 480ml) — You need cold heavy cream. Not light cream. Not half-and-half. The higher the fat content, the stiffer the whip. I keep two containers in the fridge specifically for this. If your cream is warm, it won’t whip. I even chill my mixing bowl and beaters for 15 minutes before starting. It’s worth the extra step.
Vanilla Bean Paste (2 tablespoons) — Or 1 large vanilla pod, scraped. I prefer paste because it’s convenient and has the seeds already in it. Look for a brand with real vanilla beans listed as the first ingredient. If you can’t find paste, scrape a pod and use the seeds and the pod (remove the pod later). The specks are beautiful and add a sophisticated look.
Granulated Sugar (½ cup / 100g) — This sweetens the cream. Don’t skimp. The cream needs enough sugar to hold its structure and balance the tartness of the berries. I use white sugar for a clean flavor. Powdered sugar works too but adds a slight cornstarch texture. I stick with granulated for the fluffiest whip.
Strawberries (2 pints / 900g) — Fresh, ripe strawberries are non-negotiable. Look for deep red berries that smell sweet. If they’re white on the tips, they’re not ready. I wash and hull them, then slice them in half or quarters depending on size. I reserve the best-looking berries for the top layer garnish. The rest go into the layers. If fresh berries are out of season, frozen works, but you must thaw and drain them well so the trifle doesn’t get watery.
Strawberry Jam or Preserves (¼ cup / 60g) — This adds a flavor punch and helps bind the fruit layers. I use a high-quality strawberry jam. If you can’t find strawberry jam, raspberry jam works too, but strawberry keeps the theme cohesive. Warm it slightly to make it easier to drizzle.
Pound Cake or Sponge Cake (1 pound / 450g) — You can buy a loaf from the bakery or bake your own. Pound cake is denser and holds up better to the cream. Sponge cake is lighter and absorbs more liquid. I like pound cake for outdoor events because it’s less likely to get soggy if it sits out for a while. Slice it into ½-inch cubes. Uniform cubes look neater.
Lemon Juice (1 teaspoon) — Just a splash. It brightens the strawberries and prevents them from browning. It’s a small detail that makes a big difference in flavor balance.
Optional: Chambord or Strawberries à la Mode Syrup (2 tablespoons) — For an adult twist. I add this to the cream layer sometimes. It adds a boozy depth that pairs beautifully with the vanilla. Use sparingly—you want to taste the strawberries, not the alcohol.
Pro Tip: I always buy extra vanilla bean paste. It keeps for months in the pantry, and I use it in my creamy strawberry cheesecake milkshake too. It’s a versatile ingredient that upgrades any dessert.
Equipment Needed
You don’t need fancy gadgets for this. Here’s what I actually use when I’m prepping for a backyard cookout:
Large Glass Trifle Bowl — 3-4 quart capacity. I have a vintage-style one with handles. It looks great on the picnic table. If you don’t have a trifle bowl, a large glass mixing bowl or even a deep serving dish works. The key is transparency so you can see the layers.
Mixing Bowl — Large, chilled. Metal or glass. Plastic works too but retains heat. I keep mine in the fridge.
Electric Hand Mixer or Stand Mixer — Whip the cream until stiff peaks form. A hand mixer is fine, but a stand mixer is easier if you’re making other things. I use my hand mixer because I can control the speed better.
Serrated Knife — For slicing the cake. A serrated knife cuts through pound cake without crushing it. This is crucial for clean layers.
Measuring Cups and Spoons — Standard stuff. I use metal measuring spoons for accuracy.
Spatula — Rubber spatula for folding the cream and scraping the bowl. Don’t skip folding; you want to keep the air in the cream.
Small Saucepan — Optional, for warming the jam if it’s thick. Or just microwave it for 15 seconds.
Strawberry Huller — Not essential, but it speeds up prep. I use a small paring knife if I’m being lazy. Just cut a V-shape around the stem.
Cooler or Fridge Space — You’ll need room for the assembled trifle. If you’re assembling outdoors, keep it in a cooler with ice packs until serving time. The cream will hold up better if it stays cold.
How to Make It: Step-by-Step
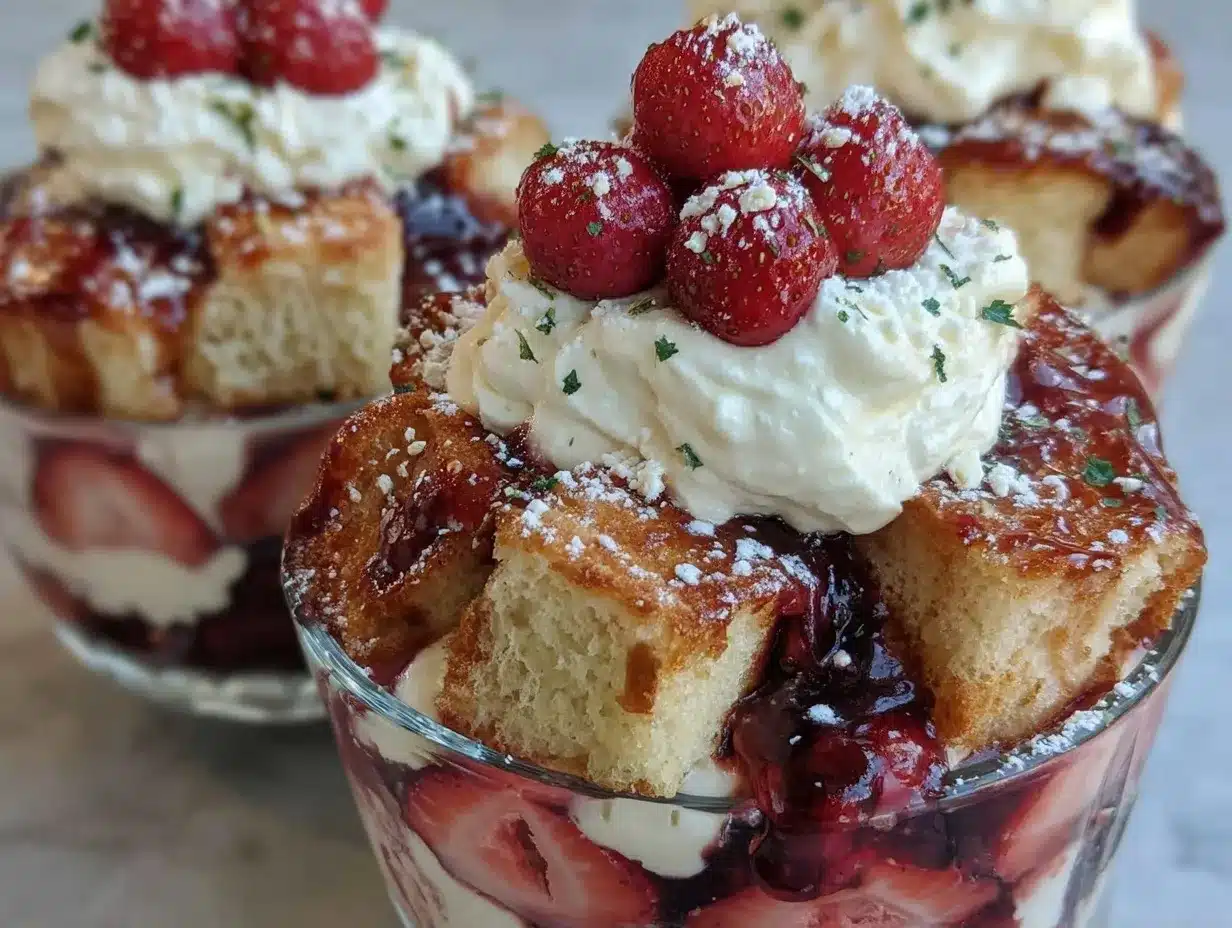
Alright, let’s build this Whipped Strawberry Shortcake Trifle with Vanilla Bean Cream. It’s intuitive, but there are a few tricks to keep it from getting mushy. I’m walking you through exactly how I do it.
Step 1: Prep the Strawberries (10 minutes)
Wash and hull your strawberries. Slice them in half or quarters. Toss them gently with the lemon juice and a tablespoon of sugar. Let them sit for 15 minutes. This draws out the juices and makes them juicy and flavorful. Drain any excess liquid before layering—you don’t want a watery trifle. Reserve the best-looking berries for the top.
Step 2: Prepare the Cake (5 minutes)
Slice your pound cake or sponge cake into ½-inch cubes. If you’re baking your own, let it cool completely before cutting. Warm cake will melt the cream. I like to toast the cake cubes lightly on the grill grate for 1-2 minutes per side. It adds a smoky crunch that contrasts with the soft cream. This is my secret weapon for outdoor trifles.
Step 3: Whip the Vanilla Bean Cream (5 minutes)
In your chilled bowl, combine the heavy cream, vanilla bean paste (or scraped seeds), and sugar. Whip on medium-high speed until stiff peaks form. Don’t over-whip, or it’ll turn to butter. You want it smooth, glossy, and holding its shape. If you’re adding Chambord, fold it in gently at the end. Taste it—it should be sweet but not cloying.
Step 4: Build the First Layer (2 minutes)
Spread a thin layer of whipped cream on the bottom of the trifle bowl. This acts as glue for the cake. Arrange a single layer of cake cubes over the cream. Don’t pack them too tightly; you want space for the cream to seep in.
Step 5: Add the Fruit and Jam (2 minutes)
Scatter half of the strawberries over the cake. Drizzle with half of the warmed strawberry jam. The jam adds sweetness and color. Then, add another layer of whipped cream. Use a spatula to spread it evenly, covering the fruit completely.
Step 6: Repeat the Layers (5 minutes)
Add the second layer of cake cubes. Top with the remaining strawberries. Drizzle with the rest of the jam. Finish with a thick, generous layer of whipped cream. Smooth the top with the spatula. You want it to look like a cloud.
Step 7: Garnish and Chill (1 hour minimum)
Place the reserved whole strawberries on top. You can halve them or keep them whole for a decorative look. Sprinkle with a little extra vanilla bean paste if you have it. Cover with plastic wrap and refrigerate for at least 1 hour. Ideally, 2-4 hours. This lets the flavors meld and the cake soften slightly. If you’re serving outdoors, keep it in a cooler until the last minute.
Total Time: About 30 minutes active, plus chilling time.
Expert Tips & Tricks
Here’s everything I’ve learned from making this dozens of times. These tips will save you from my mistakes.
Keep Everything Cold
The #1 rule. Cold cream whips better. Cold bowls help. If your kitchen is hot, work quickly. I’ve had cream fail to whip because the ambient temperature was too high. Keep your cream in the fridge until the last second.
Don’t Skip the Toasting
Toast the cake cubes on the grill. It adds texture and prevents sogginess. Outdoor cooking is all about texture contrast. Soft cream, juicy fruit, crunchy toast. It’s a mouthfeel explosion.
Drain the Berries
If your strawberries are super juicy, drain them well. Excess liquid makes the bottom layer soupy. I lay them on paper towels for a few minutes before layering.
Use High-Quality Vanilla
Don’t use imitation vanilla. It tastes chemical. Use real vanilla bean paste or scraped pods. The difference is noticeable and worth the cost.
Chill Long Enough
I know you want to eat it now. Wait. The cake needs time to absorb the cream. An hour is the minimum. Two hours is better. Four hours is perfect. Trust me.
Variations & Substitutions
Once you’ve nailed the basic version, here’s how you can mix it up. I’ve tried all of these.
Raspberry Swap
Replace strawberries with raspberries. Use raspberry jam. It’s tart and beautiful. Great with blackberries too.
Chocolate Twist
Add a layer of chocolate ganache or chocolate shavings. Pair with chocolate cake. It’s richer and more decadent.
Tropical Version
Use mango and passion fruit. Swap vanilla for coconut cream. It’s a completely different vibe but equally refreshing.
Gluten-Free
Use gluten-free pound cake. Everything else is naturally gluten-free. I’ve used gluten-free sponge cake and it works well.
Lower Sugar
Use unsweetened whipped cream and fresh berries without added sugar. The jam adds sweetness, so reduce or omit it. It’s less sweet but still delicious.
Serving & Storage
How to Serve:
Serve straight from the bowl. Scoop generous portions. Garnish with mint leaves if you want a pop of green. It looks festive.
Side Dishes:
Pairs well with grilled fruits like peaches or pineapples. Also great with mixed berry buttermilk sheet cake if you want to double down on berry flavors.
Storage:
Refrigerate in an airtight container for up to 2 days. The cream may soften slightly, but it’s still good. Do not freeze. The cream will separate and become grainy.
Pro Tip:
If you’re serving at a picnic, keep the trifle in a cooler with ice packs. It will stay firm and fresh for hours.
Nutrition Information
I’m not a nutritionist, but here’s the breakdown if you’re tracking. This is a rich dessert, so portion control is key.
Per Serving (based on 8 servings):
- Calories: 320
- Protein: 4g
- Carbs: 35g
- Fiber: 2g
- Sugar: 22g
- Fat: 18g
What’s Good:
Fresh fruit provides vitamins. The cream provides energy. It’s a treat, not a health food.
What to Know:
High in sugar and fat. Use sparingly if watching calories. The vanilla bean adds flavor without calories.
Final Thoughts
So that’s my Whipped Strawberry Shortcake Trifle with Vanilla Bean Cream! It’s simple, it’s stunning, and it’s the perfect end to an outdoor meal. I’ve made it for birthdays, cookouts, and lazy Sunday afternoons. It never fails to delight. Make it yours! Add different fruits, change the cake, tweak the sweetness. The best recipes are the ones you adapt to your tastes.
If you make this, drop a comment and let me know what you think! I love hearing how recipes turn out in your kitchen. And if something doesn’t work, tell me that too—I’m here to help troubleshoot.
Happy cooking! And I hope your kitchen smells half as good as mine does right now. Now, if you’ll excuse me, I need to go check on the grill.
Frequently Asked Questions
Can I use frozen strawberries?
Yes, but you must thaw and drain them thoroughly. Frozen berries release a lot of water. If you don’t drain them, the trifle will be soggy. I pat them dry with paper towels after thawing.
Why did my cream not whip?
It was probably too warm. Heavy cream needs to be cold to whip. Chill your bowl and beaters, and keep the cream in the fridge until you’re ready. Also, make sure it’s heavy whipping cream, not light cream.
Can I make this ahead?
Absolutely. It’s best made the day before. Assemble it, cover it, and refrigerate for up to 2 days. The flavors meld beautifully over time.
Can I add alcohol?
Yes! Chambord, Kirsch, or even a splash of rum work well. Add it to the cream or drizzle it over the cake layers. Just be careful not to make it too wet.
How do I store leftovers?
Store in an airtight container in the fridge for up to 2 days. The cream will soften, but it’s still tasty. Do not freeze.
Can I use a different cake?
Yes! Sponge cake, angel food cake, or even ladyfingers work. Pound cake is my favorite for its density, but any cake will do. Just make sure it’s not too dry.
What if I don’t have vanilla bean paste?
Use vanilla extract. It won’t have the specks, but the flavor will be similar. Use 1-2 teaspoons of extract instead of 2 tablespoons of paste.
Pin This Recipe!
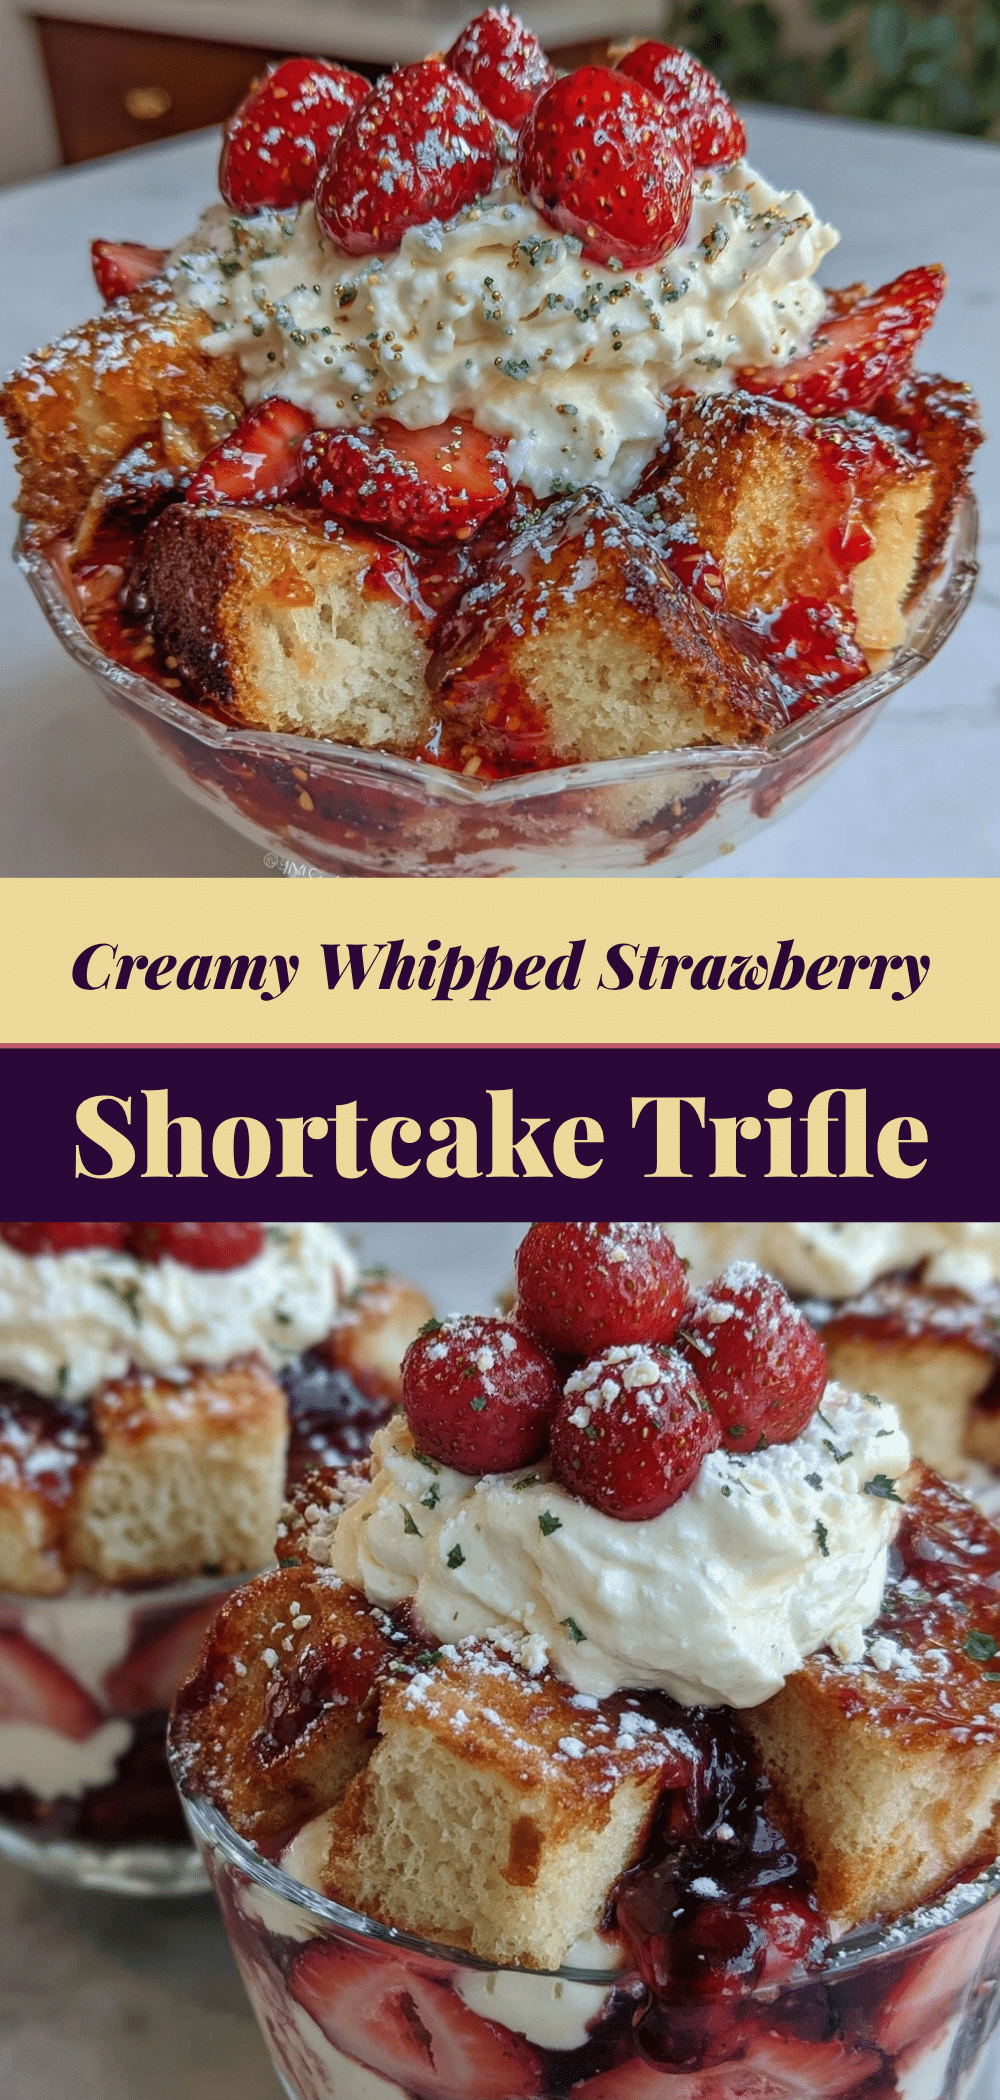
Whipped Strawberry Shortcake Trifle with Vanilla Bean Cream
- Total Time: 1 hour 30 minutes (including chilling)
- Yield: 8 servings 1x
Description
A no-bake outdoor dessert featuring layers of pound cake, fresh strawberries, and vanilla bean whipped cream. This trifle is make-ahead friendly, visually stunning, and perfect for backyard gatherings.
Ingredients
- 2 cups (480ml) heavy whipping cream, chilled
- 2 tablespoons vanilla bean paste (or 1 large vanilla pod, scraped)
- ½ cup (100g) granulated sugar
- 2 pints (900g) fresh strawberries, hulled and sliced
- ¼ cup (60g) strawberry jam or preserves
- 1 pound (450g) pound cake or sponge cake, cut into ½-inch cubes
- 1 teaspoon lemon juice
- 1 tablespoon granulated sugar (for macerating strawberries)
- Optional: 2 tablespoons Chambord or strawberry syrup
Instructions
- Wash and hull strawberries. Slice them in half or quarters and toss gently with lemon juice and 1 tablespoon of sugar. Let sit for 15 minutes to draw out juices, then drain excess liquid.
- Slice pound cake or sponge cake into ½-inch cubes. Optionally, toast the cubes lightly on a grill grate for 1-2 minutes per side for added texture.
- In a chilled mixing bowl, combine heavy cream, vanilla bean paste, and ½ cup sugar. Whip on medium-high speed until stiff peaks form. If using Chambord, fold it in gently at the end.
- Spread a thin layer of whipped cream on the bottom of a large glass trifle bowl.
- Arrange a single layer of cake cubes over the cream.
- Scatter half of the strawberries over the cake and drizzle with half of the warmed strawberry jam.
- Add another layer of whipped cream, spreading it evenly to cover the fruit.
- Repeat layers: add remaining cake cubes, remaining strawberries, remaining jam, and finish with a thick, generous layer of whipped cream.
- Garnish with reserved whole strawberries and extra vanilla bean paste if desired.
- Cover with plastic wrap and refrigerate for at least 1 hour (ideally 2-4 hours) to allow flavors to meld and cake to soften.
Notes
Keep all ingredients and equipment cold to ensure the cream whips properly. If using frozen strawberries, thaw and drain thoroughly to prevent a watery trifle. The trifle is best made ahead and refrigerated for 2-4 hours. Do not freeze as the cream will separate. For a gluten-free version, use gluten-free pound cake.
- Prep Time: 30 minutes
- Cook Time: 0 minutes
- Category: Dessert
- Cuisine: American
Nutrition
- Serving Size: 1 scoop/serving
- Calories: 320
- Sugar: 22
- Sodium: 45
- Fat: 18
- Saturated Fat: 11
- Carbohydrates: 35
- Fiber: 2
- Protein: 4
Keywords: strawberry shortcake, trifle, no-bake dessert, outdoor dessert, vanilla bean cream, summer dessert, make-ahead dessert, backyard party food


