I have a confession to make. For the longest time, I was terrified of buying shishito peppers. I’d stand in the produce aisle, staring at those wrinkled little green beauties, wondering if they were worth the risk. You know the deal. You buy a bag, you eat one, and it’s the spiciest thing you’ve ever tasted. Or worse, you eat a whole plate and they’re bland as cardboard. I was done with the gamble. I was done with disappointment.
Then, about three years ago, I made a simple mistake. I was rushing through dinner prep, tired from work, and I just tossed a whole bag of shishito peppers into a hot skillet with some olive oil. I didn’t measure anything. I didn’t check a recipe. I just cooked them until they looked shriveled and browned, then finished them with garlic and sea salt. I ate one. Then another. Then I scraped the plate clean before my husband even sat down.
That was the moment I realized something most people miss: shishito peppers aren’t just a garnish. They’re the ultimate weeknight hero. They’re fast, they’re addictive, and when you nail the blistering technique, they taste like nature’s candy. This isn’t just about cooking vegetables; it’s about finding joy in five minutes when you have zero energy left. This recipe for blistered shishito peppers with garlic sea salt has saved me more weeknight dinners than any fancy roast or slow-cooked stew ever could.
I’ve tested this method dozens of times—sometimes with butter, sometimes with oil, sometimes with lemon, sometimes without. But the core remains the same: high heat, quick cook, and plenty of garlic. It’s the simplest thing you can make, yet it elevates any meal from “meh” to “wow.” Whether you’re serving these alongside crispy garlic chicken for a family dinner or just eating them straight out of the pan while scrolling through your phone, they deliver. Let me show you how to stop gambling with your peppers and start enjoying them every single time.
Why You’ll Love This Garlic Shishito Recipe
There are a dozen reasons I keep buying shishito peppers week after week, but let’s be real. You don’t need a list of ten reasons to love something. You need to know why it fits your life right now. Here’s why this recipe for blistered shishito peppers with garlic sea salt belongs in your weekly rotation.
It’s Actually Fast — I’m not talking about “prep-heavy” fast. I’m talking five minutes total. Five. You throw them in the pan, they blister, you add garlic, you salt them, you eat them. That’s it. I make this on nights when I’m exhausted, when the kids are screaming, when I just want to sit down. It doesn’t get easier than this.
They’re Naturally Gluten-Free and Vegan — This is huge for our household. My sister is gluten-sensitive, and my neighbor is vegan. This appetizer works for everyone at the table without me having to make two separate dishes. It’s inclusive without being complicated. Plus, the base ingredients are just peppers, oil, garlic, and salt. Simple, clean, and safe.
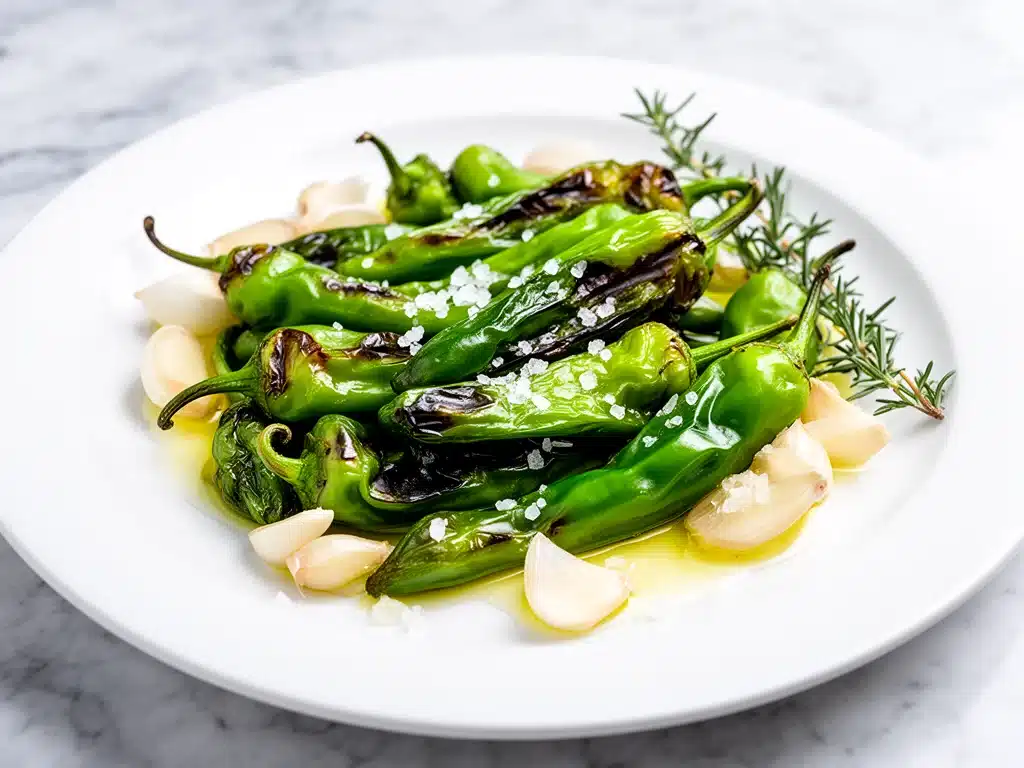
The Texture is Irresistible — There is a specific sound shishito peppers make when they hit a hot pan. It’s a sizzle, followed by a soft pop as the skins blister. The result? A pepper that’s tender inside with a slightly charred, chewy exterior. It’s a texture contrast that makes you keep eating. One pepper turns into a whole plate before you realize it.
They Cost Pennies Compared to Takeout — Think about it. A small appetizer of these at a trendy bar or gastropub costs $12 to $15. A bag of fresh shishito peppers costs about $3 to $4 at the grocery store. You’re saving money while eating something fresher and healthier than the fried version they serve out there. Smart cooking is just smart shopping.
Zero Cleanup Stress — Because the cooking time is so short, there’s no time to wash pots or prep complex sides. You use one skillet. Maybe a small bowl for the garlic if you’re being fancy. One pan to wash. That’s the win. When dinner is done, you’re done. No lingering in the kitchen for an hour.
This recipe is my answer to “what’s for a snack?” or “what’s for dinner?” when I’m low on energy. It’s reliable, it’s delicious, and it makes me feel like a good cook without actually trying hard. That’s the sweet spot.
Ingredients You’ll Need
Here’s the best part about this recipe: the ingredient list is so short you can probably read it while the water boils for pasta. You don’t need a specialty store. You don’t need exotic spices. You just need a few good basics. Here’s what goes into making the perfect blistered shishito peppers with garlic sea salt.
Shishito Peppers (1 pound / 450g) — This is your star. Look for bags that are bright green, firm, and not slimy. If they look shriveled or soft, skip them. You want them crisp. One pound is the perfect amount for two adults as a side or four as an appetizer. Pro tip: If you can’t find shishito peppers, you can substitute with Padrón peppers, though they tend to be spicier.
Olive Oil (2 tablespoons / 30ml) — Use a decent quality extra virgin olive oil. You don’t need the expensive stuff you’d drink on bread, but don’t use the cheapest stuff either. You want that fruity, grassy flavor to complement the peppers. If you prefer butter, you can use half oil and half butter for a richer taste, but oil gives you a better blister.
Garlic (3-4 cloves, minced / about 1 tablespoon) — Fresh garlic is non-negotiable here. Jarred garlic has a metallic aftertaste that clashes with the sweet peppers. Minced it finely so it cooks quickly and distributes evenly. If you’re garlic-averse, use two cloves, but trust me—three is the sweet spot.
Sea Salt (1 teaspoon / to taste) — I use flaky sea salt or kosher salt. Table salt is too fine and can make the dish overly salty. Flaky salt adds a nice crunch and visual appeal. If you don’t have sea salt, kosher salt works great. Avoid iodized table salt if you can.
Optional: Lemon (1 lemon, cut into wedges) — I almost always serve this with lemon. The acid cuts through the richness of the oil and brightens the flavor. It’s not strictly necessary, but it elevates the dish from “good” to “restaurant-quality.” Squeeze a little over the top right before eating.
Optional: Red Pepper Flakes (½ teaspoon) — Since most shishito peppers are mild, some people like a little kick. If you want heat, add red pepper flakes when you add the garlic. If you prefer mild, skip it. I usually skip it because I like the natural sweetness of the peppers to shine.
Optional: Parmesan Cheese (2 tablespoons, grated) — This is my personal twist. Sprinkling a little parmesan over the hot peppers adds a savory, umami punch. It’s not traditional, but it’s delicious. Try it once and see if you like it. If you’re vegan, skip this or use nutritional yeast.
You really don’t need much else. The beauty of this blistered shishito peppers with garlic sea salt recipe is in its simplicity. Don’t overcomplicate it. Let the peppers speak for themselves.
Equipment Needed
You don’t need a fancy kitchen to make this. In fact, fancy equipment might get in the way. Here’s what I actually use when I’m whipping up this quick side dish.
Large Skillet or Sauté Pan — I use a 12-inch stainless steel skillet. Stainless steel is great because it gets hot and stays hot, which helps with blistering. Cast iron works too, but it takes longer to heat up. Non-stick works if that’s all you have, but you won’t get the same nice char. Just make sure your pan is big enough to hold the peppers in a single layer. If you overcrowd the pan, they steam instead of blister.
Colander — You’ll need to rinse the peppers before cooking. A colander is perfect for this. Just give them a quick rinse under cold water and shake off the excess. You don’t need to dry them perfectly, but get the bulk of the water off so they don’t splatter in the hot oil.
Cutting Board and Knife — You’ll need to trim the stems off the peppers. It’s a quick job. A sharp knife makes it easier, but a dull one works if you’re careful. If you’re lazy, you can leave the stems on, but most people find them tough to chew.
Spatula or Tongs — I prefer tongs for tossing the peppers. They give you better control and keep your fingers away from the heat. A silicone spatula works too, but tongs are nicer for flipping.
Small Bowl — If you’re mincing the garlic, keep it in a small bowl nearby so you can dump it in quickly. Timing is everything with garlic—it burns fast.
Plate or Serving Dish — Transfer the hot peppers to a plate immediately after cooking. They’ll continue to cook slightly from residual heat, so don’t leave them in the hot pan.
That’s really all you need. No fancy gadgets, no special tools. Just basic kitchen staples. If you have these, you’re ready to go.
How to Make Blistered Shishito Peppers: Step-by-Step

Alright, let’s get cooking. This is where the magic happens. I’m walking you through exactly how I do it, including the little tricks I’ve picked up over the years. It’s simple, but there are a few key moments to watch for.
Step 1: Prep the Peppers (2 minutes)
Start by rinsing the shishito peppers under cold water. Give them a good shake in a colander to remove excess water. Then, place them on a cutting board. Trim off the stem ends. You don’t need to remove every bit of stem, just the hard part. If you leave a little bit of stem, it’s fine—it’s easier to pick off when you’re eating. Toss the prepped peppers into a bowl and set aside.
Step 2: Heat the Pan (1 minute)
Place your large skillet over medium-high heat. Let it get hot for about a minute. You want the pan to be properly heated before you add oil. This ensures a good sear. Once the pan is hot, add the olive oil. Swirl it around to coat the bottom evenly. The oil should shimmer but not smoke. If it’s smoking, it’s too hot—turn it down slightly.
Step 3: Blister the Peppers (3-4 minutes)
Add the peppers to the hot oil. They should sizzle immediately. Spread them out in a single layer if possible. If your pan is small, do this in two batches. Don’t crowd the pan! This is the most important step. Let the peppers cook undisturbed for about 2-3 minutes. You’re looking for blisters—little brown spots on the skin. Use your tongs to flip them over. They should be tender and charred in spots. Cook for another 1-2 minutes on the other side.
Step 4: Add the Garlic (30 seconds)
This is the moment of truth. Add the minced garlic to the pan. Stir quickly to coat the peppers in the garlic and oil. Cook for just 30 seconds to 1 minute. Watch closely! Garlic burns fast. You want it fragrant and golden, not brown or black. If it starts to smell burnt, remove the pan from the heat immediately.
Step 5: Season and Serve (1 minute)
Remove the pan from the heat. Immediately sprinkle with sea salt. If you’re using red pepper flakes or parmesan, add them now. Toss everything together one last time. Transfer to a serving plate. If you’re using lemon, serve the wedges on the side. Squeeze over the top right before eating. Enjoy immediately while they’re hot and crispy.
Total Time: About 5-7 minutes (depending on how fast you prep).
Expert Tips & Tricks for Perfect Blistering
Here’s everything I’ve learned from making this dozens of times. These tips will save you from my mistakes and ensure your peppers come out perfect every time.
Don’t Crowd the Pan
I know it’s tempting to fit all the peppers in at once, but if they’re piled on top of each other, they’ll steam instead of blister. Steam makes them soggy. You want dry heat. If your pan is small, cook in batches. It takes an extra minute, but the texture difference is huge.
High Heat is Key
Keep the heat at medium-high. If it’s too low, the peppers will just get soft and oily. If it’s too high, the garlic will burn before the peppers are cooked. Find that sweet spot where they sizzle vigorously but don’t smoke. Adjust as needed.
Garlic Timing
Never add garlic at the beginning. It will burn in the high heat. Always add it in the last 30-60 seconds of cooking. This gives you that fragrant garlic flavor without the bitterness. If you’re worried about burning it, take the pan off the heat for a few seconds when you add the garlic, then put it back on.
Choose Good Peppers
This sounds obvious, but it’s crucial. Look for bright green, firm peppers. Avoid any that are dark, slimy, or wrinkled. Wrinkled peppers are old and will be tough. Fresh peppers blister beautifully. If you’re buying them for the first time, ask the produce clerk for recommendations—they usually know which bags are fresh.
Use Tongs
Tongs give you the best control for flipping and tossing. A spatula can work, but it’s harder to get under individual peppers. Tongs make the process faster and more efficient.
Variations & Substitutions
Once you’ve nailed the basic version, here’s how you can mix it up. I’ve tried all of these, and they’re all delicious in their own way.
Lemon-Herb Version
Add the zest of one lemon and a tablespoon of chopped fresh parsley or basil right after you remove the pan from the heat. The fresh herbs and lemon zest add a bright, summery flavor. This is my favorite variation for spring dinners.
Sriracha Lime Version
Swap the sea salt for a drizzle of sriracha and a squeeze of lime juice. This adds heat and tang. It’s great if you like spicy food. The sweetness of the peppers balances the heat perfectly.
Soy Ginger Version
Add a tablespoon of soy sauce and a teaspoon of grated ginger when you add the garlic. This gives it an Asian-inspired flavor profile. It’s amazing served with fried rice or as a side for grilled meats.
Bacon Bits
Cook a few strips of bacon until crispy, crumble them, and sprinkle over the hot peppers. The salty, smoky bacon pairs beautifully with the sweet peppers. This is a crowd-pleaser at parties.
Dietary Modifications
This recipe is naturally gluten-free and vegan (if you skip the parmesan). If you’re dairy-free, just omit the cheese. If you’re low-carb, these peppers are perfect since they’re low in carbs and high in fiber.
Serving & Storage
How to Serve:
I usually serve these straight from the skillet at the dinner table—it looks rustic and stays warm. They make a great appetizer, a side dish for grilled meats, or a snack with a cold drink. Pair them with easy chicken tacos for a complete meal, or serve them alongside steak for a fancy touch.
Toppings Bar:
When I have guests, I put out a toppings bar: extra sea salt, red pepper flakes, lemon wedges, and grated parmesan. Everyone customizes their bowl. It’s fun and interactive.
Storage:
Store leftovers in an airtight container in the refrigerator for up to 3 days. The peppers will soften as they cool, which is normal. They’re best eaten fresh, but leftovers are still tasty.
Reheating:
Reheat in a skillet over medium heat for a minute or two to crisp them up again. The microwave will make them soggy, so avoid it if you can. If you must use the microwave, do it in short bursts and let them sit out for a minute to dry off.
Freezing:
I don’t recommend freezing these. The texture changes too much when thawed. They become mushy and lose their blister. Make them fresh whenever you want them.
Nutrition Information
I’m not a nutritionist, but here’s the breakdown if you’re tracking. This is per serving (based on 4 servings).
| Nutrient | Amount |
|---|---|
| Calories | 85 |
| Protein | 2g |
| Carbs | 6g |
| Fiber | 2g |
| Sugar | 3g |
| Fat | 6g |
| Sodium | 320mg |
What’s Good:
- Low in calories and carbs
- Good source of fiber and Vitamin C
- Healthy fats from olive oil
What to Know:
- Sodium can vary based on salt used
- Calories increase if you add butter or cheese
Look, this is a vegetable dish. It’s healthy, but it’s also delicious. Don’t overthink the macros. Enjoy it.
Final Thoughts
So that’s my go-to blistered shishito peppers! I’ve probably talked your ear off at this point, but when you make a recipe this often, you have a lot to say about it. This simple dish has saved me more weeknight dinners than I can count. It’s my answer to “what’s for dinner?” when I’m tired, don’t want takeout, and still want something that tastes really good. My kids are happy, my husband’s happy, and I’m happy because I’m not stressed about cooking.
Make it yours! Try different add-ins, swap in your favorite herbs, adjust the garlic. The best recipes are the ones you adapt to your family’s tastes. If you make this, drop a comment and let me know what you think! I love hearing how recipes turn out in your kitchen. And if something doesn’t work, tell me that too—I’m here to help troubleshoot.
Happy cooking! And I hope your kitchen smells half as good as mine does right now.
Frequently Asked Questions
Why are some of my shishito peppers spicy?
It’s a roll of the dice. About 1 in 10 shishito peppers contains capsaicin, the compound that makes peppers hot. It’s random. If you get a spicy one, don’t worry—it’s not a bad pepper. Just enjoy the heat! If you’re sensitive to spice, you can seed them, but that’s extra work. Most people don’t mind the occasional kick.
Can I use frozen shishito peppers?
I don’t recommend it. Fresh peppers blister beautifully. Frozen peppers release too much water and become soggy. You’ll lose that nice char and texture. Always use fresh if you can.
How do I know when they’re done?
They’re done when they’re tender, blistered, and slightly charred. They should collapse a bit when you press them with tongs. If they’re still firm, cook them a minute longer. If they’re blackened, they’re overdone.
Can I make this ahead of time?
Not really. These are best served hot and fresh. You can prep the peppers ahead of time (trim stems and rinse), but cook them right before serving. The texture changes quickly as they cool.
What can I serve with blistered shishito peppers?
They go with almost anything. Grilled steak, roasted chicken, fried rice, tacos, or just with a cold beer. They’re versatile and pair well with rich, savory dishes.
Can I substitute shishito peppers with something else?
Padrón peppers are the closest substitute. They’re similar in size and flavor, though often spicier. You can also use mini bell peppers, but they won’t blister the same way. Shishitos are unique for their texture.
Pin This Recipe!


Blistered Shishito Peppers: 5-Min Easy Garlic Recipe
- Total Time: 5 minutes
- Yield: 4 servings 1x
Description
A quick and easy weeknight side dish featuring blistered shishito peppers cooked in olive oil with garlic and sea salt. Naturally gluten-free and vegan, this recipe takes only 5 minutes to prepare.
Ingredients
- 1 pound (450g) shishito peppers
- 2 tablespoons (30ml) extra virgin olive oil
- 3–4 cloves garlic, minced
- 1 teaspoon sea salt (or to taste)
- 1 lemon, cut into wedges (optional)
- 1/2 teaspoon red pepper flakes (optional)
- 2 tablespoons grated parmesan cheese (optional)
Instructions
- Rinse the shishito peppers under cold water and shake off excess water in a colander. Trim off the stem ends and place in a bowl.
- Heat a large skillet over medium-high heat for about 1 minute. Add olive oil and swirl to coat the bottom; the oil should shimmer but not smoke.
- Add the peppers to the hot oil in a single layer (cook in batches if necessary to avoid crowding). Cook undisturbed for 2-3 minutes until blisters form.
- Flip the peppers and cook for another 1-2 minutes until tender and charred in spots.
- Add the minced garlic to the pan and stir quickly for 30 seconds to 1 minute until fragrant and golden. Do not let the garlic burn.
- Remove the pan from heat and immediately sprinkle with sea salt. Add optional toppings like red pepper flakes or parmesan and toss to combine.
- Transfer to a serving plate and serve immediately with lemon wedges on the side.
Notes
Do not crowd the pan, as this causes steaming instead of blistering. Add garlic only in the last 30-60 seconds to prevent burning. For best texture, serve immediately while hot. Leftovers can be stored in the refrigerator for up to 3 days but are best eaten fresh.
- Prep Time: 2 minutes
- Cook Time: 3-4 minutes
- Category: Side Dish
- Cuisine: American
Nutrition
- Serving Size: Approximately 1/4 of
- Calories: 85
- Sugar: 3
- Sodium: 320
- Fat: 6
- Saturated Fat: 1
- Carbohydrates: 6
- Fiber: 2
- Protein: 2
Keywords: shishito peppers, blistered peppers, garlic peppers, quick side dish, vegan appetizer, gluten-free recipe, weeknight dinner, easy vegetables


