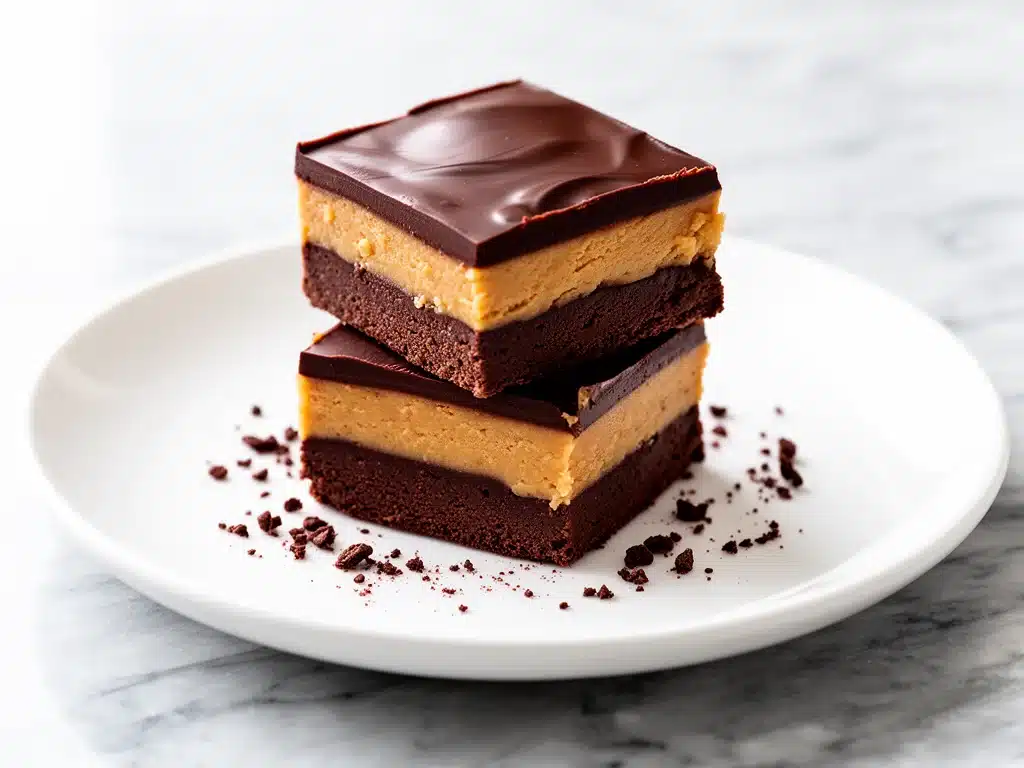
It was 11:30 PM on a Tuesday, and I was staring into the refrigerator light with the desperation of someone who had just realized dinner was handled but dessert was not. My kids were already in bed, which meant I had exactly five minutes to make something that would satisfy my own sweet tooth without waking them up or requiring me to heat up the kitchen. I didn’t want to bake. I definitely didn’t want to wash a mountain of dishes. I wanted chocolate. And I wanted peanut butter. Specifically, I wanted those little Ohio-born candies called Buckeyes, but I wanted them in a form that didn’t involve rolling fifty tiny balls by hand.
So I did what any stressed-out home cook does: I threw things into a bowl until they looked right. I mixed crushed cookies with peanut butter, pressed them into a pan, poured melted chocolate over the top, and hoped for the best. What came out of the fridge an hour later wasn’t just “good for a last-minute hack.” It was, hands-down, the best chocolate peanut butter dessert I have ever made. It’s rich, it’s creamy, it’s perfectly sweet, and it’s stupidly easy. I’ve made these Chocolate Peanut Butter Buckeye Bars at least twenty times since that random Tuesday night, and they have officially replaced anything store-bought in our house. If you’re looking for a no-bake dessert that feels indulgent but actually comes together in fifteen minutes, this is the one.
Why You’ll Love This Recipe
There are about a dozen reasons I keep coming back to this recipe, but let’s be real—you probably don’t need a lecture on why chocolate and peanut butter are a good idea. You know they are. What you need to know is why this version works so much better than the others. Here’s the breakdown of why these bars have earned a permanent spot in my rotation.
Zero Baking Required — Seriously. No oven, no preheating, no waiting for cooling racks. If you can melt chocolate and mix ingredients in a bowl, you can make this. I’ve made these while helping my middle schooler with math homework because it’s that low-stress.
Texture Perfection — Most no-bake bars end up either too hard (like eating a block of wax) or too soft (like a mess). I’ve tweaked the ratio of butter to peanut butter to get that perfect firm-but-yield bite. It holds its shape when you cut it, but it melts on your tongue.
Pantry Staples — You probably have almost everything you need right now. I’m talking graham crackers, peanut butter, butter, and chocolate chips. No weird specialty ingredients you have to drive to three different stores to find. It’s budget-friendly and convenient.
Make-Ahead Friendly — This is the ultimate party saver. I make these on Sunday, store them in the fridge, and they are ready for any weekday snack, after-school treat, or last-minute dinner party guest. They actually taste better after they’ve chilled for a day or two, as the flavors meld together.
Kid-Approved (and Adult-Approved) — My kids think these are “fancy cookies,” and I don’t correct them. But the real test is my husband. He’s a purist when it comes to dessert, and he asked for the recipe after eating just one square. That’s the stamp of approval I look for.
This recipe has saved me more times than I can count. It’s my go-to when I need something sweet, something easy, and something that makes me look like I put in way more effort than I actually did.
Ingredients You’ll Need
Here’s the best part: you probably have most of this already in your pantry. This recipe relies on high-quality basics because there are so few ingredients that every single one needs to shine. I’m not particular about fancy brands, but I am particular about quality. Here’s what you need and why it matters.
For the Peanut Butter Base
Graham Crackers (10-12 full sheets / about 150g) — I use standard honey graham crackers. You want them to be fully crushed into fine crumbs. If you leave them chunky, the base won’t hold together well. I usually put them in a food processor, but a ziplock bag and a rolling pin works if you’re doing it the old-school way.
Unsalted Butter (½ cup / 113g, melted) — This acts as the glue for your crust. Use good quality butter. If you only have salted butter, reduce the added salt in the recipe (if you add any) or just accept a slightly saltier bar. It adds richness and helps the base set firmly.
Creamy Peanut Butter (1 cup / 250g) — This is the star. I use standard brands like Jif or Skippy because they have the perfect consistency for binding. Natural peanut butter separates and has an oily texture, which can make these bars greasy and hard to cut. If you must use natural, make sure it’s well-mixed and室温 (room temperature), but I stick to the standard stuff for reliability.
Powdered Sugar (1 cup / 120g) — This sweetens the base and adds structure. Don’t skip it, and don’t use granulated sugar. Granulated won’t dissolve into the peanut butter mixture and will leave a gritty texture. Powdered sugar melts into the fats, creating a smooth, fudge-like consistency.
For the Chocolate Topping
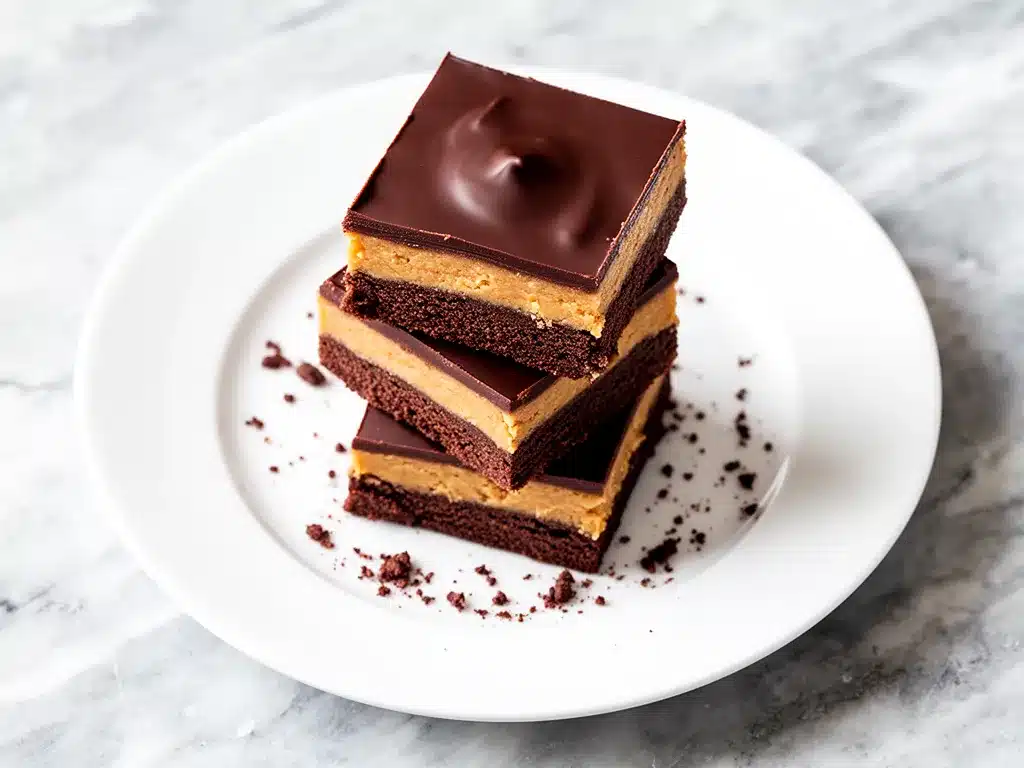
Semi-Sweet Chocolate Chips (2 cups / 340g) — I prefer semi-sweet because it balances the sweetness of the peanut butter layer. Milk chocolate is too sweet for my taste, and dark chocolate might be too bitter against the creamy base. Ghirardelli or Godiva work great, but you don’t need to spend a fortune. Just avoid the cheapest baking chips if you can help it—they often have a waxy mouthfeel.
Heavy Cream (2-3 tablespoons) — This is the secret weapon. Adding a tablespoon or two of heavy cream to the melted chocolate makes it glossy, smooth, and easier to spread. It also prevents the chocolate from cracking when you cut the bars. It turns a simple topping into a ganache-like finish.
Sea Salt Flakes (optional, for sprinkling) — A tiny pinch of flaky sea salt on top right after you pour the chocolate elevates the entire flavor profile. It cuts through the sweetness and makes the chocolate taste more intense. I do this every time now. It’s a game-changer.
Quick Substitution Note: Can’t find graham crackers? Digestive biscuits or even vanilla wafers work in a pinch. The flavor will be slightly different, but the texture will still be solid.
Equipment Needed
You don’t need fancy equipment for this. Here’s what I actually use, along with some honest opinions on why.
9×9 Inch Baking Pan — This is the ideal size for these bars. It gives you the right thickness—thick enough to be substantial, but thin enough to cut easily. If you use a larger pan, they’ll be too thin and fragile. If you use a smaller pan, they’ll be too thick and hard to cut cleanly.
Parchment Paper — I always line the pan with parchment, leaving an overhang on the sides. This is non-negotiable. It allows you to lift the entire block of bars out of the pan once they’re set, making cutting and serving a breeze. Without it, you’re stuck trying to pry them out with a knife, and you’ll lose half the chocolate layer.
Food Processor or Ziplock Bag — For crushing the crackers. A food processor is faster and gives you uniform crumbs, which helps the crust bind better. But if you don’t have one, a heavy rolling pin and a sturdy ziplock bag work perfectly. It’s good exercise, too.
Microwave-Safe Bowl — For melting the chocolate and butter. Glass or ceramic works best. Avoid plastic bowls if you can, as they can retain heat unevenly or melt slightly.
Spatula — A silicone spatula is essential for scraping the bowl clean and spreading the chocolate evenly. Get a flexible one that reaches the corners.
Knife — A sharp chef’s knife for cutting the bars. A dull knife will crush the bars and smear the chocolate. I keep a separate knife just for desserts so it’s always sharp.
Measuring Cups and Spoons — Standard stuff. Accuracy matters here, especially with the powdered sugar and chocolate, to get the texture right.
How to Make It: Step-by-Step
Alright, let’s make these bars! I’m walking you through exactly how I do it, including the little tricks I’ve picked up to ensure they turn out perfect every time.
Step 1: Prep Your Pan (2 minutes)
Line your 9×9 inch baking pan with parchment paper. I like to lay it out like a cross, so you have overhang on all four sides. This makes lifting the bars out later much easier. Set it aside.
Step 2: Crush the Crackers (3 minutes)
Place your graham crackers in a food processor and pulse until they are fine crumbs. If you’re using the bag method, put them in a ziplock bag, squeeze out the air, and roll over them with a rolling pin until they’re sandy. You want fine crumbs, not chunks. Transfer the crumbs to a medium mixing bowl.
Step 3: Make the Peanut Butter Base (5 minutes)
Add the melted butter, creamy peanut butter, and powdered sugar to the bowl with the crumbs. Mix everything together with a spatula or your hands until it resembles wet sand. It should hold together when you pinch it. If it’s too dry, add a teaspoon more peanut butter. If it’s too wet, add a sprinkle more crumbs. Press this mixture firmly and evenly into the bottom of your prepared pan. Use the bottom of a measuring cup to pack it down tight. This step is crucial for structure.
Step 4: Melt the Chocolate (2 minutes)
In a microwave-safe bowl, combine the chocolate chips and heavy cream. Microwave in 30-second intervals, stirring well between each interval. Stop when there are just a few unmelted chips left, then stir vigorously. The residual heat will melt the rest. Do not overheat the chocolate, or it will seize up and become grainy. If it looks too thick, add another teaspoon of cream.
Step 5: Top and Chill (30+ minutes)
Pour the melted chocolate over the peanut butter layer. Use a spatula to spread it evenly to the edges. Don’t worry if it’s not perfectly smooth—little ridges add character. Sprinkle with flaky sea salt if using. Place the pan in the refrigerator for at least 30 minutes, or until the chocolate is completely set and firm.
Step 6: Cut and Serve
Lift the bars out of the pan using the parchment overhang. Place on a cutting board. Use a sharp knife to cut into squares. For clean cuts, wipe the knife between each slice. Serve immediately or store in an airtight container in the fridge.
Troubleshooting Tips:
- Base won’t stick? You didn’t pack it down hard enough. Press firmly!
- Chocolate is too thick to spread? Add more cream, a teaspoon at a time.
- Bars are too soft? They need more time in the fridge. Chocolate needs to fully harden to cut cleanly.
Expert Tips & Tricks
Here’s everything I’ve learned from making these dozens of times. These tips will save you from my mistakes.
Cool the Pan First — If you pour warm chocolate onto a warm crust, it might sink in. Let the peanut butter layer cool in the fridge for 10 minutes before adding the chocolate. This keeps the layers distinct.
Don’t Skimp on the Cream — I know it says “optional,” but the heavy cream makes a huge difference in texture. It makes the chocolate glossy and less likely to crack. It’s worth the extra tablespoon.
Use a Sharp Knife — This cannot be overstated. A dull knife will ruin your beautiful bars. If you don’t have a sharp knife, use a pizza cutter for cleaner cuts. Or chill the knife in the freezer for a minute before cutting.
Room Temperature Peanut Butter — If your peanut butter is cold from the fridge, it will be harder to mix with the powdered sugar. Let it sit out for 15 minutes before starting.
Storage is Key — These bars must be stored in the fridge. They will soften at room temperature within a few hours. Keep them chilled until you’re ready to eat them.
Variations & Substitutions
Once you’ve nailed the basic version, here’s how you can mix it up. I’ve tried all of these, and they all work.
Salted Caramel Buckeyes — Drizzle salted caramel sauce over the peanut butter layer before adding the chocolate. It adds a boozy, sweet depth that’s incredible.
Chocolate Chip Crunch — Stir mini chocolate chips into the peanut butter layer before pressing it into the pan. Adds texture and extra chocolate bursts.
Cookie Butter Version — Swap half the peanut butter for Biscoff spread. It’s spicier and has a unique flavor that pairs beautifully with chocolate.
Gluten-Free — Use gluten-free graham crackers or even crushed gluten-free cookies. The rest of the ingredients are naturally gluten-free, so this is an easy swap.
Lower Sugar — Reduce the powdered sugar to ½ cup and use sugar-free chocolate chips. It’s not as sweet, but still delicious. I make this version when I’m watching my sugar intake.
Vegan — Use vegan butter, vegan peanut butter (some brands have honey, so check labels), powdered sugar (some brands use bone char, so look for organic), and vegan chocolate chips. It works surprisingly well.
Serving & Storage
How to Serve: I usually serve these straight from the fridge, cut into 1-inch squares. They’re perfect for after-school snacks, lunchbox additions, or dessert after a light dinner. They pair well with cold milk or a cup of coffee.
Side Dishes: Since these are rich and sweet, they pair well with light, fresh sides if you’re serving them as part of a larger meal. A simple green salad or some fresh fruit balances the richness.
Refrigerator: Store in an airtight container in the fridge for up to 1 week. Layer them between sheets of parchment paper to prevent sticking. They actually taste better after day 2, as the flavors meld.
Freezing: Yes, you can freeze these! Wrap individual bars in plastic wrap, then place in a freezer bag. They’ll keep for up to 3 months. Thaw in the fridge overnight before eating. The texture remains good after freezing.
Pro Tip: If you’re bringing these to a party, take them out of the fridge 15 minutes before serving. This allows the chocolate to soften slightly, making it more enjoyable to eat.
Nutrition Information
I’m not a nutritionist, but here’s the breakdown if you’re tracking. Keep in mind that these are rich bars, so portion control is key.
Per Serving (based on 16 bars):
- Calories: 180
- Protein: 4g
- Carbs: 22g
- Fiber: 1g
- Sugar: 16g
- Fat: 10g
- Saturated Fat: 5g
- Cholesterol: 10mg
- Sodium: 90mg
What’s Good: It has some protein from the peanut butter and is relatively low in carbs compared to other desserts. It’s also made with simple ingredients.
What to Know: It’s high in sugar and saturated fat due to the chocolate and peanut butter. It’s a treat, not a health food. Enjoy in moderation.
My Take: Look, this is dessert. It’s supposed to be indulgent. When I make these, I eat one square and enjoy it slowly. It satisfies the craving without leaving me feeling weighed down. If you want to make it lighter, use less chocolate or reduce the sugar.
Final Thoughts
So that’s my go-to Chocolate Peanut Butter Buckeye Bars! I’ve probably talked your ear off at this point, but when you make a recipe this often, you have a lot to say about it. This has saved weeknight desserts more times than I can count. It’s my answer to “what’s for dessert?” when I’m tired, don’t want to bake, and still want something that tastes really good. My kids are happy, my husband’s happy, and I’m happy because I’m not stressed about cooking.
Make it yours! Try different toppings, swap in your favorite cookies, adjust the sweetness. The best recipes are the ones you adapt to your family’s tastes. If you make this, drop a comment and let me know what you think! I love hearing how recipes turn out in your kitchen. And if something doesn’t work, tell me that too—I’m here to help troubleshoot.
Happy cooking! And I hope your kitchen smells half as good as mine does right now.
Frequently Asked Questions
Can I use natural peanut butter?
You can, but the results will be different. Natural peanut butter separates and is oilier, which can make the bars greasy and harder to cut. If you must use it, make sure it’s well-mixed and at room temperature. I recommend adding a bit more powdered sugar to help bind the extra oil. But for the best texture, stick to standard creamy peanut butter.
Why did my chocolate crack when I cut the bars?
This usually happens if the chocolate was too thick or if the bars weren’t chilled long enough. Make sure you add enough heavy cream to make the chocolate glossy and spreadable. Also, let the bars chill for at least 30-45 minutes, or until the chocolate is completely firm. A sharp knife helps too—dragging a dull knife through soft chocolate causes cracks.
Can I make these ahead of time?
Absolutely! These are perfect for make-ahead desserts. You can make them up to a week in advance and store them in the fridge. In fact, they taste better after a day or two as the flavors meld. You can also freeze them for up to 3 months. Just thaw in the fridge overnight before serving.
Can I use dark chocolate instead?
Yes! I actually prefer semi-sweet, but dark chocolate works great if you want less sweetness. Just be aware that the flavor profile will be more intense and less sweet. Milk chocolate will make them very sweet, so I’d recommend reducing the powdered sugar in the base if you go that route.
How do I store these bars?
Store them in an airtight container in the refrigerator. Layer them between sheets of parchment paper to prevent sticking. They will keep for up to 1 week. Do not store them at room temperature, as the peanut butter and chocolate will soften and become messy.
Can I double this recipe?
Yes, but you’ll need a larger pan. For double the recipe, use a 9×13 inch pan. The cooking and chilling times remain the same. Just make sure to press the base down firmly, as a larger surface area can make it harder to get an even layer.
Pin This Recipe!
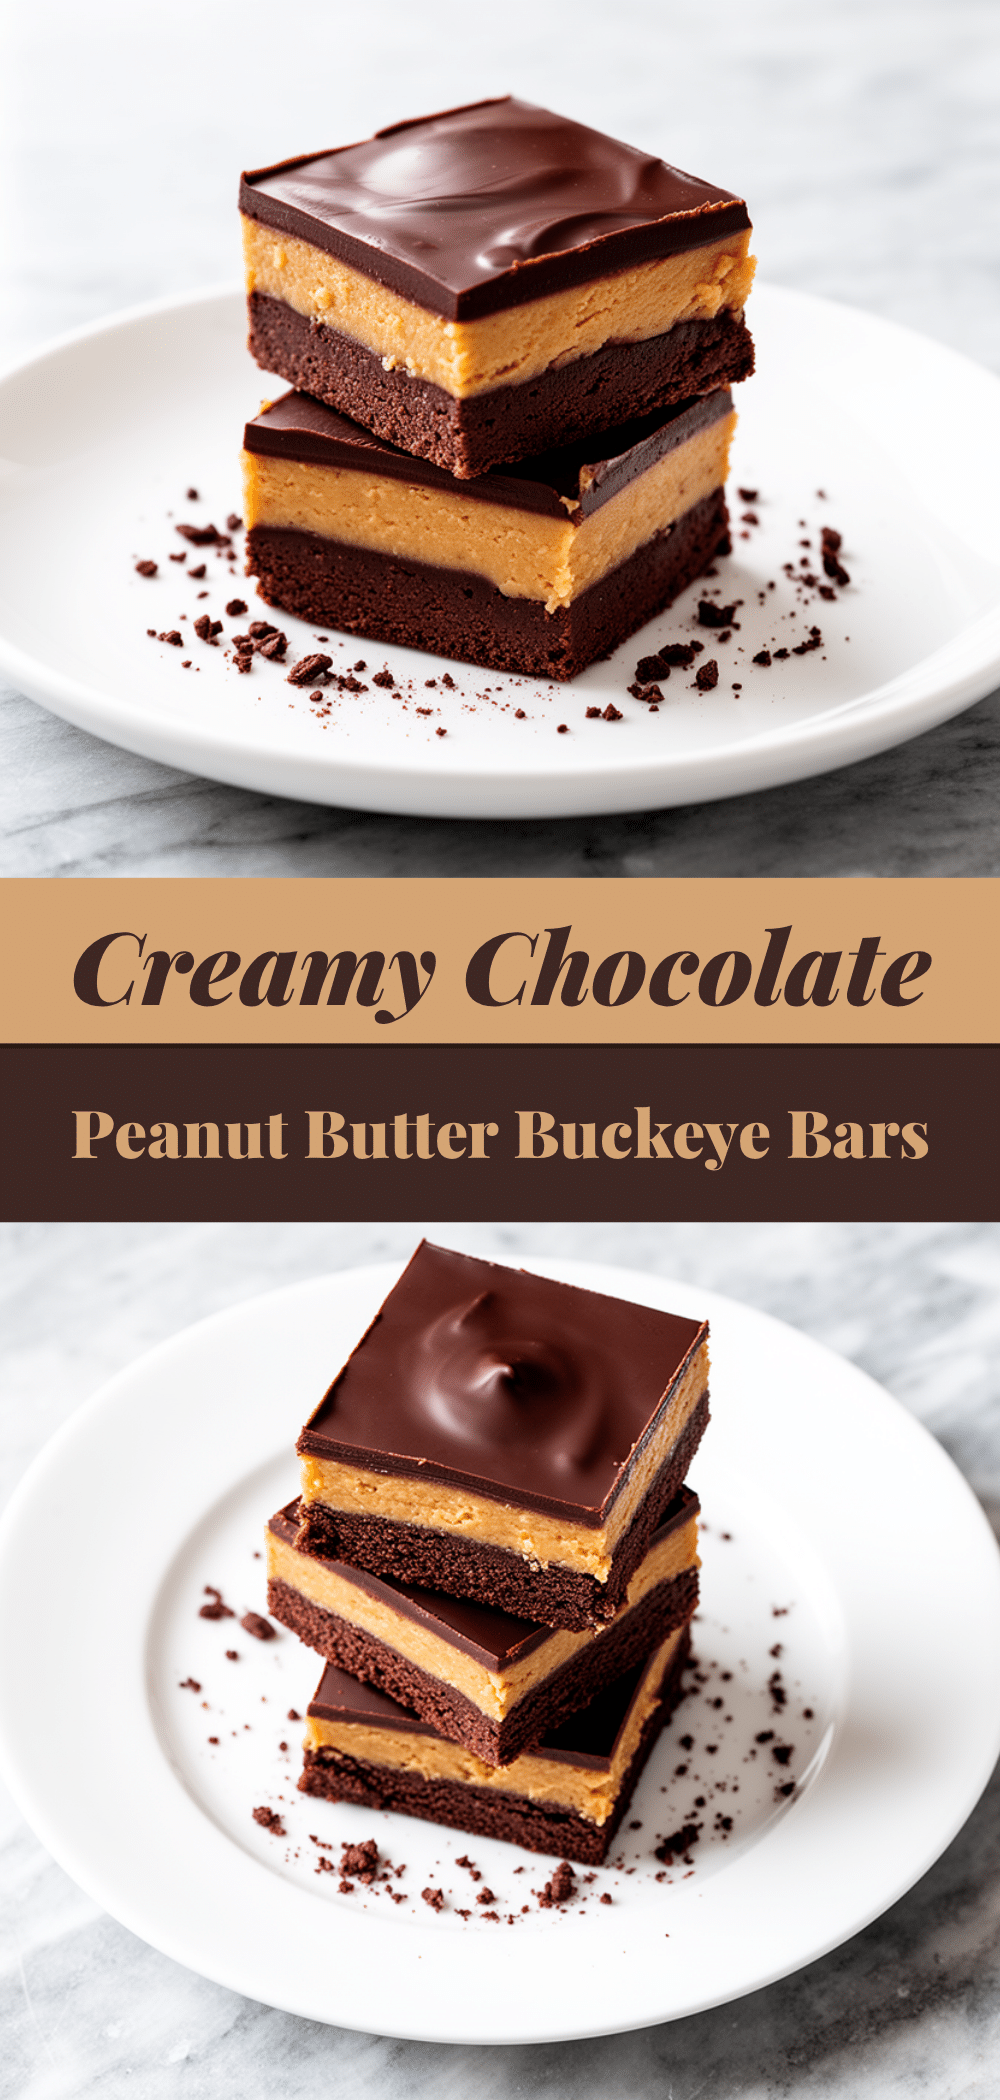
Chocolate Peanut Butter Buckeye Bars: Easy No-Bake Dessert
- Total Time: 45 minutes
- Yield: 16 servings 1x
Description
These rich, creamy, and perfectly sweet no-bake bars combine a crunchy graham cracker peanut butter base with a smooth chocolate ganache topping. They are incredibly easy to make, require no oven, and taste better after chilling.
Ingredients
- 10–12 full sheets graham crackers (about 150g), crushed into fine crumbs
- ½ cup (113g) unsalted butter, melted
- 1 cup (250g) creamy peanut butter (standard brands like Jif or Skippy)
- 1 cup (120g) powdered sugar
- 2 cups (340g) semi-sweet chocolate chips
- 2–3 tablespoons heavy cream
- Sea salt flakes, optional for sprinkling
Instructions
- Line a 9×9 inch baking pan with parchment paper, leaving an overhang on the sides for easy removal.
- Crush the graham crackers into fine crumbs using a food processor or a ziplock bag and rolling pin. Transfer crumbs to a medium mixing bowl.
- Add the melted butter, creamy peanut butter, and powdered sugar to the crumbs. Mix until the texture resembles wet sand and holds together when pinched.
- Press the mixture firmly and evenly into the bottom of the prepared pan using the bottom of a measuring cup to pack it down tight.
- In a microwave-safe bowl, combine chocolate chips and heavy cream. Microwave in 30-second intervals, stirring between each, until mostly melted. Stir vigorously until smooth. Add more cream if too thick.
- Pour the melted chocolate over the peanut butter layer and spread evenly to the edges with a spatula.
- Sprinkle with sea salt flakes if desired.
- Refrigerate for at least 30 minutes, or until the chocolate is completely set and firm.
- Lift the bars out of the pan using the parchment overhang. Cut into squares with a sharp knife, wiping the knife between cuts for clean edges.
- Serve immediately or store in an airtight container in the refrigerator.
Notes
For clean cuts, ensure the chocolate is fully set and use a sharp knife. You can chill the knife in the freezer for a minute before cutting. The bars must be stored in the fridge as they soften at room temperature. They taste better after chilling for a day or two as flavors meld. Natural peanut butter can be used but may result in a greasier texture; standard creamy peanut butter is recommended for best results.
- Prep Time: 15 minutes
- Cook Time: 0 minutes
- Category: Dessert
- Cuisine: American
Nutrition
- Serving Size: 1 square (approx. 1-
- Calories: 180
- Sugar: 16
- Sodium: 90
- Fat: 10
- Saturated Fat: 5
- Carbohydrates: 22
- Fiber: 1
- Protein: 4
Keywords: no-bake dessert, chocolate peanut butter, buckeye bars, easy dessert, kid-friendly, make-ahead dessert, graham cracker crust


