Last Super Bowl, I made the mistake of assuming store-bought pretzels and cheese dip would suffice. Big mistake. By halftime, my living room was a graveyard of empty bags and disappointed faces. My husband looked at me with that specific “we are ordering pizza” stare that haunts every parent during big games. That was the moment I realized I needed a snack that was cheap, easy, and actually kept people at the table instead of driving them to the drive-thru.
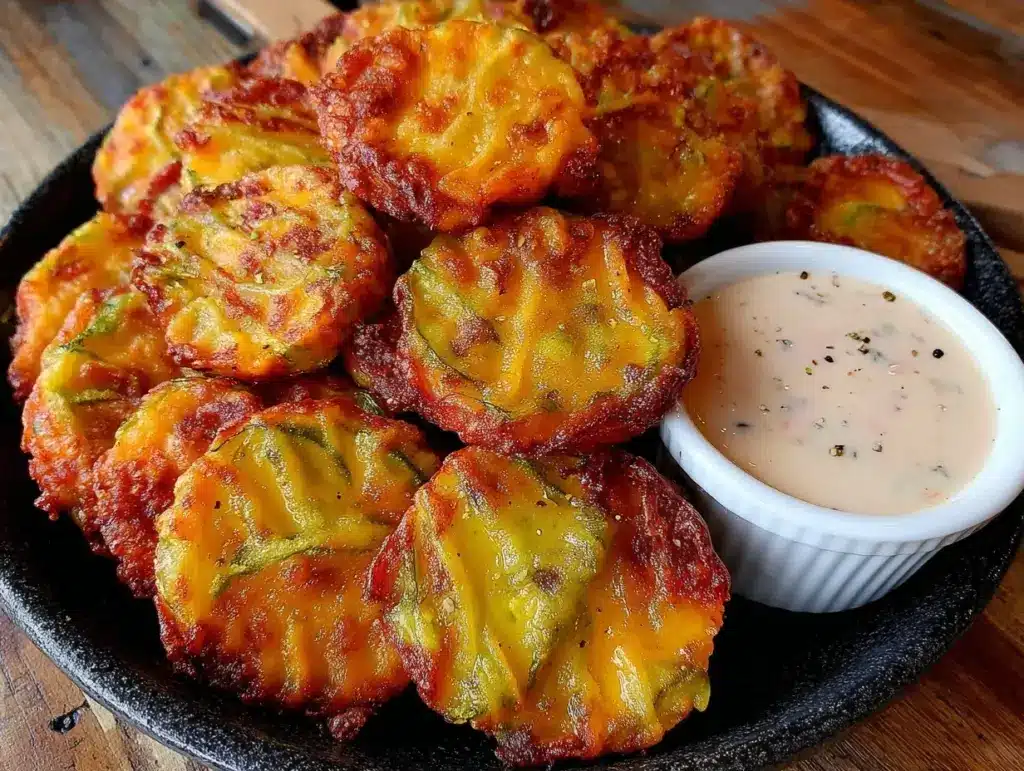
So, I dug through my pantry and freezer, threw together a batch of crispy fried pickle chips, and honestly? It saved the day. These aren’t the sad, soggy pickle slices you get at overpriced bars. These are crunchy, salty, tangy little discs of joy that cost pennies to make but taste like they came from a high-end appetizer menu. And the best part? The ranch dip is made from scratch in two minutes flat.
I’ve been making these crispy fried pickle chips for every game since then. They’ve become the cornerstone of our game day spread, sitting right next to the sticky honey sriracha chicken wings and the crispy buffalo chicken egg rolls. If you’re looking for a cheap game day snack that actually gets eaten, stop scrolling. You need to make these immediately.
Why You’ll Love This Recipe
Look, I get it. Game day snacks can get expensive fast. Between the chips, the dips, the wings, and the drinks, the grocery bill adds up faster than a touchdown. This recipe is my secret weapon for keeping the budget down while keeping the flavor up. Here’s why these fried pickles have earned a permanent spot in our rotation:
- Insanely Cheap — Seriously. A jar of dill pickle chips costs about $3 to $4, and you get enough for four people. Compare that to $12 for a basket of fries at a sports bar. This is budget parenting at its finest.
- Lightning Fast — You can have these in the oven in 15 minutes. I know, “fried” usually implies standing over hot oil for ages. Not here. We’re using a sheet pan and a little trick to get that crunch without the mess.
- Kid-Approved — My picky eater, who usually refuses anything green, devours these. The breading hides the sourness just enough, and the ranch dip makes everything feel like a treat.
- Pantry Friendly — You likely have the breadcrumbs, spices, and oil already. You just need pickles and maybe some mayo or sour cream for the dip. No weird ingredients required.
- Makes Amazing Leftovers — Okay, be real. There are rarely leftovers with these. But if you do have them, they reheat surprisingly well in the air fryer or a hot oven. They stay crunchy for hours, which is perfect if you’re snacking throughout the day.
This is my go-to when I need a crowd-pleaser that doesn’t require me to be a chef. It’s reliable, it’s delicious, and it keeps everyone happy without breaking the bank.
Ingredients You’ll Need
Here’s the best part: you probably have most of this already in your kitchen. I’m particular about a few things, but honestly, you can swap based on what you have. This recipe is flexible because life is busy.
For the Pickles
Dill pickle chips (1 large jar / 24 oz) — Look for “extra crunchy” or “bread and butter” style if you can find them, but standard deli-style chips work too. Avoid the soft, squishy ones from the bottom of the jar. You want firmness. Drain them well!
Egg (1 large) — This is your binder. It helps the breadcrumbs stick. Whisk it with a tablespoon of water or milk. Don’t skip this step.
Buttermilk (½ cup / 120ml) — Optional but recommended. Soaking the pickles in buttermilk for 10 minutes before breading adds tang and helps the coating adhere. If you don’t have buttermilk, mix ½ cup milk with 1 tablespoon lemon juice and let it sit for 5 minutes.
Panko breadcrumbs (1 cup / 100g) — This is the secret to the crunch. Regular breadcrumbs are too dense and turn mushy. Panko stays light and crispy. I buy the big bags at Costco because I use them for everything from crispy parmesan zucchini rounds to chicken tenders.
Garlic powder (1 teaspoon) — Adds savory depth. Don’t use granulated; powder is finer and mixes better.
Onion powder (1 teaspoon) — Complements the garlic. Again, powder is better here.
Smoked paprika (½ teaspoon) — This gives them a hint of smokiness that mimics actual frying. If you don’t have smoked paprika, regular paprika works, but it won’t have that depth.
Cayenne pepper (¼ teaspoon) — Optional. If you like a little kick, add this. If you’re making these for toddlers, skip it. I usually add it because I like my snacks with a little fire.
Salt (½ teaspoon) — Pickles are already salty, so go easy here. Taste the breadcrumbs before you add them to be sure.
Vegetable oil or avocado oil (2-3 tablespoons) — You need enough to coat the baking sheet and brush over the pickles. Avocado oil has a higher smoke point, so it’s better if you’re baking at high heat, but vegetable oil works fine.
For the Ranch Dip
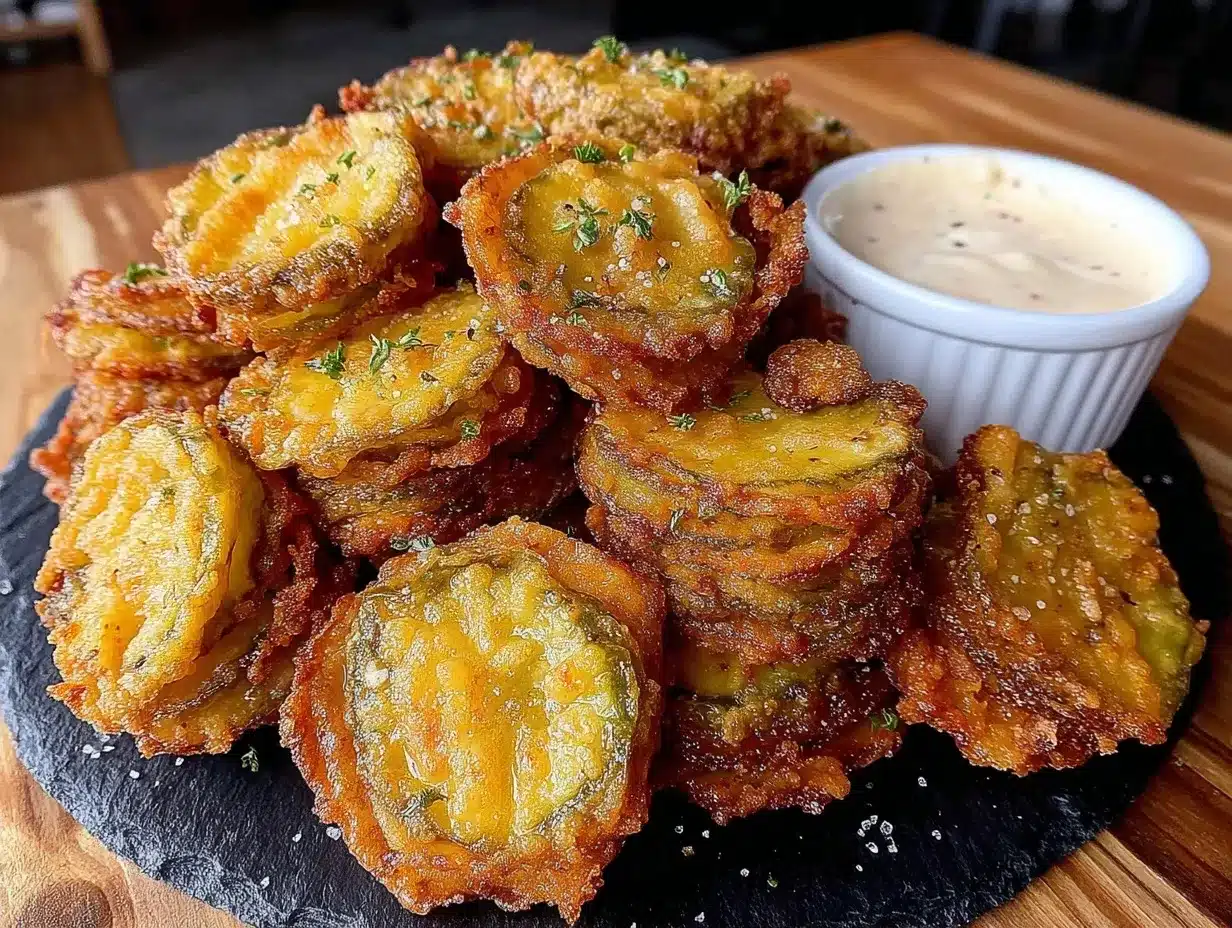
Sour cream (½ cup / 120g) — Full fat is best for texture. Low-fat versions can be watery.
Mayonnaise (½ cup / 120g) — Again, full fat. This creates the creamy base.
Dried dill (1 teaspoon) — Fresh dill is nice, but dried has a stronger flavor that stands up to the baking. I use dried.
Dried parsley (1 teaspoon) — For color and subtle herbal notes.
Garlic powder (½ teaspoon) — Just a little boost.
Onion powder (½ teaspoon) — Same as above.
Lemon juice (1 teaspoon) — Brightens up the dip. If you don’t have it, a tiny splash of vinegar works.
Black pepper (¼ teaspoon) — Freshly cracked is best.
Equipment Needed
You don’t need fancy equipment for this. Here’s what I actually use:
Baking sheets — I use two half-sheet pans. You need space between the pickles so they crisp up. If you crowd them, they steam and get soggy. I line them with parchment paper for easy cleanup.
Wire rack — Optional but game-changing. Placing a wire rack on top of the baking sheet allows air to circulate underneath the pickles. This makes them extra crispy. If you don’t have one, just use the parchment-lined pan.
Shallow bowls — You’ll need two or three shallow bowls for the dredging station (flour/egg/breadcrumbs). Pie dishes work perfectly for this.
Pastry brush — To brush oil on top of the pickles. A silicone brush is easiest. Or just use a fork to drizzle oil if you’re feeling lazy.
Mixing spoon — For the ranch dip. A simple fork works too.
How to Make It: Step-by-Step
Alright, let’s make this! I’m walking you through exactly how I do it, including the little tricks I’ve picked up to ensure they’re crunchy and not soggy.
Step 1: Prep Your Station (5 minutes)
Preheat your oven to 425°F (220°C). Line two baking sheets with parchment paper. If you have a wire rack, place it on the baking sheet. Set out three shallow bowls. In the first bowl, add the flour (if using a dredge step, though I often skip flour for pickles since they’re wet enough, but a light dusting helps). In the second, whisk the egg with a splash of water or buttermilk. In the third, mix the panko breadcrumbs with garlic powder, onion powder, paprika, cayenne, and salt.
Step 2: Drain the Pickles (Crucial Step)
Open your jar of pickles and drain them thoroughly. I mean *thoroughly*. Lay the pickle chips out on paper towels and pat them dry. Any excess moisture will turn your breadcrumbs into mush. This is the number one reason homemade fried pickles fail. Be impatient here, and you’ll pay for it later.
Step 3: The Breading Station
Take a dried pickle chip and dip it into the egg wash, ensuring it’s fully coated. Let the excess drip off for a second. Then, press it firmly into the panko mixture. Use your hands to press the crumbs onto the pickle. You want a thick, even coat. Don’t be shy with the breadcrumbs. Place the breaded pickle on the prepared baking sheet, leaving at least half an inch between each chip.
Step 4: Oil and Bake
Lightly spray or brush the tops of the pickles with oil. This helps them brown and get crispy. Bake for 10-12 minutes. Flip them carefully with a spatula and bake for another 5-7 minutes. You want them golden brown and crunchy. Keep an eye on them after 10 minutes because ovens vary. Mine take about 15 minutes total.
Step 5: Make the Ranch Dip
While the pickles bake, mix the sour cream, mayo, dried dill, parsley, garlic powder, onion powder, lemon juice, and black pepper in a small bowl. Taste and adjust. Need more tang? Add a squeeze of lemon. Need more crunch? Add a pinch of pepper. Chill in the fridge while the pickles finish baking.
Step 6: Serve Immediately
Remove the pickles from the oven and let them cool for 2 minutes. They’ll crisp up more as they cool slightly. Serve hot with the ranch dip on the side. I usually put the dip in a small bowl in the center of the plate and surround it with the pickles for a rustic look.
Expert Tips & Tricks
Here’s everything I’ve learned from making these dozens of times. These tips will save you from my mistakes.
Pat Dry, Then Pat Dry Again
I cannot stress this enough. Wet pickles = soggy bread. If your pickles are still dripping after the first pat, use fresh paper towels and press hard. It takes an extra minute but makes all the difference.
Don’t Skip the Oil
You’re baking, not frying, so you need fat to help the breadcrumbs brown. Brushing or spraying the tops with oil ensures they turn golden instead of staying pale and soft.
Use Panko, Not Regular Breadcrumbs
Regular breadcrumbs are like sand. Panko is like shards of glass (in a good way). They create air pockets that stay crunchy. If you only have regular breadcrumbs, pulse them in a food processor to break them up, but panko is worth buying.
Double the Batch
These disappear fast. I usually double the recipe when we have guests. Just make sure you have enough baking sheet space. If you’re overcrowding the pan, the pickles will steam instead of bake. Use two sheets or bake in two batches.
Keep Them Warm
If you’re baking in batches, keep the first batch warm in a 200°F oven while you bake the second. They stay crispy for a good 10-15 minutes after coming out of the oven.
Variations & Substitutions
Once you’ve nailed the basic version, here’s how you can mix it up. I’ve tried all of these.
Spicy Jalapeño Pickles
Swap the dill pickles for spicy jalapeño slices. Add extra cayenne and smoked paprika to the breading. Serve with a chipotle mayo dip instead of ranch. This is perfect if you like heat.
Garlic Parmesan Crust
Mix ¼ cup grated Parmesan cheese into the panko breadcrumbs. Add extra garlic powder. This is richer and more savory. Great if you’re serving these alongside crispy garlic butter cajun shrimp for a seafood-themed party.
Gluten-Free Option
Use gluten-free panko breadcrumbs. They’ve gotten much better in recent years. I’ve used brands like Bob’s Red Mill and they work well. Just make sure to press the crumbs on firmly, as GF breadcrumbs can be heavier.
Air Fryer Method
If you have an air fryer, cook these at 375°F for 8-10 minutes, shaking the basket halfway through. They cook faster and get even crispier. Just watch them closely so they don’t burn.
Vegan Version
Skip the egg wash and use a slurry of 1 tablespoon cornstarch mixed with 3 tablespoons water, or use a commercial egg replacer. The panko needs to be vegan (most are, but check the label). For the dip, use vegan sour cream and mayo.
Serving & Storage
How to Serve:
I usually serve these straight from the baking sheet with a small bowl of ranch in the middle. It’s rustic and easy to grab. But here are other ways I’ve enjoyed them:
Side Dishes:
These pair perfectly with grilled bacon-wrapped corn for a summer BBQ vibe. They also go great with burgers or sausages if you’re doing a full cookout.
Wine Pairing:
Not a wine expert, but my wine-snob friend says a crisp Pinot Grigio or a cold lager beer works great with the tangy pickles. The carbonation cuts through the crunch nicely.
Storage Instructions:
Refrigerator:
Store leftovers in an airtight container for up to 3 days. They will lose some crunch, but they’re still good.
Reheating:
Best method: Air fryer or toaster oven at 375°F for 3-5 minutes. This brings back the crunch. Microwave method: Do not microwave. They will get soft and chewy. Never microwave pickles. Ask me how I know.
Freezing:
You can freeze unbreaded pickles, but not breaded ones. The breading gets soggy when thawed. If you have extra pickles, freeze them plain and bread them fresh later.
Meal Prep:
Make the ranch dip ahead of time. It tastes better after sitting in the fridge for an hour. Bread the pickles right before baking for the best texture.
Nutrition Information
I’m not a nutritionist, but here’s the breakdown if you’re tracking. Keep in mind that these are indulgent snacks, so enjoy in moderation.
Per Serving (based on 6 servings, approx. 10 chips + 2 tbsp dip):
- Calories: 280
- Protein: 6g
- Carbs: 32g
- Fiber: 2g
- Sugar: 4g
- Fat: 14g
- Saturated Fat: 2g
- Cholesterol: 35mg
- Sodium: 680mg
What’s Good:
Decent amount of protein from the egg and cheese (if used). The panko provides some fiber.
What to Know:
Higher in sodium due to the pickles. If you’re watching salt, look for low-sodium pickles or rinse them before drying. The fat comes from the oil and mayo/sour cream in the dip.
My Take:
Look, this is a game day snack. It’s not a salad. It’s salty, crunchy, and delicious. When I want to make it lighter, I use less oil and light sour cream, but honestly? I usually just enjoy a reasonable portion and move on. It’s way better than store-bought chips and costs less.
Final Thoughts
So that’s my go-to crispy fried pickle chips! I’ve probably talked your ear off at this point, but when you make a recipe this often, you have a lot to say about it. These have saved our game day snacking routine more times than I can count. They’re my answer to “what’s for a snack?” when I’m tired, don’t want to spend $20 on appetizers, and still want something that tastes really good.
Make it yours! Try different spices, swap the ranch for a spicy aioli, or add some parmesan to the crust. The best recipes are the ones you adapt to your family’s tastes. If you make this, drop a comment and let me know what you think! I love hearing how recipes turn out in your kitchen. And if something doesn’t work, tell me that too—I’m here to help troubleshoot.
Happy cooking! And I hope your kitchen smells half as good as mine does right now (crispy, salty, and delicious).
Frequently Asked Questions
Can I use regular breadcrumbs instead of panko?
You can, but the texture won’t be as crunchy. Panko has larger flakes that create air pockets, keeping the coating light and crisp. Regular breadcrumbs are denser and can turn soggy or hard. If you must use regular breadcrumbs, pulse them in a food processor to break them up, but panko is definitely worth buying.
Why did my pickles get soggy?
Usually, this means there was too much moisture on the pickles before breading. Make sure you pat them dry thoroughly with paper towels. Also, ensure your oven is fully preheated to 425°F. If the oven isn’t hot enough, the pickles will steam instead of bake. Don’t overcrowd the pan either; give them space to breathe.
Can I make these ahead of time?
You can bread them ahead of time and keep them on the baking sheet in the fridge for up to 2 hours before baking. Just take them out 10 minutes before baking to take the chill off. However, for the best crunch, it’s always better to bread and bake them right before serving. The ranch dip can be made 2-3 days ahead.
Can I bake these instead of frying?
Yes! This recipe is designed to be baked, not deep-fried. It’s much easier and healthier. You just need to brush or spray them with oil to help them brown. If you want to deep-fry, heat oil to 375°F and fry for 2-3 minutes until golden. But honestly, baking is just as good and way less messy.
What kind of pickles work best?
Look for “extra crunchy” dill pickle chips. Avoid the soft, squishy ones. Bread and butter pickles work too but will be sweeter. If you can find them, pickles cut into spears or chips from a deli jar (not the pre-packaged snack packs) tend to be firmer and hold up better to breading.
How do I reheat leftovers?
Never microwave them! The microwave will make the breading soft and chewy. Reheat in an air fryer at 375°F for 3-5 minutes, or in a toaster oven/conventional oven at 375°F for 5-7 minutes. This will restore the crunch. They won’t be quite as good as fresh, but they’ll be much better than room temperature.
Can I freeze the fried pickles?
It’s not recommended. The breading tends to get soggy and separate when thawed. It’s best to freeze the plain pickle slices (drained and patted dry) and bread/fry them fresh when you’re ready to eat. This ensures the best texture.
Pin This Recipe!
Crispy Fried Pickle Chips: Cheap Game Day Snack
- Total Time: 30 minutes
- Yield: 4 servings 1x
Description
These baked crispy fried pickle chips are a cheap, easy, and kid-approved game day snack that delivers a crunchy, salty, and tangy flavor without the mess of deep frying. Served with a quick homemade ranch dip, they are a budget-friendly alternative to restaurant appetizers.
Ingredients
- 1 large jar (24 oz) dill pickle chips
- 1 large egg
- 1 tablespoon water or milk
- ½ cup buttermilk (optional, for soaking)
- 1 cup panko breadcrumbs
- 1 teaspoon garlic powder
- 1 teaspoon onion powder
- ½ teaspoon smoked paprika
- ¼ teaspoon cayenne pepper (optional)
- ½ teaspoon salt
- 2–3 tablespoons vegetable oil or avocado oil
- ½ cup sour cream
- ½ cup mayonnaise
- 1 teaspoon dried dill
- 1 teaspoon dried parsley
- ½ teaspoon garlic powder
- ½ teaspoon onion powder
- 1 teaspoon lemon juice
- ¼ teaspoon black pepper
Instructions
- Preheat oven to 425°F (220°C). Line two baking sheets with parchment paper.
- Drain pickle chips thoroughly and pat them dry with paper towels to remove excess moisture.
- In a shallow bowl, whisk the egg with water or milk. In another shallow bowl, mix panko breadcrumbs with garlic powder, onion powder, smoked paprika, cayenne, and salt.
- Dip each dried pickle chip into the egg wash, letting excess drip off, then press firmly into the breadcrumb mixture to coat evenly.
- Place breaded pickles on the baking sheets, leaving space between them.
- Lightly brush or spray the tops of the pickles with oil.
- Bake for 10-12 minutes, flip carefully, and bake for another 5-7 minutes until golden brown and crunchy.
- While pickles bake, mix sour cream, mayonnaise, dried dill, dried parsley, garlic powder, onion powder, lemon juice, and black pepper to make the ranch dip.
- Let pickles cool for 2 minutes before serving immediately with the ranch dip.
Notes
Patting the pickles dry is crucial to prevent soggy breadcrumbs. Use panko breadcrumbs for maximum crunch. If baking in batches, keep finished pickles warm in a 200°F oven. Do not microwave leftovers as they will become soft; reheat in an air fryer or oven at 375°F.
- Prep Time: 15 minutes
- Cook Time: 15 minutes
- Category: Appetizer
- Cuisine: American
Nutrition
- Serving Size: Approx. 10 chips + 2
- Calories: 280
- Sugar: 4
- Sodium: 680
- Fat: 14
- Saturated Fat: 2
- Carbohydrates: 32
- Fiber: 2
- Protein: 6
Keywords: crispy fried pickle chips, game day snack, cheap appetizer, baked pickles, ranch dip, party food, easy snack, kid-friendly


