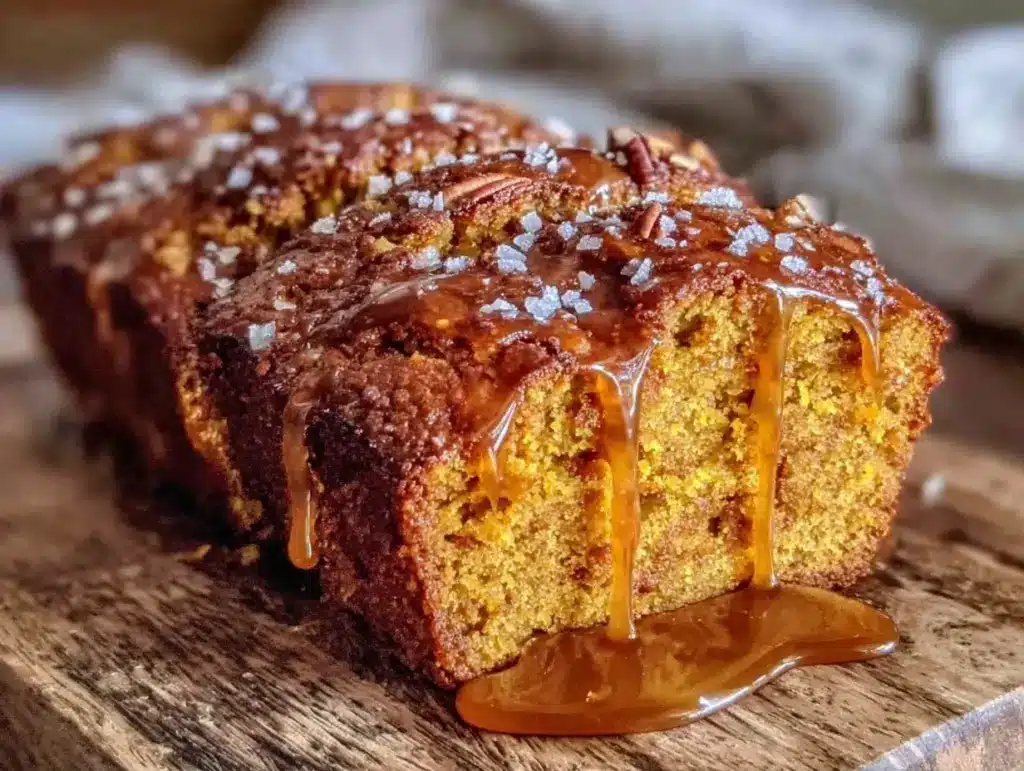
Last October, I was sitting in my tiny apartment kitchen, staring at a $7 can of pumpkin puree like it was going to bite me. I had $12 left until payday, and the craving for something warm, spiced, and sweet was hitting harder than caffeine withdrawal. I could have bought a slice of pumpkin bread from that fancy coffee shop down the street for $5.50. That would have left me with $6.50 for the rest of the week. Not exactly a winning strategy.
Instead, I decided to gamble on making my own. I raided my pantry for the basics I already had—flour, sugar, eggs, oil—and checked my local discount grocer for the rest. The result? A loaf of fall pumpkin bread with brown butter maple glaze that tasted like it came from a bakery, cost me less than $4 total, and lasted me five days of breakfasts and afternoon snacks. It’s honestly embarrassing how good it is compared to what I was buying.
I’ve made this specific version of fall pumpkin bread with brown butter maple glaze probably ten times since then. Not because I’m obsessed (okay, maybe a little), but because it’s the perfect intersection of “I want something cozy” and “I refuse to spend $6 on a single slice.” It’s rich, it’s moist, and that glaze? It’s the kind of thing that makes your neighbors wonder if you have a secret bakery license.
Here’s the thing about budget baking: it’s not about sacrificing flavor. It’s about being smart about what you buy. This recipe uses pantry staples you likely already have, and the few things you need to grab are cheap and versatile. Plus, the brown butter step? It sounds fancy, but it’s just butter cooking until it smells like hazelnuts. It adds this deep, nutty richness that makes the bread feel expensive, even though it cost pennies to make.
So, if you’re trying to stretch a grocery budget without eating plain toast for dinner every day, this is your bread. It’s practical, it’s delicious, and it won’t wreck your wallet. Let’s get into how to make it.
Why You’ll Love This Budget-Friendly Pumpkin Bread
There are a lot of pumpkin bread recipes out there. Some are too dry, some are too sweet, and some require ingredients I’d have to buy specifically for one recipe, which is a total budget no-no. This version is different. It’s designed for real life and real bank accounts.
It Uses Cheap, Accessible Ingredients — Seriously. You don’t need specialty flours or expensive maple syrup. I use all-purpose flour, vegetable oil (which is cheaper than butter and keeps it moist), and pure maple syrup for the glaze. If you don’t have maple syrup, honey works too. It’s flexible.
The Brown Butter Trick is Free Flavor — Most people think you need expensive extracts or spices to make bread taste good. But browning your butter? It adds this incredible depth. It’s like the bread is telling you it has a personality. And it costs nothing extra—you’re just cooking the butter you already bought.
It’s a Single-Serving Friendly Loaf — This recipe makes one standard 9×5 loaf. Perfect for one person. No waste. No freezing half a loaf that turns into a rock in your freezer. You eat it, you enjoy it, you’re done. It’s efficient.
It Stays Moist for Days — Pumpkin bread can dry out fast. But the oil and the brown butter keep this loaf tender for at least four days at room temperature. I usually have a slice with my morning coffee for half the week. It’s like having a little bakery in your kitchen.
It’s Faster Than Ordering Takeout — From mixing to cooling, it takes about an hour and a half. That’s less time than it takes to wait for a delivery driver. And it’s way better for your soul (and your wallet).
This isn’t just a recipe. It’s a strategy. It’s proof that you can eat well, eat cozy, and eat delicious without spending a fortune. I’ve paired it with my soft cinnamon sugar breakfast pull apart bread for those really lazy weekends, but on a normal Tuesday, this pumpkin bread is my go-to.
Ingredients You’ll Need
Here’s the best part: you probably have most of this already. I’m being very specific about what you need because I don’t want you to buy a whole jar of something you’ll use once. This list is lean, mean, and budget-friendly.
For the Bread
All-purpose flour (2 cups / 250g) — The standard. Don’t bother with cake flour or self-rising unless you want to complicate things. All-purpose is cheap and works perfectly here.
Baking soda (1 teaspoon) — Check the expiration date. Old baking soda makes flat, dense bread. It’s cheap, but if it’s been sitting since 2019, toss it and buy new. It makes a huge difference.
Baking powder (½ teaspoon) — Same as above. Fresh is key. You only need a little bit, so this box will last you for months.
Salt (½ teaspoon) — Essential for balancing the sweet. Don’t skip it.
Cinnamon (2 teaspoons) — Ground cinnamon. Again, check the date. If it doesn’t smell like cinnamon when you open it, it’s not doing its job. Buy the store brand; it’s the same stuff.
Ground ginger (1 teaspoon) — Adds that warm, spicy kick. If you don’t have it, you can skip it, but it’s worth the $2 for the jar because you’ll use it again.
Ground cloves (¼ teaspoon) — Just a pinch. It adds depth. If you don’t have cloves, you can use more ginger or nutmeg. I usually have a “pumpkin pie spice” blend, which works great too.
Pumpkin puree (1 cup / 245g) — NOT pumpkin pie filling. Look for the can labeled “100% Pure Pumpkin.” It’s usually around $1.50-$2.00 at discount stores. If you have a whole pumpkin, you can roast and puree it, but that’s a lot of work for one loaf. The can is your budget friend.
Vegetable oil (½ cup / 120ml) — Oil keeps pumpkin bread moist longer than butter. It’s also cheaper. I use generic vegetable or canola oil. It has a neutral flavor, so it won’t change the taste.
Granulated sugar (¾ cup / 150g) — Regular white sugar. You can reduce it to ½ cup if you’re watching sugar, but it adds structure and moisture. Don’t go below ½ cup or the bread might be dense.
Large egg (1 large) — Room temperature is best, but if you forget, just drop it in warm water for 5 minutes. One egg is all you need. No waste.
Vanilla extract (1 teaspoon) — I use imitation vanilla sometimes to save money, but real vanilla is nicer. A little goes a long way, so your bottle will last forever.
For the Brown Butter Maple Glaze
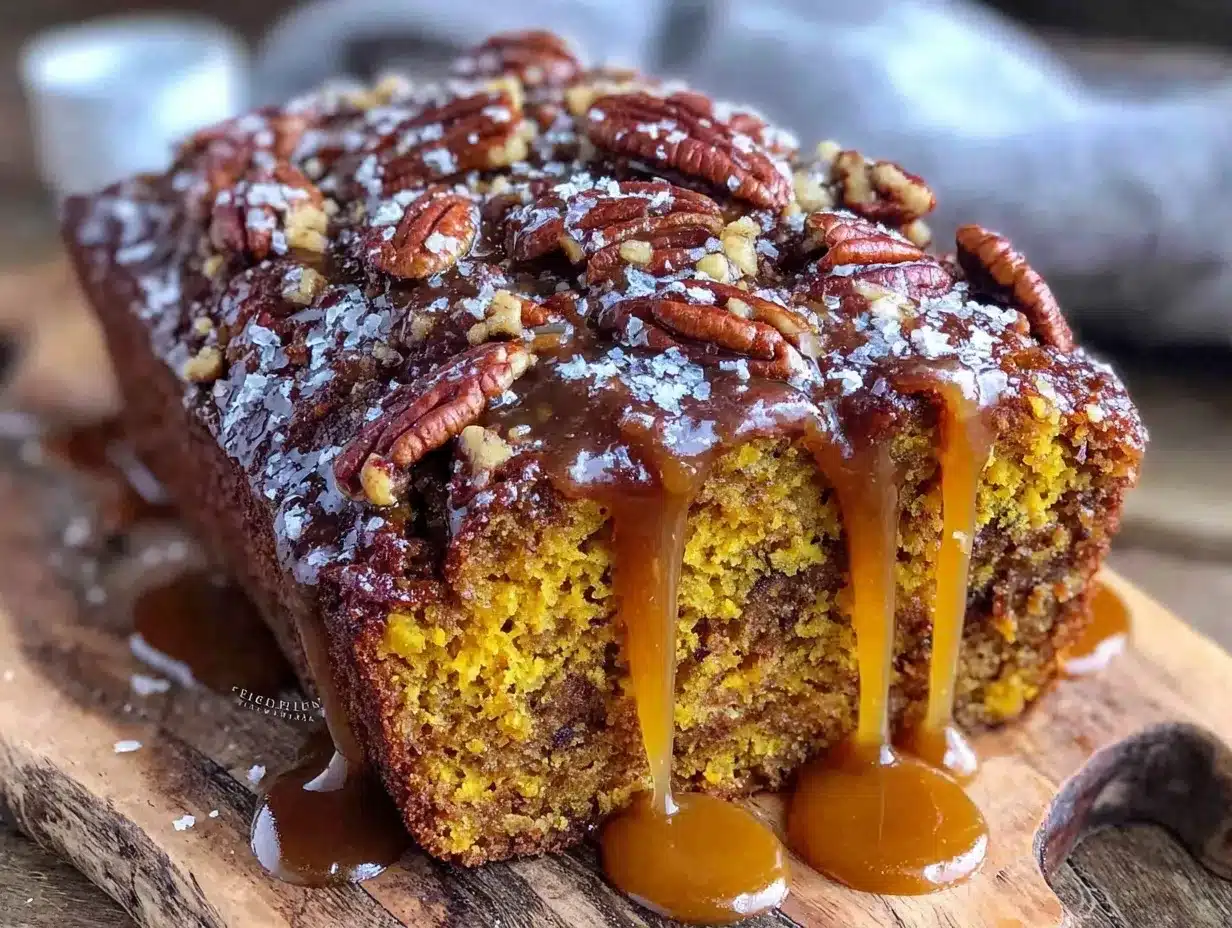
Unsalted butter (3 tablespoons / 42g) — This is where the magic happens. You’re going to cook this until it’s brown and nutty. Use whatever butter you have; salted or unsalted is fine, but unsalted gives you more control.
Confectioners’ sugar (1 cup / 120g) — Powdered sugar. Check your pantry. You might already have a bag from when you made those creamy strawberry cheesecake milkshake. It’s a staple for a reason.
Maple syrup (2-3 tablespoons) — Pure maple syrup. Not “pancake syrup” (which is corn syrup). Look for the bottle that says “100% Pure Maple Syrup.” It’s more expensive upfront, but you only need a little, so it lasts. If you’re on a super tight budget, you can use half maple syrup, half honey, or just honey. It’ll still be good.
Milk (1-2 tablespoons) — Any milk. Whole, skim, almond, oat. Whatever you have. It thins the glaze to the right consistency.
Salt (a pinch) — Cuts the sweetness. Essential.
Equipment Needed
You don’t need fancy gadgets. Here’s what I actually use.
9×5 inch loaf pan — Standard size. Grease it well. I use a little oil and then dust with flour, or just line it with parchment paper for easy removal. Parchment paper saves cleanup, which saves time.
Mixing bowls — One medium for dry ingredients, one large for wet. I use cheap plastic ones from the dollar store. They’re unbreakable and easy to clean.
Whisk — For mixing the dry ingredients and the glaze. A fork works in a pinch, but a whisk is faster.
Small saucepan — For browning the butter. A small one works best so you can watch it closely. Non-stick is helpful because browned butter can stick and burn.
Spatula — For folding the batter. Silicone is best because it scrapes the bowl clean.
Cooling rack — Optional but helpful. If you don’t have one, just let the bread cool in the pan for 10 minutes, then flip it onto a plate. It’s fine.
Measuring cups and spoons — Standard stuff. Accuracy matters in baking, so don’t eyeball it too much. But you don’t need digital scales unless you’re a perfectionist.
How to Make It: Step-by-Step
Alright, let’s make this! I’m walking you through exactly how I do it, including the little tricks I’ve picked up so you don’t mess up.
Step 1: Prep Your Pan and Oven (5 minutes)
Preheat your oven to 350°F (175°C). Grease your 9×5 loaf pan. I like to line the bottom with parchment paper for easy removal, but greasing it well with cooking spray or butter is fine too. This step is crucial because nothing ruins budget baking faster than a stuck loaf that you have to pry out and end up breaking.
Step 2: Mix the Dry Ingredients (3 minutes)
In a medium bowl, whisk together the flour, baking soda, baking powder, salt, cinnamon, ginger, and cloves. Make sure there are no lumps of baking soda. If you see white clumps, keep whisking. This ensures even rising. Set this aside.
Step 3: Mix the Wet Ingredients (2 minutes)
In a large bowl, whisk the vegetable oil, sugar, egg, vanilla, and pumpkin puree until smooth. The mixture might look a little curdled at first—that’s normal. Just keep whisking until it’s mostly uniform. The pumpkin puree should be smooth; if your can has watery liquid on top, drain it off first.
Step 4: Combine Wet and Dry (2 minutes)
Add the dry ingredients to the wet ingredients. Use a spatula to gently fold them together. Stop as soon as the flour disappears. Do not overmix! Overmixing makes bread tough. It should look shaggy and thick. That’s good.
Step 5: Bake the Bread (50-60 minutes)
Pour the batter into your prepared loaf pan. Smooth the top with your spatula. Bake in the preheated oven for 50-60 minutes. After 40 minutes, check it. If the top is browning too fast, tent it loosely with aluminum foil. The bread is done when a toothpick inserted into the center comes out clean or with just a few moist crumbs. If it’s wet batter, give it 5 more minutes.
Step 6: Cool Completely (30 minutes)
This is the hardest part. Let the bread cool in the pan for 10 minutes, then flip it out onto a cooling rack. Let it cool completely before adding the glaze. If you put glaze on warm bread, it will melt and slide off. Trust me. I’ve done it. It’s a mess.
Step 7: Make the Brown Butter Glaze (5 minutes)
In a small saucepan over medium heat, melt the butter. Keep stirring with a wooden spoon. The butter will foam, then crackle. Watch it closely. It will turn from yellow to golden to amber. You’ll see little brown bits at the bottom and smell a nutty, toasty aroma. This is brown butter. Immediately remove it from the heat and pour it into a small bowl to stop the cooking.
Step 8: Whisk the Glaze (2 minutes)
While the butter is still warm, whisk in the confectioners’ sugar, maple syrup, milk, and salt. Start with 1 tablespoon of milk and add more if needed. You want a glaze that’s thick but drizzles easily. If it’s too thick, add more milk. If it’s too thin, add more sugar.
Step 9: Glaze and Serve
Drizzle the glaze over the completely cooled bread. Use the back of a spoon to spread it slightly if you want full coverage. Let it set for 10 minutes before slicing. Slice thick—this bread is dense and satisfying.
Total Time: About 1 hour 30 minutes (including cooling).
Expert Tips & Tricks
Here’s everything I’ve learned from making this dozens of times. These tips will save you from my mistakes.
Don’t Skimp on the Brown Butter
This is the secret weapon. Raw butter tastes like… butter. Brown butter tastes like caramel and nuts. It makes the glaze taste like it cost $10. Just watch it closely so it doesn’t burn. If it smells like burnt toast, start over. It’s only 3 tablespoons, so it’s a cheap mistake to fix.
Drain the Pumpkin Puree
Sometimes canned pumpkin has excess water. Spoon the puree into a sieve and let it drain for 5 minutes. Too much water makes the bread soggy and dense. You want that thick, smooth puree.
Check Your Spices
I can’t stress this enough. If your cinnamon smells like dust, it’s old. Buy small jars of spices from bulk bins if you can—it’s cheaper and fresher. Fresh spices make a huge difference in flavor.
Storage is Key
Store the bread in an airtight container at room temperature for up to 4 days. If it’s humid, keep it in the fridge. It will last longer but might dry out faster. Reheat slices in the microwave for 10 seconds to soften them up.
Freezing for Later
If you don’t think you’ll eat it all, freeze it! Wrap the whole loaf tightly in plastic wrap, then in foil. It freezes well for up to 3 months. Thaw at room temperature. Don’t glaze it before freezing—the glaze gets weird when thawed. Glaze it fresh.
Variations & Substitutions
Once you’ve nailed the basic version, here’s how you can mix it up. I’ve tried all of these.
Walnut or Pecan Version
Add ½ cup of chopped walnuts or pecans to the batter. Toast them in a dry pan for 2 minutes before adding for extra flavor. This adds crunch and makes it feel more like a dessert.
Chocolate Chip Version
Stir in ½ cup of chocolate chips. Pumpkin and chocolate are a weird but amazing combo. It’s like a pumpkin brownie in bread form. If you’re feeling fancy, use the chocolate toffee crunch layer cake flavor profile by adding toffee bits instead.
Spice-It-Up
Add ½ teaspoon of cardamom or allspice. Or use pumpkin pie spice instead of individual spices. It’s easier and tastes just as good.
Gluten-Free
Use a 1:1 gluten-free flour blend. Most brands work well in quick breads. Add ¼ teaspoon of xanthan gum if your blend doesn’t have it. The texture might be slightly crumblier, but it’s still delicious.
Dairy-Free
For the bread, it’s already dairy-free (using oil). For the glaze, substitute the butter with coconut oil and the maple syrup with agave or honey. The flavor will be slightly different, but still good.
Lower Sugar
Reduce the sugar in the bread to ½ cup. The glaze will still be sweet, so you might want to reduce the sugar in the glaze too. It’s less sweet but still flavorful.
Serving & Storage
How to Serve:
I usually serve this straight from the counter, sliced thick. It’s perfect with a hot cup of coffee or tea. I like to pair it with something savory to balance the sweetness, like those savory bacon cheddar egg breakfast muffins if I’m making a big brunch. But on its own? It’s a treat.
Side Dishes:
This is a sweet bread, so it doesn’t need much. A simple green salad or some roasted vegetables work if you’re having it for breakfast with eggs. But honestly, it’s often just a snack.
Toppings:
Extra walnuts, a dollop of cream cheese (if you’re not watching dairy), or a sprinkle of cinnamon. Keep it simple.
Storage Instructions:
Refrigerator: Store in an airtight container for up to 5 days. It might dry out slightly, so reheat in the microwave.
Freezer: Wrap tightly in plastic and foil. Freeze for up to 3 months. Thaw at room temperature.
Reheating: Microwave for 10-15 seconds. This brings back the moisture. Don’t overheat or it gets rubbery.
Nutrition Information
I’m not a nutritionist, but here’s the breakdown if you’re tracking. This is per slice (1/10 of the loaf).
| Nutrient | Amount |
|---|---|
| Calories | 220 |
| Protein | 3g |
| Carbs | 35g |
| Fiber | 1g |
| Sugar | 22g |
| Fat | 9g |
| Sodium | 180mg |
What’s Good:
- It’s a single serving, so you control the portion.
- Pumpkin adds some fiber and vitamin A.
- Cost per slice is under $0.50.
What to Know:
- It’s high in sugar due to the glaze and bread.
- Contains gluten and dairy (in the glaze).
- Not a health food, but a budget-friendly treat.
Look, this is comfort food. It’s sweet and rich. It’s not a diet recipe. But it’s way better than buying a slice at a cafe, and it costs a fraction of the price. When I want to make it lighter, I skip the glaze and eat a smaller slice. But usually? I just enjoy it and move on.
Final Thoughts
So that’s my go-to fall pumpkin bread with brown butter maple glaze! I’ve probably talked your ear off at this point, but when you make a recipe this often, you have a lot to say about it.
This has saved me so much money. I used to buy pumpkin bread every fall and spend $30-$40 on it. Now I spend $4 and have enough for weeks. It’s a win-win. It’s my answer to “what’s for snack” when I’m tired, don’t want to cook a big meal, and still want something that tastes really good.
Make it yours! Try different spices, add nuts, or skip the glaze if you’re watching sugar. The best recipes are the ones you adapt to your wallet and your taste.
If you make this, drop a comment and let me know what you think! I love hearing how recipes turn out in your kitchen. And if something doesn’t work, tell me that too—I’m here to help troubleshoot.
Happy cooking! And I hope your kitchen smells half as good as mine does right now.
Frequently Asked Questions
Can I use pumpkin pie filling instead of pure pumpkin?
No, please don’t. Pumpkin pie filling has sugar and spices already added, which will throw off the balance of your bread. You’ll end up with a super sweet, spiced mess. Stick to 100% pure pumpkin puree. It’s cheap and works perfectly.
Why did my bread turn out dense?
Usually, this means you overmixed the batter. Once you add the dry ingredients, mix just until combined. Also, check your baking soda and powder. If they’re old, they won’t leaven the bread properly. And make sure you didn’t pack the flour too tightly into the measuring cup. Spoon it in and level it off.
Can I make this ahead for a party?
Absolutely. Bake the bread a day ahead, wrap it tightly, and store at room temperature. Make the glaze the day you serve it. This actually helps the bread stay moist. Just don’t glaze it until you’re ready to serve, or it’ll get soggy.
Why did my brown butter burn?
It happens to the best of us. Brown butter goes from perfect to burnt in seconds. Keep the heat medium, not high. And watch it constantly. If it smells like burnt toast, toss it and start over. It’s only 3 tablespoons, so it’s not a big waste.
Can I use honey instead of maple syrup?
Yes! Honey works great in the glaze. It has a stronger flavor, so the glaze will taste more like honey than maple. But it’s still delicious. Just be aware that honey can crystallize if it’s cold, so the glaze might get a bit thick. Add a little more milk to thin it out.
How do I store leftover glaze?
You probably won’t have leftover glaze, but if you do, store it in an airtight container in the fridge for up to 3 days. It will harden. Reheat it gently in the microwave or over low heat to soften it up before drizzling.
Can I freeze the bread with the glaze on?
I don’t recommend it. The glaze can get sticky and weird when frozen and thawed. It’s better to freeze the plain bread, then glaze it fresh when you thaw it. It’ll taste much better.
Pin This Recipe!
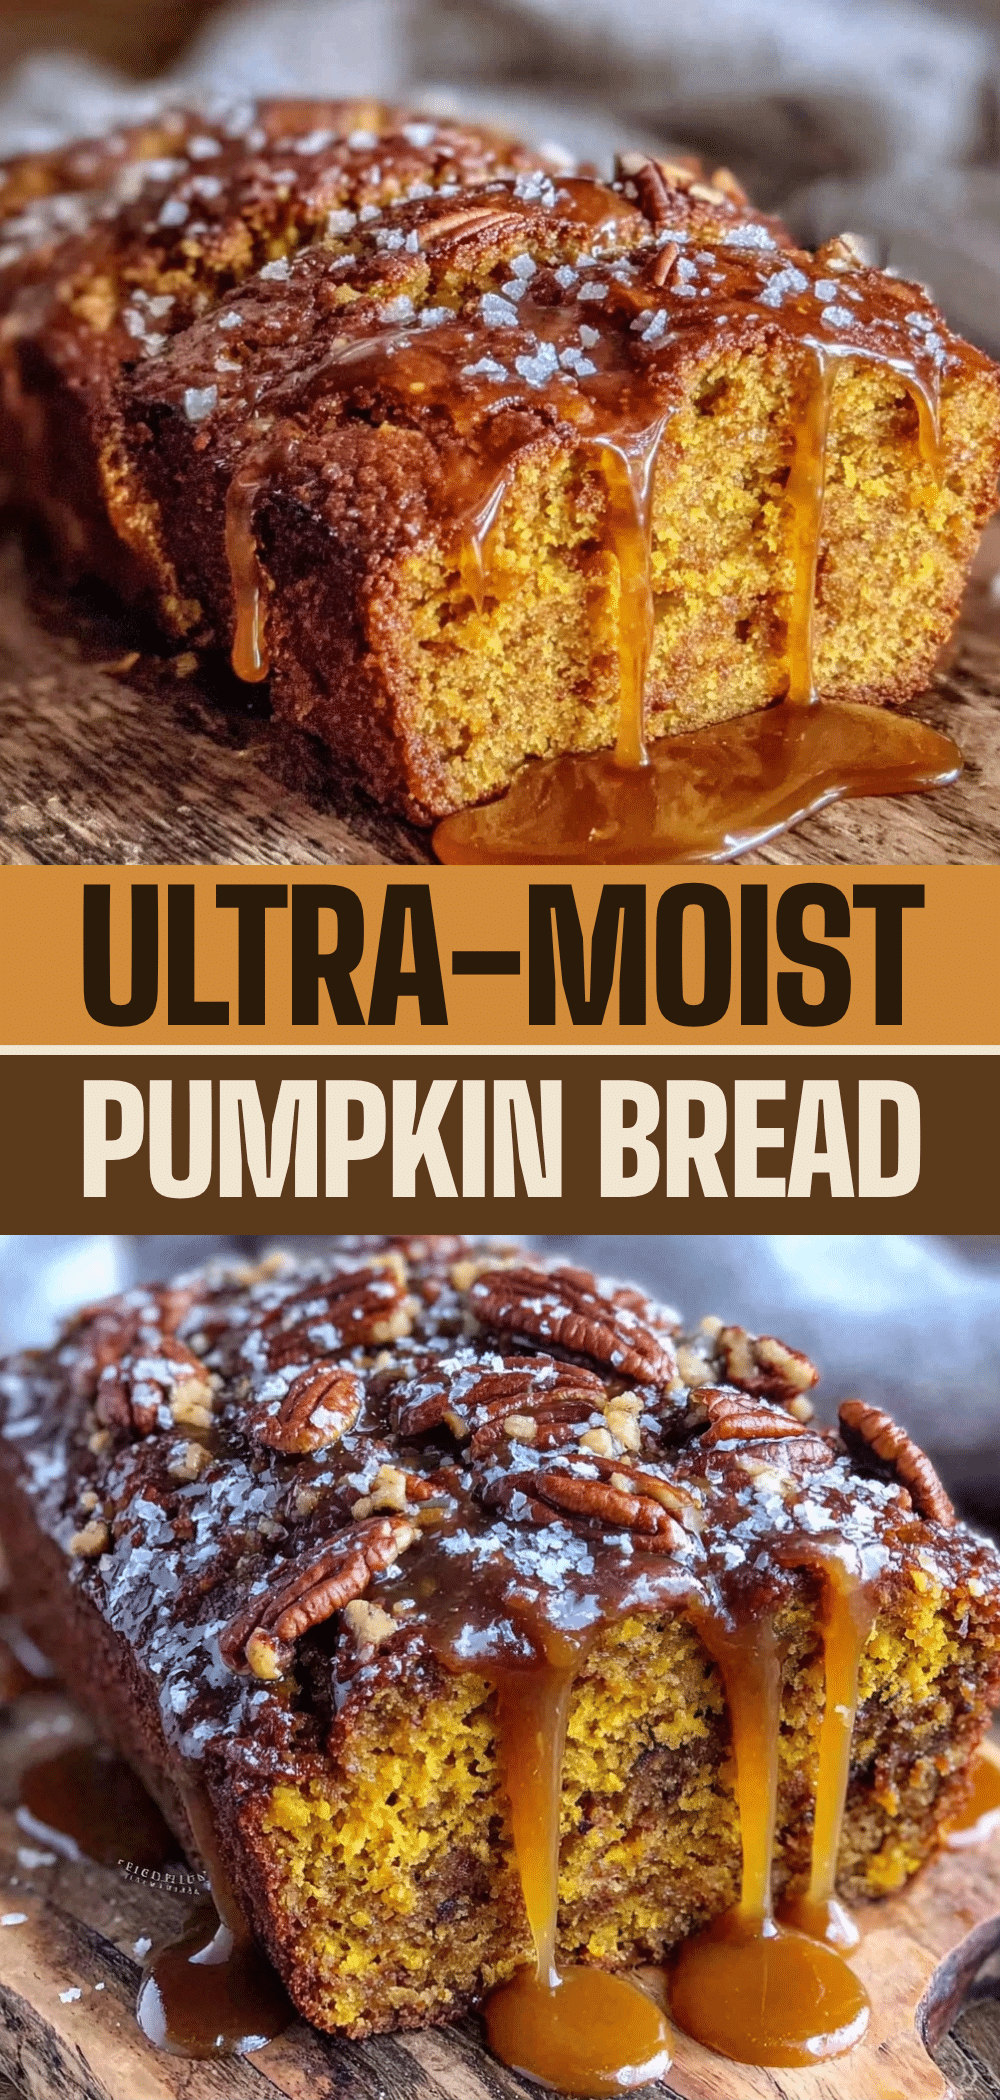
Fall Pumpkin Bread with Brown Butter Maple Glaze: Budget-Friendly
- Total Time: 1 hour 30 minutes
- Yield: 10 servings 1x
Description
A moist, budget-friendly pumpkin bread made with pantry staples and topped with a rich brown butter maple glaze. This single-loaf recipe costs less than $4 and stays fresh for days.
Ingredients
- 2 cups (250g) all-purpose flour
- 1 teaspoon baking soda
- ½ teaspoon baking powder
- ½ teaspoon salt
- 2 teaspoons ground cinnamon
- 1 teaspoon ground ginger
- ¼ teaspoon ground cloves
- 1 cup (245g) 100% pure pumpkin puree
- ½ cup (120ml) vegetable oil
- ¾ cup (150g) granulated sugar
- 1 large egg
- 1 teaspoon vanilla extract
- 3 tablespoons (42g) unsalted butter (for glaze)
- 1 cup (120g) confectioners’ sugar (for glaze)
- 2–3 tablespoons pure maple syrup (for glaze)
- 1–2 tablespoons milk (for glaze)
- a pinch of salt (for glaze)
Instructions
- Preheat oven to 350°F (175°C). Grease a 9×5 inch loaf pan and line the bottom with parchment paper.
- In a medium bowl, whisk together flour, baking soda, baking powder, salt, cinnamon, ginger, and cloves until no lumps remain.
- In a large bowl, whisk vegetable oil, sugar, egg, vanilla, and pumpkin puree until smooth.
- Add dry ingredients to wet ingredients and gently fold with a spatula until just combined. Do not overmix.
- Pour batter into prepared pan and smooth the top.
- Bake for 50-60 minutes. If the top browns too quickly, tent with foil. Test with a toothpick; it should come out clean.
- Cool in the pan for 10 minutes, then transfer to a cooling rack to cool completely.
- In a small saucepan over medium heat, melt butter until it turns amber and smells nutty. Remove from heat immediately.
- Whisk warm brown butter, confectioners’ sugar, maple syrup, milk, and a pinch of salt until smooth and drizzle-able.
- Drizzle glaze over completely cooled bread and let set for 10 minutes before slicing.
Notes
Ensure baking soda and powder are fresh for proper rising. Drain excess water from canned pumpkin if present. Brown butter carefully to avoid burning. Store in an airtight container at room temperature for up to 4 days or freeze for up to 3 months. Do not freeze with glaze on.
- Prep Time: 15 minutes
- Cook Time: 60 minutes
- Category: Breakfast
- Cuisine: American
Nutrition
- Serving Size: 1 slice (1/10 of loa
- Calories: 220
- Sugar: 22
- Sodium: 180
- Fat: 9
- Saturated Fat: 3
- Carbohydrates: 35
- Fiber: 1
- Protein: 3
Keywords: pumpkin bread, brown butter, maple glaze, budget baking, fall recipes, easy bread, single serving


