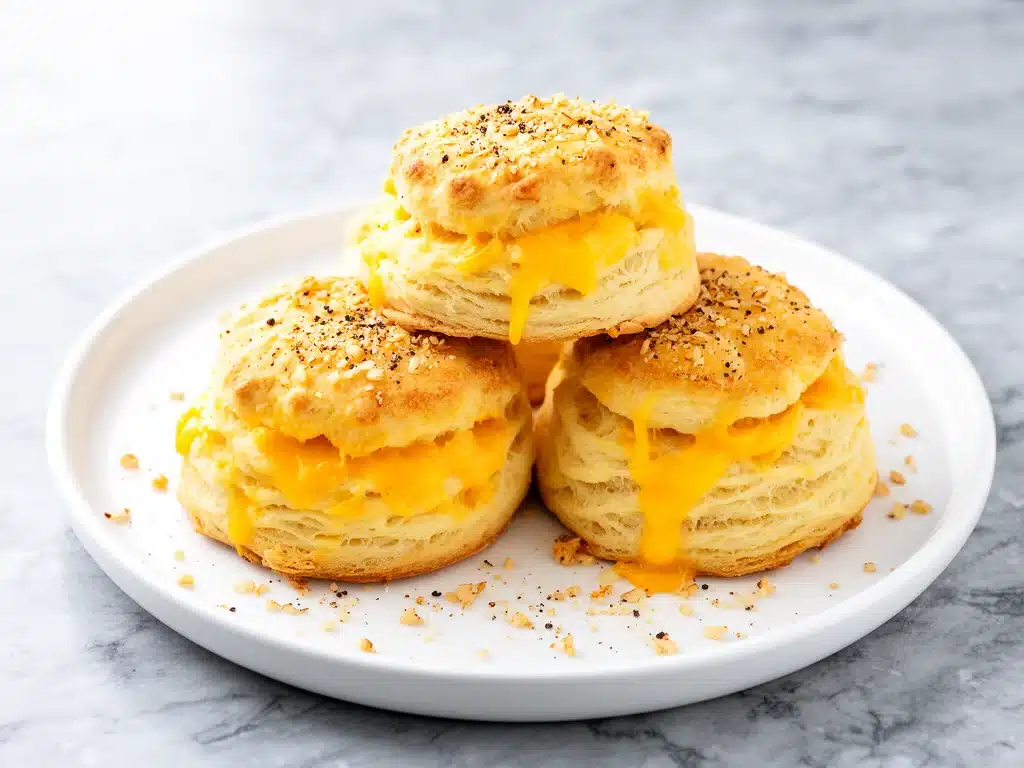
I still remember the first time I made these soft cheddar garlic biscuits. It was a Tuesday in November, the kind of night where the wind howls against the windows and the house feels just a little too quiet. I had just come back from a long day at work, my feet were throbbing, and the last thing I wanted to do was stand over a stove. But I wanted dinner. I wanted something warm, something that smelled like comfort, and something that didn’t involve cleaning up a takeout container.
I found a basic biscuit recipe online, tweaked it with whatever I had in the fridge—sharp cheddar, a generous amount of garlic powder, and a secret ingredient I’d picked up from my aunt years ago—and threw them in the oven. Fifteen minutes later, the entire house smelled like a bakery. My kids, who had been arguing over video games in the living room, suddenly appeared in the kitchen. Not because I called them, but because the scent pulled them in like a magnet.
They tore into them while they were still hot, cheese stretching between their fingers, garlic butter dripping onto the counter. My husband walked in, saw the mess, saw the empty plate, and asked, “What is that magic?” I told him it was just biscuits. He didn’t believe me. He went back for seconds. Then thirds.
That was three years ago. These soft cheddar garlic biscuits have been on our dinner table at least twice a week since then. They’ve saved us on busy weeknights, paired with everything from cheesy taco pasta to simple salads. They’ve been served at potlucks where people ask for the recipe, and they’ve been the star of lazy Sunday breakfasts. But mostly, they’ve just been the reliable, delicious friend that’s always there when I need them.
If you’ve ever struggled with dry, tough biscuits that crack when you try to butter them, this recipe is for you. I’ve tested this method so many times—sometimes failing, sometimes succeeding—that I can tell you exactly why these work. It’s not about fancy techniques or expensive ingredients. It’s about understanding the science of butter, the importance of cold dough, and not overworking the batter. Let me show you how to make biscuits that are actually soft, fluffy, and packed with cheesy, garlicky flavor.
Why You’ll Love These Soft Cheddar Garlic Biscuits
There are a lot of biscuit recipes out there. Some are flaky, some are dense, some are sweet. But these soft cheddar garlic biscuits hit a sweet spot that’s hard to find. Here’s why they’ve earned a permanent spot in my kitchen routine:
Actually Soft, Not Dry — I’m not being dramatic when I say these are the softest biscuits you’ll ever make. The buttermilk and the extra butter in the dough keep them moist for days. I’ve kept leftovers in an airtight container for three days, and they’re still soft when reheated. No cardboard texture here.
Ready in 20 Minutes — From mixing to baking, this recipe takes about 20 minutes. I know what you’re thinking: “Biscuits take forever.” They don’t if you use self-rising flour or have your baking powder ready. I make these on weeknights when I get home at 6:30 and need dinner on the table by 7:00. They’re faster than ordering pizza.
Pantry-Friendly Ingredients — You probably have most of this already. Flour, butter, cheese, garlic, milk (or buttermilk). Nothing exotic. Nothing hard to find. I keep a block of sharp cheddar and a tube of refrigerated biscuits in my fridge at all times, just in case I get hungry. But this homemade version is way better.
Kid-Approved Flavor — My pickiest eater, who usually only eats chicken nuggets and fries, loves these. The garlic isn’t overpowering; it’s savory and rich. The cheese is visible in every bite. They’re like little pockets of joy. I’ve served them to friends with kids, and every parent has thanked me for making their kids happy.
Perfect Pairing — These biscuits are versatile. They go with soup, salad, steak, or just plain butter. I’ve served them with blistered shishito peppers as an appetizer, and they were a hit. They’re also great for breakfast with scrambled eggs. Basically, if it’s food, these biscuits go with it.
This recipe has changed how I think about quick dinners. It’s not just about feeding people; it’s about making them feel cared for. When you pull a tray of golden, cheesy, garlicky biscuits out of the oven, you’re not just serving food. You’re serving warmth. And that’s what matters.
Ingredients You’ll Need
Here’s the best part: this recipe is simple. You don’t need a stand mixer. You don’t need a pastry cutter. You just need a few basic ingredients and about 10 minutes of hands-on time. I’m particular about a few things here, so pay attention to the details.
For the Biscuit Dough
Self-Rising Flour (3 cups / 375g) — This is the key to easy biscuits. Self-rising flour already has baking powder and salt mixed in. If you can’t find it, use all-purpose flour plus 1 ½ teaspoons baking powder and ½ teaspoon salt per cup. But honestly, self-rising saves time and ensures consistent rise. I use Gold Medal brand; it’s reliable.
Unsalted Butter (½ cup / 113g, cold and cubed) — Cold butter is non-negotiable. Cut it into small cubes and keep it in the fridge until the last second. The cold butter creates steam in the oven, which makes the biscuits fluffy. If your butter is soft, your biscuits will be dense. I learned this the hard way.
Sharp Cheddar Cheese (1 ½ cups / 150g, freshly grated) — Buy a block and grate it yourself. Pre-shredded cheese has anti-caking agents that prevent it from melting properly. Sharp cheddar has more flavor than mild, so you taste the cheese in every bite. I use Cabot sharp cheddar; it’s my favorite.
Garlic Powder (1 teaspoon) — Not fresh garlic. Fresh garlic can burn or make the biscuits soggy. Garlic powder gives a consistent, savory flavor that infuses the dough. I use McCormick; it’s fresh and potent.
Buttermilk (1 cup / 240ml, cold) — Buttermilk adds tang and tenderness. If you don’t have buttermilk, make a substitute: add 1 tablespoon of lemon juice or white vinegar to a measuring cup, then fill with regular milk. Let it sit for 5 minutes. It works almost as well.
Green Onions (2 stalks, finely chopped) — Optional, but I highly recommend it. They add a fresh, oniony bite that balances the richness of the cheese and butter. I chop them so finely that they disappear into the dough, leaving just the flavor.
For the Garlic Butter Topping
Unsalted Butter (¼ cup / 57g, melted) — This is brushed on top after baking. It adds richness and helps the garlic powder stick.
Garlic Powder (½ teaspoon) — More garlic flavor on the outside. Don’t skip this.
Parsley Flakes (1 teaspoon, dried) — Adds a pop of color and a hint of freshness. It’s not essential, but it makes the biscuits look professional.
Salt (a pinch, optional) — Taste the butter first. If your cheese is salty, you might not need extra salt.
Pro Tip: Keep everything cold until it hits the oven. I even chill my mixing bowl for 10 minutes before starting. It sounds extreme, but it makes a difference in the texture.
Equipment Needed
You don’t need fancy equipment for this. Here’s what I actually use:
Mixing Bowl — A large bowl, about 4-quart size. I use a glass bowl because I can see the dough mixing. Plastic works too.
Pastry Blender or Fork — To cut the butter into the flour. A pastry blender is faster, but a fork works fine. I use a fork because it’s easier to clean.
Baking Sheet — A standard 13×9-inch sheet. Line it with parchment paper for easy cleanup. I’ve burned biscuits on bare pans before; parchment saves lives.
Biscuit Cutter — A 2-inch round cutter. If you don’t have one, use a glass. Don’t use a knife; it seals the edges and stops the rise.
Pastry Brush — For brushing the garlic butter on top. A silicone brush is easier to clean than bristle brushes.
Rolling Pin — Optional. If you’re cutting by hand, you might need to roll the dough slightly. But honestly, I just pat it out with my hands. It’s faster and less messy.
Measuring Cups and Spoons — Standard stuff. I use the nested set for dry ingredients and the liquid measuring cup for buttermilk.
Microplane Grater — For the cheese. It grates finely, so it mixes evenly into the dough. A box grater works too, but it takes longer.
That’s it. Nothing fancy. If you have a kitchen, you have what you need.
How to Make It: Step-by-Step
Alright, let’s make these soft cheddar garlic biscuits. I’m walking you through exactly how I do it, including the little tricks I’ve picked up over the years.
Step 1: Prep Your Ingredients (5 minutes)
Before you start, make sure your butter is cold. Cut it into small cubes and put it back in the fridge. Grate your cheese. Chop your green onions. Measure out your buttermilk. I know it seems fussy, but it makes the actual mixing way less stressful. Once you start combining ingredients, things move fast.
Step 2: Mix the Dry Ingredients (2 minutes)
In a large bowl, whisk together the self-rising flour, garlic powder, and a pinch of salt if your flour doesn’t have enough. Whisking ensures the baking powder is evenly distributed, which means consistent rise. Don’t skip this step.
Step 3: Cut in the Butter (3 minutes)
Add the cold, cubed butter to the flour mixture. Use a pastry blender or a fork to cut the butter into the flour. You’re looking for pea-sized pieces. Some larger chunks are okay—they create flakiness. Don’t overwork it. You should still see distinct pieces of butter. This is crucial for fluffy biscuits.
Step 4: Add the Wet Ingredients (2 minutes)
Pour in the cold buttermilk and add the grated cheddar and chopped green onions. Stir gently with a wooden spoon or spatula. Just until the dough comes together. It will look shaggy and messy. That’s okay. Do not overmix. Overmixing develops gluten, which makes biscuits tough. Stop when there are no dry patches left.
Step 5: Shape the Dough (3 minutes)
Turn the dough out onto a lightly floured surface. Pat it out with your hands into a rectangle about ¾-inch thick. Don’t roll it with a pin; the pressure from a pin can compress the dough. Fold the dough in half, then pat it out again. This creates layers. Do this twice. Then, cut out circles with a 2-inch cutter. Press straight down; don’t twist. Twist seals the edges.
Step 6: Bake (15 minutes)
Place the biscuits on a parchment-lined baking sheet, about 1 inch apart. Bake in a preheated 425°F (220°C) oven for 12-15 minutes. They’re done when they’re golden brown on top. If they’re browning too fast, cover them with foil. If they’re pale, give them 2 more minutes.
Step 7: Brush with Garlic Butter (1 minute)
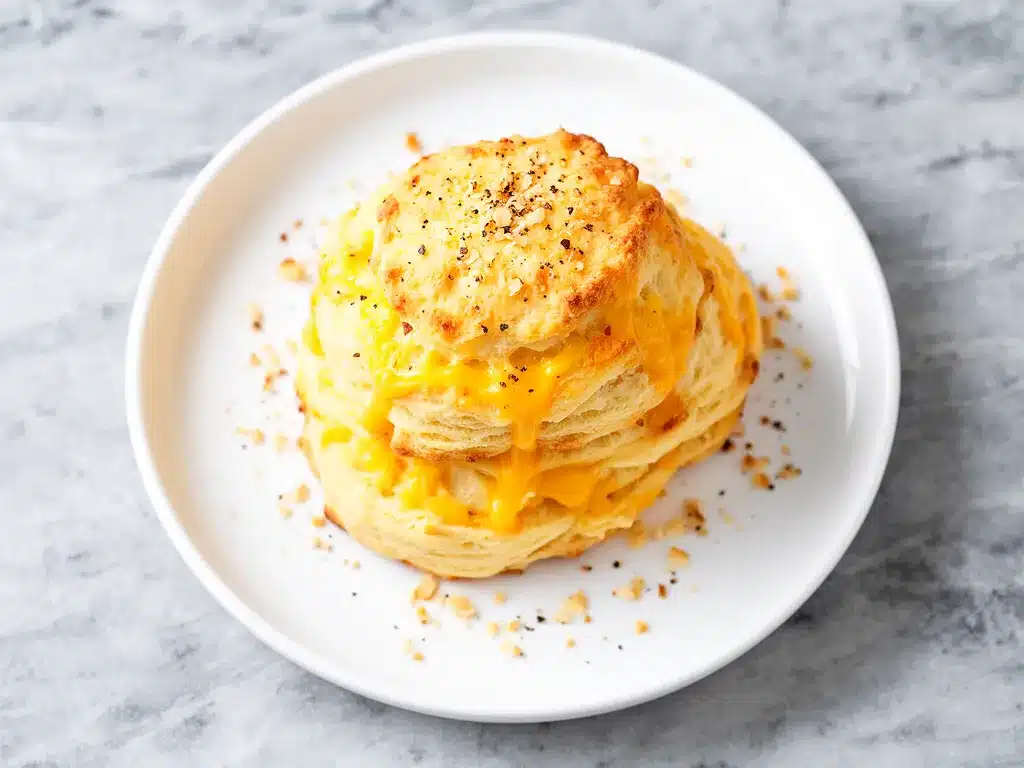
While the biscuits bake, melt the ¼ cup of butter and mix in the garlic powder and parsley. As soon as the biscuits come out of the oven, brush them generously with the garlic butter. The heat will melt the butter into the top, creating a savory, aromatic crust.
Visual Cues: The biscuits should look puffy and golden. They should pull away slightly from the edges of the pan. The garlic butter should sizzle when it hits the hot biscuit. If they’re pale, they need more time. If they’re dark brown, they’re done.
Total Time: About 20 minutes (5 minutes prep, 15 minutes bake).
Expert Tips & Tricks
Here’s everything I’ve learned from making this recipe dozens of times. These tips will save you from my mistakes.
Keep Everything Cold
This is the #1 rule. Cold butter, cold buttermilk, cold bowl. If your butter melts before it hits the oven, your biscuits will be flat and dense. I keep my butter in the freezer for 10 minutes before cubing it. It stays cold longer.
Don’t Overmix
I know it’s tempting to stir until it’s smooth. Don’t. The dough should look shaggy and uneven. Overmixing makes tough biscuits. Stir just until combined. It’s okay if it looks messy.
Use Sharp Cheddar
Mild cheddar is too subtle. Sharp cheddar has a stronger flavor that stands up to the garlic and butter. I’ve tried both, and sharp is always better. If you can’t find sharp, use a mix of sharp and extra-sharp.
Pat, Don’t Roll
Rolling pins compress the dough. Patting it with your hands preserves the air pockets. If you must roll, use a very light touch. But honestly, patting is easier and faster.
Brush Immediately
Don’t let the biscuits cool before brushing. The heat helps the butter absorb. If you wait, the butter sits on top and doesn’t penetrate. Brush while they’re still hot.
Common Mistakes:
- Biscuits are flat: Butter was too warm, or you twisted the cutter. Use cold butter and press straight down.
- Biscuits are dry: Overbaked. Check them at 12 minutes. They continue cooking on the pan.
- Biscuits are tough: Overmixed. Stir gently and stop early.
Variations & Substitutions
Once you’ve nailed the basic version, here’s how you can mix it up. I’ve tried all of these.
Jalapeño Cheddar
Add 1 diced jalapeño (seeds removed for less heat) and use pepper jack cheese instead of cheddar. Spicy and cheesy. Great with taco pasta.
Herb Garlic
Skip the cheese and add 1 tablespoon of dried Italian herbs or fresh rosemary. Lighter and more herbaceous.
Bacon Cheddar
Add ½ cup of cooked, crumbled bacon to the dough. Smoky and savory. My husband’s favorite.
Gluten-Free
Use a 1:1 gluten-free flour blend. Make sure it contains xanthan gum. The texture is slightly different but still good.
Dairy-Free
Use dairy-free butter and dairy-free cheddar alternative. The flavor is different, but it works in a pinch.
Serving & Storage
How to Serve:
I serve these warm, straight from the oven. They’re perfect with soup, salad, or as a side to any meal. I’ve served them with creamy sun-dried tomato chicken and they were amazing. They’re also great for breakfast with eggs.
Leftovers:
Store in an airtight container at room temperature for up to 2 days. Or in the fridge for up to 5 days. Reheat in the microwave for 30 seconds or in the oven at 350°F for 5 minutes. They stay soft if stored properly.
Freezing:
You can freeze unbaked biscuits. Cut them out, freeze on a baking sheet, then transfer to a bag. Bake from frozen, adding 2-3 minutes to the bake time. Or bake first, then freeze. Reheat in the oven.
Nutrition Information
I’m not a nutritionist, but here’s the breakdown if you’re tracking. Per biscuit (makes 12):
| Nutrient | Amount |
|---|---|
| Calories | 220 |
| Protein | 6g |
| Carbs | 22g |
| Fat | 12g |
| Sodium | 350mg |
This is comfort food. It’s not a diet recipe. But it’s better than store-bought, and you know exactly what’s in it. When I want to make it lighter, I use less butter and more herbs. But usually? I just enjoy a couple and move on.
Final Thoughts
So that’s my go-to soft cheddar garlic biscuit recipe. I’ve probably talked your ear off, but when you make a recipe this often, you have a lot to say about it. These biscuits have saved weeknight dinners, impressed guests, and made my kids happy. They’re my answer to “what’s for dinner” when I’m tired and don’t want takeout.
Make it yours! Try different cheeses, add bacon, or skip the garlic if you prefer. The best recipes are the ones you adapt. If you make this, drop a comment and let me know what you think. I love hearing how recipes turn out in your kitchen.
Happy baking! And I hope your kitchen smells half as good as mine does right now.
Frequently Asked Questions
Can I use all-purpose flour instead of self-rising?
Yes, but you need to add leavening. For every cup of all-purpose flour, add 1 ½ teaspoons baking powder and ½ teaspoon salt. Whisk it in well. Self-rising is easier, but all-purpose works if you’re careful.
Why are my biscuits dense?
Usually, it’s because the butter was too warm or you overmixed the dough. Keep butter cold, and stir just until combined. Don’t knead the dough.
Can I make these ahead?
You can mix the dough and refrigerate it for up to 24 hours. Let it come to room temperature for 10 minutes before baking. Or freeze unbaked biscuits and bake from frozen.
How do I reheat leftovers?
Microwave for 30 seconds. Or bake at 350°F for 5 minutes. They should be soft and warm. If they’re dry, brush with a little melted butter before reheating.
Can I use fresh garlic instead of powder?
You can, but it can burn or make the biscuits soggy. If you use fresh, mince it very finely and use less (about 1 clove). But powder is more consistent and safer.
Do I need to brush the garlic butter on?
It’s optional, but highly recommended. It adds flavor and makes the biscuits look professional. If you skip it, they’re still good, but less savory.
Can I double the recipe?
Yes, double everything. Use a larger bowl and two baking sheets. Bake in batches if needed. Cooking time stays the same.
Pin This Recipe!


Soft Cheddar Garlic Biscuits
- Total Time: 20 minutes
- Yield: 12 servings 1x
Description
These soft cheddar garlic biscuits are easy to make, ready in 20 minutes, and packed with cheesy, garlicky flavor. They are fluffy, moist, and perfect for weeknight dinners or breakfast.
Ingredients
- 3 cups (375g) self-rising flour
- 1/2 cup (113g) unsalted butter, cold and cubed
- 1 1/2 cups (150g) sharp cheddar cheese, freshly grated
- 1 teaspoon garlic powder
- 1 cup (240ml) buttermilk, cold
- 2 stalks green onions, finely chopped
- 1/4 cup (57g) unsalted butter, melted (for topping)
- 1/2 teaspoon garlic powder (for topping)
- 1 teaspoon parsley flakes, dried
- Pinch of salt (optional)
Instructions
- Preheat oven to 425°F (220°C). Line a 13×9-inch baking sheet with parchment paper.
- In a large bowl, whisk together the self-rising flour, 1 teaspoon garlic powder, and a pinch of salt.
- Add the cold, cubed butter to the flour mixture. Use a pastry blender or fork to cut the butter into the flour until pea-sized pieces remain.
- Pour in the cold buttermilk, grated cheddar cheese, and chopped green onions. Stir gently with a wooden spoon or spatula just until the dough comes together. Do not overmix.
- Turn the dough out onto a lightly floured surface. Pat it into a rectangle about 3/4-inch thick. Fold the dough in half, pat it out again, and repeat once more to create layers.
- Cut out circles using a 2-inch biscuit cutter. Press straight down without twisting to ensure the biscuits rise properly.
- Place biscuits on the prepared baking sheet, about 1 inch apart.
- Bake for 12-15 minutes until golden brown on top.
- While biscuits bake, mix the melted 1/4 cup butter with 1/2 teaspoon garlic powder and parsley flakes.
- Immediately upon removing biscuits from the oven, brush them generously with the garlic butter mixture.
- Serve warm.
Notes
Keep all ingredients cold until baking to ensure fluffy biscuits. Do not overmix the dough. If you don’t have self-rising flour, use all-purpose flour with 1 1/2 teaspoons baking powder and 1/2 teaspoon salt per cup. Leftovers can be stored in an airtight container for up to 2 days at room temperature or 5 days in the fridge.
- Prep Time: 5 minutes
- Cook Time: 15 minutes
- Category: Side Dish
- Cuisine: American
Nutrition
- Serving Size: 1 biscuit
- Calories: 220
- Sugar: 2
- Sodium: 350
- Fat: 12
- Saturated Fat: 7
- Carbohydrates: 22
- Fiber: 1
- Protein: 6
Keywords: soft biscuits, cheddar garlic biscuits, homemade biscuits, quick dinner, comfort food, easy baking


