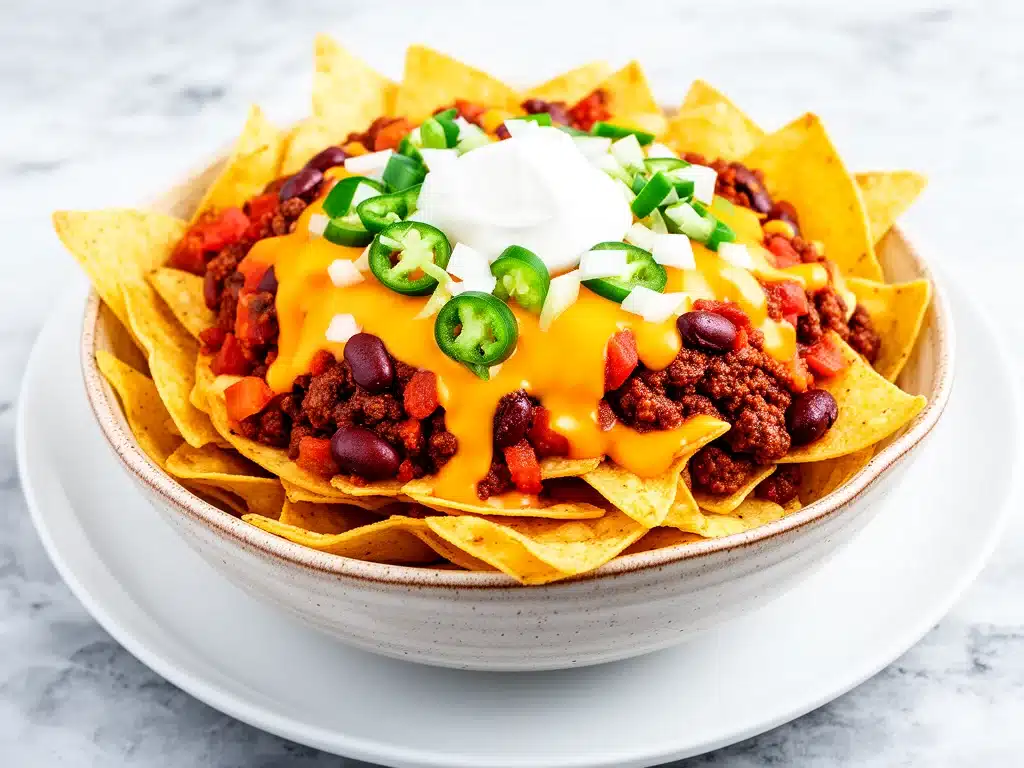
I still remember the first time I tried to make “supreme” nachos for a Super Bowl party. I was twenty-two, living in my first apartment with a tiny oven that barely fit a baking sheet, and I thought I had it all figured out. I piled high a sheet pan with tortilla chips, dolloped on some canned chili, and showered it with a bag of cheap shredded cheese. I stuck it under the broiler for three minutes, pulled it out, and watched in horror as the chips turned into soggy, greasy cardboard. The cheese hadn’t melted; it had just congealed into little white rocks. My friends ate three chips each, politely, and then went home to order pizza.
It was a disaster. But it was also the best thing that could have happened to my cooking. That soggy disaster taught me that nachos aren’t just about throwing ingredients on a chip. They’re about engineering crunch, balancing heat, and understanding that cheese has a mind of its own.
Fast forward to today, and my Loaded Chili Cheese Nachos Supreme are legendary in my friend group. I’ve tested this recipe at least a dozen times—adjusting the chili thickness, finding the perfect cheese blend, and mastering the two-stage bake method—so that when the game starts, your kitchen smells like heaven and your guests are fighting over the last chip. These aren’t just snacks; they’re the centerpiece of the party. They’re spicy, creamy, crunchy, and absolutely addictive. If you’re looking for a way to win the game day snack war, this is it. Trust me, no one is thinking about pizza when this comes out of the oven.
Why You’ll Love This Recipe
There are a lot of game day snacks out there. You’ve got your classic wings, your buffalo dip, your humble potato skins. But there is something primal and satisfying about nachos that hits different. Here’s why this specific recipe has earned a permanent spot in my rotation, and why it will probably become yours too.
It’s Actually Crunchy — I know, I know, that sounds basic. But most nacho recipes fail here. The chips get soggy from the chili or the cheese. My two-stage baking method ensures the chips stay crisp while the toppings melt. I’ve made this for parties of 20 and 40 people, and the bottom layer never turned to mush. It’s a game-changer.
The Cheese Sauce Actually Melts — We’ve all been there: biting into a nacho and getting a chunk of unmelted cheddar that snaps like plastic. This recipe uses a blend of sharp cheddar, Monterey Jack, and a touch of pepper jack. Plus, the secret ingredient? A little cornstarch tossed with the shredded cheese. It helps the cheese melt evenly and stay creamy instead of separating into oil and curds. Your guests won’t believe how smooth it is.
It Feeds a Crowd for Pennies — Let’s talk budget. A basket of fries at a stadium costs $12. A platter of these nachos costs about $15 to make and feeds 10-12 people easily. That’s less than a dollar per person for a gourmet-style snack. I made this for my husband’s college buddies last year, and they asked for the recipe instead of the bill. That’s the power of good food.
It’s Customizable Chaos — One person wants it extra spicy. Another wants it mild with extra guac. This recipe is built to be modular. You can build one big tray or several smaller ones, letting everyone grab what they want. It’s interactive, fun, and reduces the “what do you want for dinner?” argument because everyone is too busy eating to argue.
This is the recipe I make when I want to impress without spending hours in the kitchen. It’s messy, it’s delicious, and it brings people together. Literally. I’ve seen friends sit on the floor around the coffee table just to get a good angle on the tray.
Ingredients You’ll Need
Here’s the thing about nachos: the quality of your ingredients matters more than you think. You don’t need fancy stuff, but you do need *good* stuff. I’m particular about three things here: the chips, the chili, and the cheese. Get these right, and you’re golden.
The Base:
Tortilla Chips (2 large bags / about 1.5 lbs) — Don’t use the thin, fragile kind from the snack aisle. You need sturdy, thick-cut restaurant-style chips. I swear by Utz or Tostitos Scoops, but any sturdy yellow corn chip works. If you want to go the extra mile, check out my cinnamon sugar tortilla chips recipe to make your own from scratch—they’re crispier and hold toppings better. But honestly? Store-bought is fine if they’re fresh.
The Chili:
Ground Beef (1 lb / 450g) — 80/20 lean-to-fat ratio is perfect. You want some fat for flavor. Lean beef makes dry chili. Brown it well, then drain most of the grease, leaving about a tablespoon.
Chili Powder (2 tablespoons) — This is the backbone. Use a good quality blend like McCormick or Badia. If you have a local brand, even better. Don’t skimp.
Cumin (1 teaspoon) — Adds that earthy, warm depth. Essential.
Garlic Powder & Onion Powder (1 teaspoon each) — For that savory punch without chunks of raw allium.
Tomato Sauce (1 can / 8 oz) — Not diced tomatoes. You want a smooth base for the chili. Diced tomatoes make the chili watery and chunky in a bad way.
Black Beans (1 can / 15 oz, drained) — Adds heartiness and texture. Rinse them well so they don’t add slime.
The Cheese Blend:
Sharp Cheddar Cheese (2 cups / shredded) — Buy a block and grate it yourself. Pre-shredded cheese has cellulose (anti-caking agent) that prevents melting. I learned this the hard way with a grainy, broken sauce. Grate your own—it takes 3 minutes.
Monterey Jack Cheese (1 cup / shredded) — This is your melting cheese. It’s mild and creamy. It balances the sharpness of the cheddar.
Pepper Jack Cheese (½ cup / shredded) — For a little kick. If you don’t like spice, swap this for extra Monterey Jack.
Cornstarch (1 tablespoon) — This is the secret weapon. Toss your shredded cheese with this before adding it to the nachos. It stabilizes the cheese and helps it melt into a sauce rather than an oil slick.
The Toppings (The “Supreme” Part):
Green Onions (4 stalks, sliced) — For fresh crunch and color.
Jalapeños (½ cup, sliced fresh or pickled) — Fresh for heat, pickled for tang. I use a mix.
Salsa (1 cup) — Use a medium salsa. Pico de gallo is great, but a smoother salsa distributes better.
Black Olives (½ cup, sliced) — Classic. If you hate olives, skip them, but they add a nice briny contrast.
Sour Cream (½ cup) — For cooling contrast. Add this *after* baking.
Cilantro (½ cup, chopped) — Freshness is key. Don’t skip it.
Equipment Needed
You don’t need fancy equipment for this. Here’s what I actually use. If you don’t have everything, don’t worry—adaptations are listed.
Large Rimmed Baking Sheets (2 sheets) — This is crucial. Do not try to make this on one sheet. You need two sheets so the chips are in a single layer. If you pile them up, the bottom ones get soggy. I use two half-sheet pans. If you only have one large sheet pan, you can do it, but you’ll need to work in smaller batches or accept some soggy chips.
Medium Saucepan — For making the chili. A 3-quart pot is perfect.
Large Skillet — For browning the beef. A 12-inch skillet works well.
Box Grater — For grating your own cheese. Yes, it’s more work, but the difference in melt quality is huge.
Colander — For draining beans and rinsing them.
Spatula — A sturdy silicone or metal spatula for spreading the chips.
Optional but Nice:
Cooling Rack — If you’re feeling fancy, you can bake the chips on a rack over a sheet pan to ensure even crisping, but honestly, just using two sheets is easier and works fine.
How to Make It: Step-by-Step
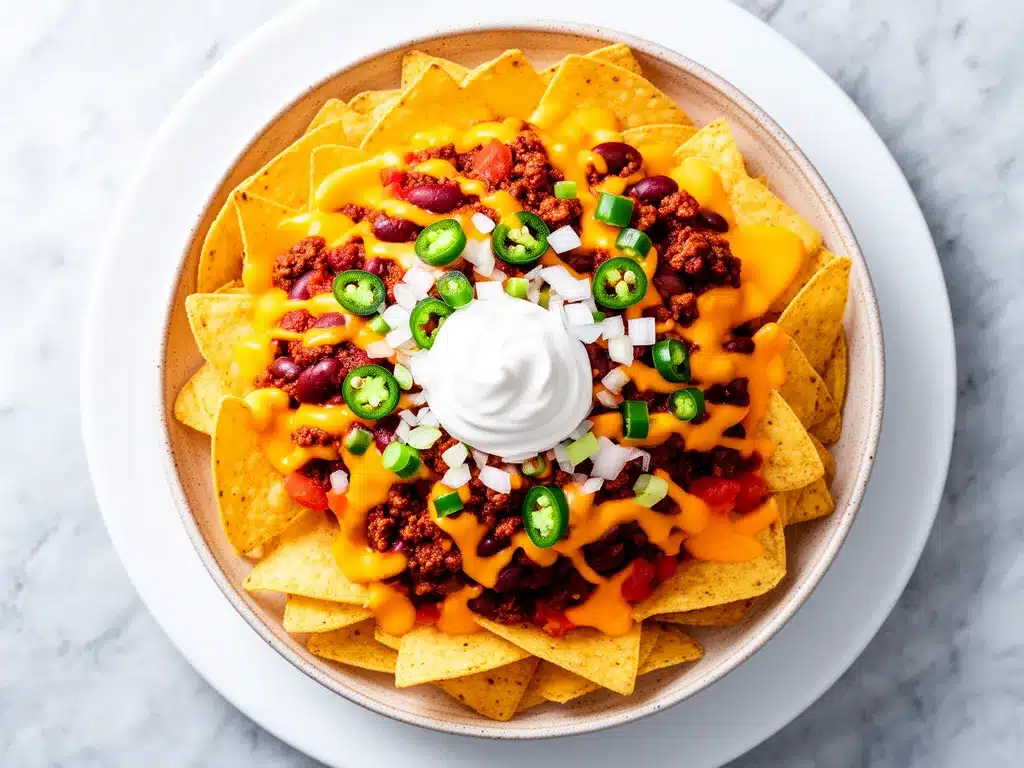
Alright, let’s make this! I’m walking you through exactly how I do it, including the little tricks I’ve picked up over the years. This takes about 45 minutes total, but most of that is passive.
Step 1: Make the Chili (15 minutes)
Start with the chili. Heat your large skillet over medium-high heat. Add the ground beef. Break it up with a wooden spoon as it cooks. You want it browned and crumbly, not steaming. This takes about 8-10 minutes. Once browned, drain the excess grease, leaving about a tablespoon in the pan for flavor.
Add the chili powder, cumin, garlic powder, and onion powder. Stir constantly for 1 minute to toast the spices. This releases their essential oils and makes the flavor pop. Pour in the tomato sauce and drained black beans. Stir to combine. Reduce heat to low and let it simmer for 10 minutes. The chili should be thick, not watery. If it’s too runny, simmer longer. If it’s too thick, add a splash of water. Taste and adjust salt. Set aside.
Step 2: Prep the Cheese (5 minutes)
While the chili simmers, grate your cheeses. Combine the sharp cheddar, Monterey Jack, and Pepper Jack in a bowl. Sprinkle the cornstarch over the cheese and toss gently until every shred is lightly coated. This step is non-negotiable for smooth melting. Trust me.
Step 3: The First Bake (10 minutes)
Preheat your oven to 375°F (190°C). Line your two baking sheets with parchment paper or foil for easy cleanup. Spread the tortilla chips in a single, even layer on both sheets. Don’t overlap them too much.
Divide the cheese blend evenly between the two sheets, sprinkling it over the chips. You want good coverage, but don’t drown them. Bake for 5-7 minutes, just until the cheese is mostly melted and bubbly. The chips should still be pale, not browned yet. Remove from the oven.
Step 4: Add the Chili and Second Bake (5 minutes)
Now, spoon the warm chili over the cheesy chips. Use a ladle or a large spoon, and try to distribute it evenly. You want every chip to have a chance to get some chili. Don’t worry if some chips get more than others—that’s the fun part.
Return the sheets to the oven and bake for another 3-5 minutes. You’re looking for the chips to be golden brown and crispy at the edges, and the chili to be hot throughout. Watch closely! The edges of the chips can burn quickly.
Step 5: The Fresh Toppings (5 minutes)
Remove the nachos from the oven. Let them sit for 2 minutes to settle. Now, add the fresh toppings. Sprinkle with sliced jalapeños, black olives, and green onions. Drizzle with salsa. Do *not* add the sour cream or cilantro yet—they’ll wilt or melt if you put them in the oven.
Bring the trays to the table immediately. Garnish with sour cream dollops and fresh cilantro right before serving. This is your moment. Take a photo (okay, maybe one), then dig in.
Expert Tips & Tricks
Here’s everything I’ve learned from making this dozens of times. These tips will save you from my mistakes.
Don’t Overcrowd the Pan
This is the #1 rule. If you pile chips on top of each other, the bottom ones steam instead of crisp. Use two pans. If you only have one, make two batches. It’s worth it.
Keep the Chili Thick
Watery chili is the enemy of crunchy nachos. Simmer your chili until it’s thick. If you’re using canned chili, drain it in a colander and press out the excess liquid with a spoon. I learned this after one disastrous party where the chips turned to soup.
Grate Your Own Cheese
I cannot stress this enough. Pre-shredded cheese contains potato starch and cellulose to prevent clumping, which stops it from melting smoothly. Grate a block of cheddar and Monterey Jack. It takes 3 minutes and makes a world of difference.
The Cornstarch Secret
Tossing your shredded cheese with cornstarch helps it melt into a creamy sauce rather than separating into oil and solids. It’s a trick I learned from professional chefs, and it works every time.
Add Sour Cream Last
If you bake the sour cream, it breaks and becomes grainy. Add it cold, right before serving. It provides a cool, creamy contrast to the hot, spicy nachos.
Common Mistakes (and how to avoid them):
Mistake: Soggy Chips
Fix: Your chili was too wet, or you overcrowded the pan. Ensure chili is thick and chips are in a single layer.
Mistake: Burnt Edges
Fix: Your oven was too hot, or you baked too long. Check nachos at the 3-minute mark of the second bake. If edges are browning too fast, cover with foil.
Mistake: Greasy Nachos
Fix: You didn’t drain the beef or beans well. Drain beef thoroughly and rinse beans. Also, use a paper towel to blot excess grease from the chili if needed.
Variations & Substitutions
Once you’ve nailed the basic version, here’s how you can mix it up. I’ve tried all of these.
Vegetarian Version
Skip the beef. Use a can of black beans and a can of kidney beans for the chili base. Add diced bell peppers and corn to the chili for extra texture. Use a vegetarian chili powder. It’s just as delicious.
Chicken Nachos
Swap the beef for shredded rotisserie chicken. Toss the chicken with the chili spices and warm it through. This is a lighter option, and my kids love it.
Seafood Nachos
Use shrimp instead of beef. Sauté shrimp with Cajun seasoning and add them to the nachos after the first bake. Top with a lime crema. It’s fancy but easy.
Spicy Kick
Add diced habanero peppers to the chili. Use extra pepper jack cheese. Add a drizzle of hot sauce (like Cholula or Tapatío) after baking. For the heat lovers.
Mild Version
Skip the jalapeños and pepper jack. Use mild cheddar. Add extra sour cream and guacamole for cooling. Perfect for kids or sensitive stomachs.
Gluten-Free
Use certified gluten-free tortilla chips. Most corn chips are naturally gluten-free, but check labels. The rest of the recipe is naturally GF.
Dairy-Free
Use dairy-free cheese shreds (like Violife or Daiya). Note: They don’t melt as well, so you may need to bake longer. Use coconut cream instead of sour cream. It’s different but still tasty.
Serving & Storage
How to Serve:
I usually serve these straight from the oven, hot and messy. Put the baking sheets on the table with spatulas. Let everyone dig in. It’s communal and fun. Pair with a cold drink—beer or soda works well. If you want to be fancy, serve with a side of blistered shishito peppers for an extra veggie bite.
Side Dishes:
– Simple green salad with vinaigrette (cuts the richness)
– Corn on the cob (classic combo)
– Cucumber salad (refreshing contrast)
Storage Instructions:
Refrigerator:
Store leftovers in an airtight container for up to 2 days. The chips will lose some crunch, but they’re still good.
Reheating:
Best method: Reheat in a 375°F oven for 10 minutes to restore crispness. Microwave will make them soggy. If you must microwave, do it in short bursts and let them sit to cool slightly.
Freezing:
Not recommended. The chips get soggy when thawed. Make fresh.
Nutrition Information
I’m not a nutritionist, but here’s the breakdown if you’re tracking. These are estimated values per serving (based on 8 servings from 2 sheets).
| Nutrient | Amount |
|---|---|
| Calories | 450 |
| Protein | 18g |
| Carbs | 35g |
| Fiber | 4g |
| Sugar | 3g |
| Fat | 28g |
| Saturated Fat | 12g |
| Cholesterol | 45mg |
| Sodium | 680mg |
What’s Good:
– Decent protein from beef and cheese
– Fiber from beans and chips
– Customizable to add more veggies
What to Know:
– Higher in calories and fat due to cheese and chips
– Contains dairy and gluten (unless modified)
– Moderate sodium (use low-sodium beans and broth to reduce)
My Take:
Look, this is game day food. It’s indulgent. It’s not a diet recipe. But it’s way better than store-bought snacks, and you control the ingredients. When I want to make it lighter, I use less cheese, more veggies, and whole-grain chips. But usually? I just enjoy it in moderation and feel good about making it from scratch.
Final Thoughts
So that’s my Loaded Chili Cheese Nachos Supreme! I’ve probably talked your ear off at this point, but when you make a recipe this often, you have a lot to say about it. This has saved game days more times than I can count. It’s my answer to “what do we eat when the game starts?” when I’m tired, don’t want takeout, and still want something that tastes really good. My kids are happy, my husband’s happy, and I’m happy because I’m not stressed about cooking.
Make it yours! Try different add-ins, swap in your favorite vegetables, adjust the spice level. The best recipes are the ones you adapt to your family’s tastes. If you make this, drop a comment and let me know what you think! I love hearing how recipes turn out in your kitchen. And if something doesn’t work, tell me that too—I’m here to help troubleshoot.
Happy cooking! And I hope your kitchen smells half as good as mine does right now.
Frequently Asked Questions
Can I use canned chili instead of making my own?
You can, but homemade is so much better. If you must use canned, drain it well in a colander to remove excess liquid, then heat it with a teaspoon of chili powder and cumin to boost the flavor. I’ve done this when I’m in a rush—it works, but homemade is superior.
Why did my cheese turn out oily?
This usually happens if the heat was too high, or if you used pre-shredded cheese. The cornstarch I mentioned helps prevent this. Also, ensure your cheese is at room temperature before baking. Cold cheese can seize up. If it’s already oily, blot with a paper towel before serving.
Can I make these ahead of time?
Sort of. You can prep the chili and grate the cheese ahead of time. But assemble and bake right before serving. Nachos are best hot and fresh. If you must make ahead, bake them, let them cool, and reheat in the oven at 375°F for 10 minutes. They won’t be as crisp, but they’ll be edible.
How do I keep the chips from getting soggy?
Use sturdy chips, keep the chili thick, and don’t overcrowd the pan. Also, add wet toppings (salsa, sour cream) *after* baking. If you add them before, they’ll steam the chips. This is the golden rule of nacho engineering.
Can I freeze leftover nachos?
Not recommended. The chips will lose their texture and become soggy when thawed. It’s better to make fresh. If you have leftovers, store them in the fridge and reheat in the oven to restore some crispness.
What’s the best cheese for nachos?
A blend of sharp cheddar (for flavor) and Monterey Jack (for melt) is ideal. Pepper Jack adds spice. Avoid pre-shredded cheese. Grate your own for the best results. I’ve tried many blends, and this trio is the winner.
Can I make these in the microwave?
You can, but the chips won’t be as crispy. Microwave for 1-2 minutes on high, checking every 30 seconds. It’s faster, but the texture is different. For the best results, use the oven.
Pin This Recipe!
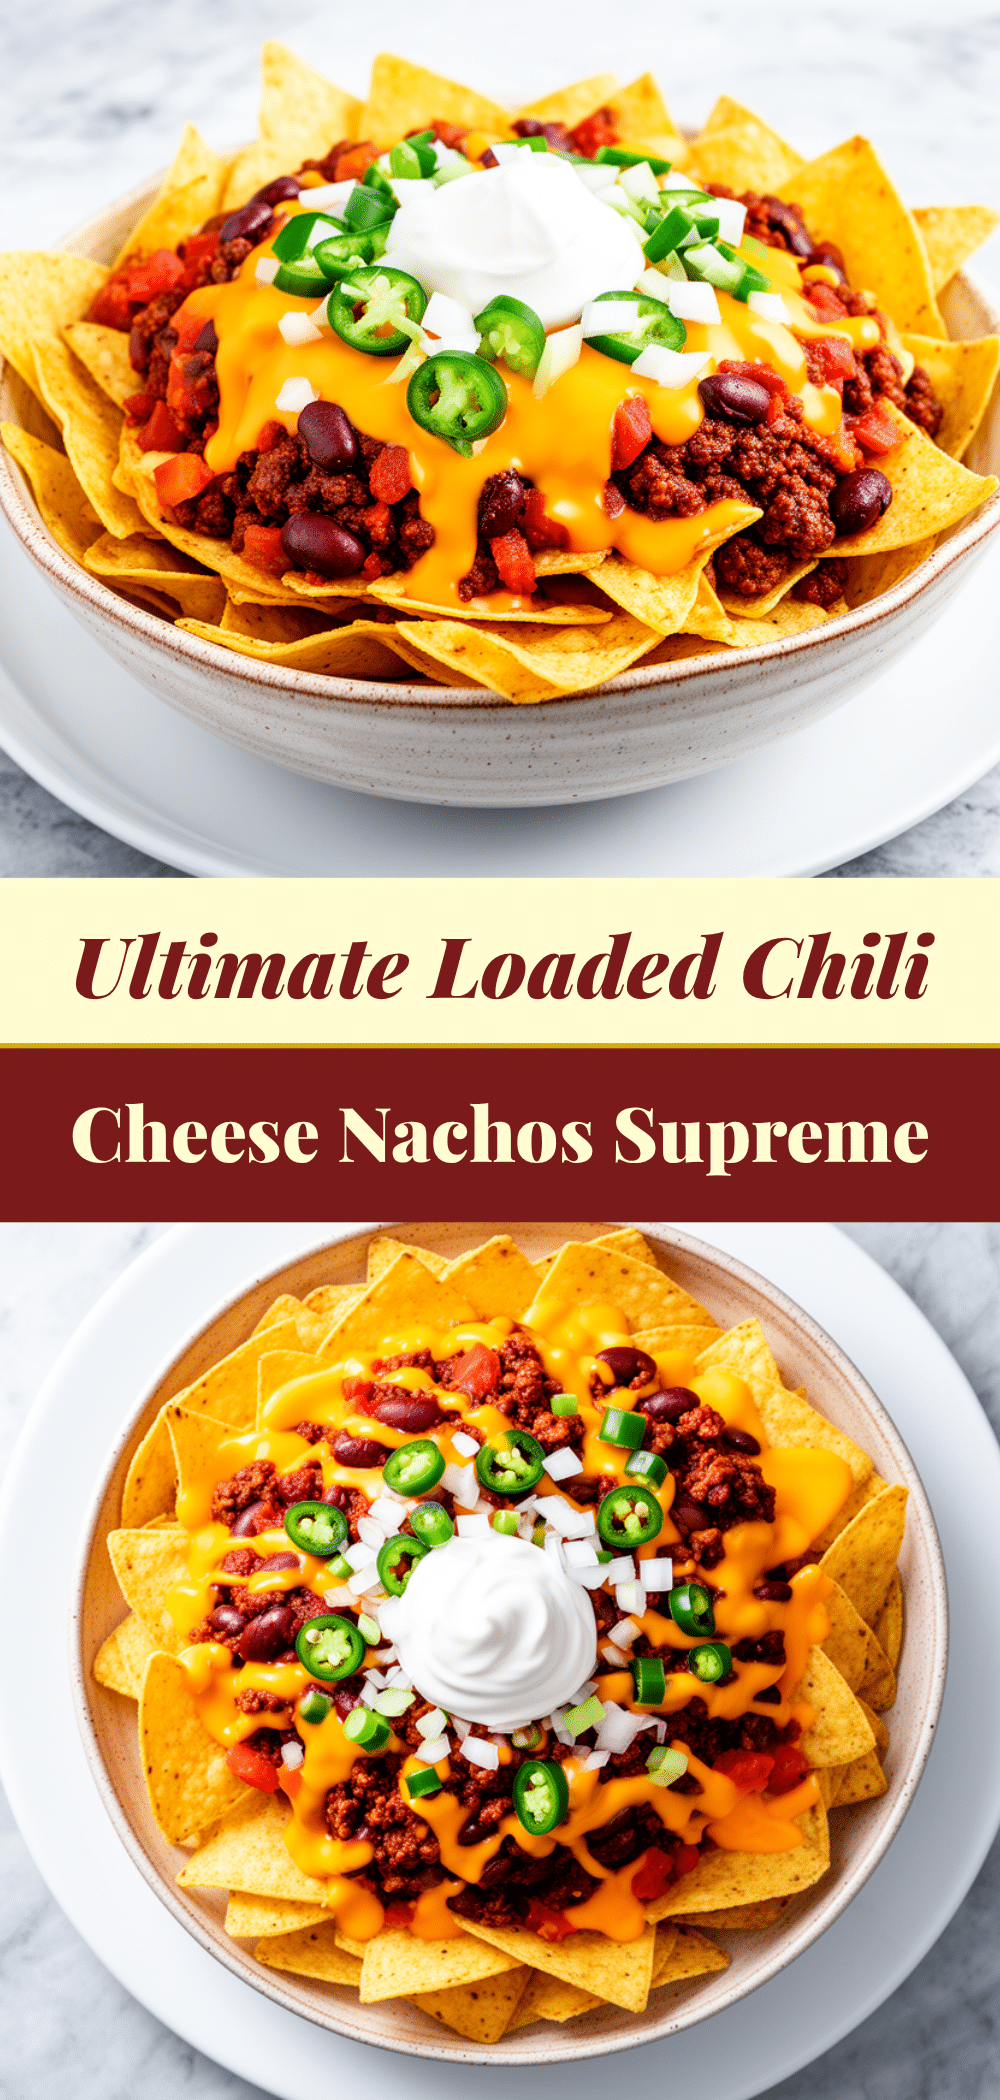
Loaded Chili Cheese Nachos Supreme
- Total Time: 45 minutes
- Yield: 8 servings 1x
Description
Legendary game day nachos featuring a two-stage baking method to ensure crispy chips, a smooth cheese sauce stabilized with cornstarch, and homemade chili. This recipe feeds a crowd and is customizable for various dietary needs.
Ingredients
- 2 large bags (about 1.5 lbs) sturdy tortilla chips (restaurant-style)
- 1 lb ground beef (80/20 lean-to-fat ratio)
- 2 tablespoons chili powder
- 1 teaspoon cumin
- 1 teaspoon garlic powder
- 1 teaspoon onion powder
- 1 can (8 oz) tomato sauce
- 1 can (15 oz) black beans, drained and rinsed
- 2 cups sharp cheddar cheese, shredded
- 1 cup Monterey Jack cheese, shredded
- 1/2 cup Pepper Jack cheese, shredded
- 1 tablespoon cornstarch
- 4 stalks green onions, sliced
- 1/2 cup jalapeños, sliced (fresh or pickled)
- 1 cup medium salsa
- 1/2 cup black olives, sliced
- 1/2 cup sour cream
- 1/2 cup fresh cilantro, chopped
Instructions
- Preheat oven to 375°F (190°C). Line two large rimmed baking sheets with parchment paper or foil.
- Heat a large skillet over medium-high heat. Add ground beef and cook, breaking it up with a spoon, until browned and crumbly (8-10 minutes). Drain excess grease, leaving about 1 tablespoon.
- Add chili powder, cumin, garlic powder, and onion powder to the beef. Stir for 1 minute to toast spices. Add tomato sauce and drained black beans. Simmer on low for 10 minutes until thick. Set aside.
- In a bowl, combine shredded cheddar, Monterey Jack, and Pepper Jack cheeses. Sprinkle cornstarch over the cheese and toss gently to coat evenly.
- Spread tortilla chips in a single, even layer on the prepared baking sheets. Divide the cheese blend evenly over the chips.
- Bake for 5-7 minutes until cheese is mostly melted and bubbly, but chips are not yet browned. Remove from oven.
- Spoon the warm chili evenly over the cheesy chips. Return to oven and bake for another 3-5 minutes until chips are golden and crispy at the edges.
- Remove from oven and let sit for 2 minutes. Top with jalapeños, black olives, green onions, and salsa.
- Serve immediately with dollops of sour cream and fresh cilantro on the side or sprinkled on top.
Notes
Do not overcrowd the pan; use two sheets to keep chips in a single layer. Keep chili thick to prevent soggy chips. Grate your own cheese for better melting; pre-shredded cheese contains anti-caking agents. Add sour cream and fresh herbs after baking to prevent wilting or breaking.
- Prep Time: 20 minutes
- Cook Time: 25 minutes
- Category: Appetizer
- Cuisine: American
Nutrition
- Serving Size: Approximately 1/8 of
- Calories: 450
- Sugar: 3
- Sodium: 680
- Fat: 28
- Saturated Fat: 12
- Carbohydrates: 35
- Fiber: 4
- Protein: 18
Keywords: nachos, game day snack, chili cheese nachos, party food, easy recipe, crowd pleaser, Mexican inspired


