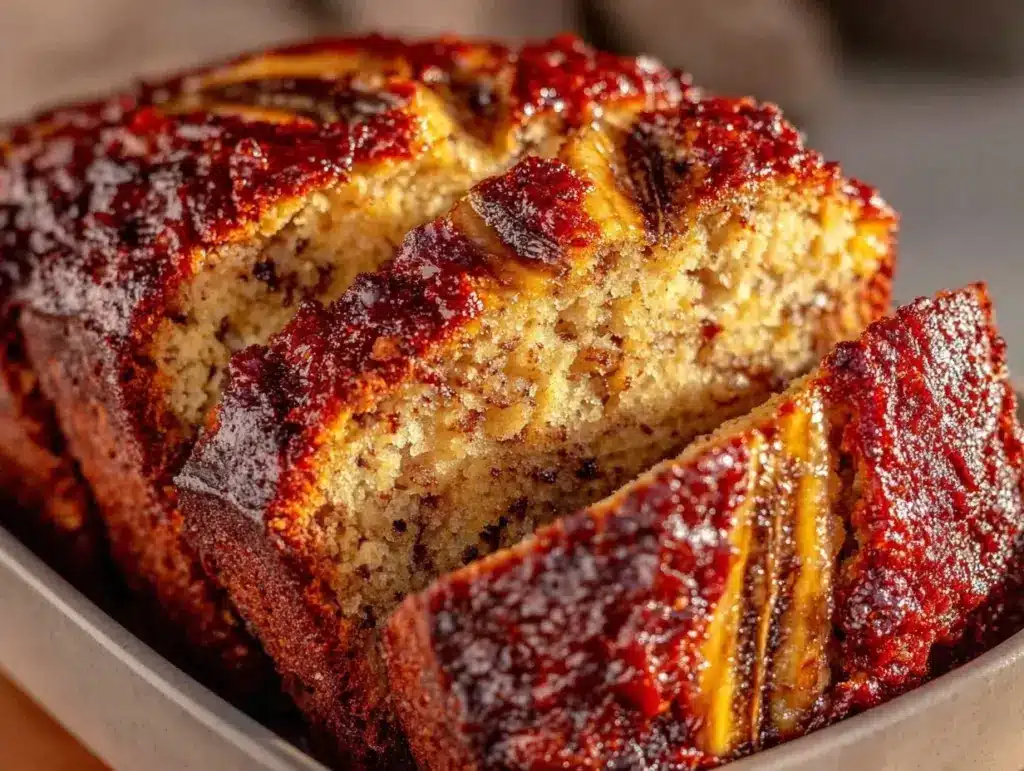
Last Saturday, my kitchen looked like a flour bomb had gone off. There were streaks of banana mush on the counter, a smear of brown butter on the oven mitt, and two kids who were absolutely convinced they were professional pastry chefs. My seven-year-old, Leo, was tasked with the “important job” of mashing the bananas, which he did with the intensity of a wrestler. My four-year-old, Mia, was in charge of sprinkling the chocolate chips (or, as she called them, “choco-dots”), and she was very serious about ensuring every single dot was visible.
When the timer went off and we pulled that loaf out of the oven, the smell was incredible. Not just sweet banana, but this deep, nutty, toasty aroma that filled the whole house. We cut into it while it was still warm—against all good baking advice, I know—and the inside was so moist it practically slid off the knife. Leo took a big bite, chocolate smudging his chin, and said, “This is better than store-bought.” Mia nodded vigorously, crumbs falling everywhere.
That moment is why I’m obsessed with this ultra-moist one-bowl banana bread with brown butter. It’s not just because it tastes amazing (though it does). It’s because it’s the perfect recipe for getting kids in the kitchen without driving you crazy. There’s no sifting, no whisking for twenty minutes, and no delicate tempering of eggs. Just dump, mix, and bake. It’s forgiving, it’s fast, and it makes your kids feel like they’ve accomplished something huge.
I’ve tested this recipe at least a dozen times, tweaking the ratio of brown butter to sugar until it hit that sweet spot—crispy edges, a soft center, and enough moisture that it stays good for days. I’ve also made sure every step is safe and fun for little hands. If you’ve been looking for a baking project that actually keeps your kids engaged (and doesn’t leave you with a mountain of dirty dishes), this is it. It’s become our weekend ritual, and honestly, I think it’s going to become yours too.
Why You’ll Love This One-Bowl Banana Bread
There are a million banana bread recipes out there. I’ve pinned them, I’ve tried them, and I’ve even failed at a few. But this one stands out because it solves the two biggest problems with kid-friendly baking: mess and complexity. Here’s why this recipe has earned a permanent spot in our rotation.
One Bowl, Zero Stress — Seriously. You don’t need a stand mixer, a dozen bowls, or a whisk. Just one large mixing bowl and a spatula. I’ve watched my kids mix this batter without getting frustrated or overwhelmed. It’s just stirring. Easy, satisfying stirring. And cleanup? Just the one bowl and maybe a measuring cup. That’s it. My husband jokes that this is the only reason I let them “help” in the kitchen anymore.
Brown Butter Magic — This is the secret weapon. Brown butter takes simple melted butter and cooks it until the milk solids turn golden and nutty. It adds this deep, sophisticated flavor that makes the bread taste like it came from a fancy bakery, not a kids’ baking project. It’s surprisingly easy to do (just watch it closely!), and it elevates the whole recipe. If you like my glazed brown butter blondie bars, you already know how good brown butter is. This bread is just the banana version of that same magic.
Ultra-Moist Texture — Nothing ruins banana bread faster than a dry, crumbly loaf. This recipe uses overripe bananas (the browner, the better) and a touch of extra oil to keep it incredibly moist. It stays soft for days, which is perfect for packing in lunchboxes or grabbing as a morning snack. I’ve made this on Sunday, and it’s still good on Wednesday. No one complains about dry bread here.
Kid-Safe Steps — Every part of this recipe is designed for little helpers. Mashing bananas is fun. Pouring wet ingredients is safe. Sprinkling mix-ins is exciting. There’s no cracking eggs (unless you want to), no handling raw flour in large quantities, and no complex techniques. It’s just simple, hands-on fun. Plus, the smell of baking banana bread is basically an invitation for kids to hang out in the kitchen.
Budget-Friendly — Bananas are cheap. Butter is cheap. Flour is cheap. This recipe uses pantry staples you probably already have. It’s a great way to use up those bananas that are starting to turn brown in the fruit bowl. It’s economical, delicious, and makes a big loaf that feeds a crowd. Perfect for sharing with classmates or neighbors.
This is my go-to when I want to spend some quality time with the kids in the kitchen. It’s not about speed; it’s about connection. It’s about watching their faces light up when they realize they made something delicious. And honestly? It’s about getting them to eat more fruit without even realizing it.
Ingredients You’ll Need
Here’s the best part: you probably have most of these ingredients already. This is a simple, no-fuss recipe that relies on high-quality basics. I’m particular about a few things here, and I’ll tell you exactly why.
For the Base
Ripe bananas (3 large, about 1 ½ cups mashed / 350g) — These are the star. They need to be very ripe, with lots of brown spots on the peel. The browner the banana, the sweeter and more flavorful the bread. If your bananas are still yellow, you can bake them in the oven at 300°F for 15 minutes to speed up the process. Don’t skip this—underripe bananas make bland bread.
Butter (½ cup / 115g) — We’re using unsalted butter so we can control the salt. You’ll be browning this, so use a good quality butter. I prefer European-style butter for its higher fat content, but regular unsalted works fine. Don’t use margarine or spread; it won’t brown properly.
Granulated sugar (¾ cup / 150g) — This gives the top a slight crispness and sweetness. You can use light brown sugar for a deeper molasses flavor, but I like the contrast of white sugar on top. Half-and-half works too if you want a softer top.
Vegetable oil (¼ cup / 60ml) — This is the secret to the ultra-moist texture. Butter adds flavor, but oil adds moisture. The combination keeps the bread tender for days. I use vegetable or canola oil, but any neutral oil works. Olive oil is too strong for this.
Eggs (2 large / ~100g) — Room temperature eggs mix in more easily. If you’re in a hurry, just drop them in a bowl of warm water for 5 minutes. Don’t skip them; they provide structure.
Vanilla extract (1 teaspoon / 5ml) — Pure vanilla, please. Imitation vanilla tastes artificial, especially in a simple recipe like this. It enhances the banana flavor without overpowering it.
For the Dry Mix
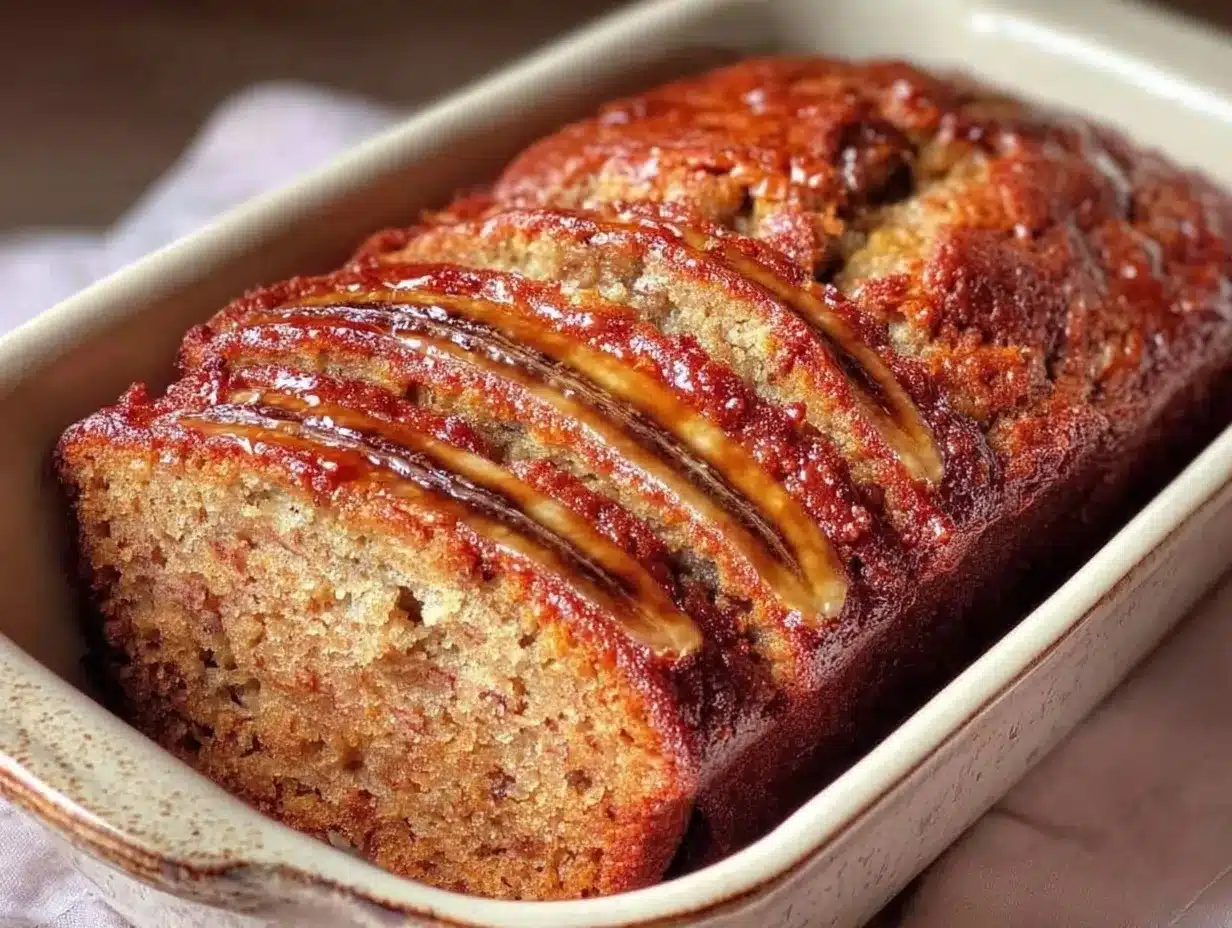
All-purpose flour (1 ½ cups / 190g) — Standard flour works best. Cake flour makes it too tender, and bread flour makes it too dense. Spoon and level your flour—don’t scoop directly from the bag, or you’ll pack in too much and end up with dry bread.
Baking soda (1 teaspoon / 5g) — This reacts with the acidic bananas to help the bread rise. Make sure it’s fresh! If your baking soda is old, it won’t work, and you’ll end up with a dense brick. I replace mine every few months.
Salt (½ teaspoon / 3g) — Salt is crucial for balancing the sweetness. Don’t skip it. It makes the banana flavor pop.
For the Mix-Ins
Chocolate chips (½ cup / 85g) — Semi-sweet chocolate chips are my go-to. They melt slightly in the bread, creating little pockets of chocolate goodness. You can also use dark chocolate chunks or white chocolate chips. Kids love these, and they’re easy to sprinkle.
Walnuts or pecans (½ cup / 60g, chopped) — Optional, but I love the crunch. If your kids are nut-sensitive, you can skip these or use pumpkin seeds. Toast the nuts in a dry pan for 2 minutes before adding for extra flavor.
Personal Tips: I always keep a bag of overripe bananas in the freezer. When I need banana bread, I just thaw them. They get mushy, but that’s perfect for baking. Also, I buy chocolate chips in bulk—it’s cheaper, and we use them for everything from caramel banana cream cheesecake bars to these cookies.
Equipment Needed
You don’t need fancy equipment for this. Here’s what I actually use.
Large mixing bowl — A 4-quart bowl works well. I use a glass bowl because I can see how mixed the batter is. Plastic is fine too.
Measuring cups and spoons — Standard stuff. Dollar store versions work fine for dry ingredients. For liquids, I prefer a clear measuring cup with a spout.
Fork or potato masher — For mashing the bananas. A fork is easier for kids to handle safely. A masher is faster but requires more strength.
Wooden spoon or silicone spatula — For mixing. Silicone is great because it scrapes the sides of the bowl, ensuring everything is incorporated. I love my soft cheddar garlic biscuits spatula for this too—it’s flexible and durable.
9×5 inch loaf pan — Standard size. I use a metal pan because it browns the crust evenly. Glass pans cook slower, so you might need to adjust time. Dark non-stick pans can over-brown the bottom, so keep an eye on it.
Parchment paper — I line the pan with parchment for easy removal. It also makes cleanup a breeze. Just fold a strip of parchment to fit the bottom and sides.
Small saucepan — For browning the butter. A light-colored pan is best so you can see the color change. Stainless steel or aluminum works well.
Cooling rack — To cool the bread. Don’t skip this; it prevents the bottom from getting soggy.
Optional but nice: A kitchen scale for precise measurements, especially for flour. If you’re baking with kids, maybe skip the scale and stick to cups—it’s more fun for them.
How to Make It: Step-by-Step
Alright, let’s make this! I’m walking you through exactly how I do it, including the little tricks I’ve picked up. This is the part where the kids get involved, so I’ll note where they can help.
Step 1: Prep Your Oven and Pan (5 minutes)
Preheat your oven to 350°F (175°C). This might seem like a small step, but getting the oven ready first ensures everything bakes evenly. Line your 9×5 inch loaf pan with parchment paper. Leave a little overhang on the sides so you can lift the bread out later. If you’re with kids, let them help tear the parchment and press it into the pan. It’s a great fine-motor skill exercise.
Step 2: Brown the Butter (5-7 minutes)
This is the game-changer. Melt the butter in a small saucepan over medium heat. Watch it closely! It will foam up, then settle. You’ll see little brown bits forming at the bottom. Swirl the pan occasionally. When the butter smells nutty and looks golden brown (like peanut butter), it’s done. This takes about 5-7 minutes. Immediately pour it into a heatproof bowl to stop the cooking. If you leave it in the pan, it’ll keep cooking and burn. Let it cool for 5 minutes. Kids can watch this step from a safe distance—it’s fascinating to see the color change.
Step 3: Mash the Bananas (3 minutes)
Peel the ripe bananas and put them in your large mixing bowl. Use a fork to mash them until smooth. There should be no large chunks. This is a perfect job for kids! They love mashing things. If the bananas are very ripe, they’ll mash easily. If not, add a little extra time. Aim for about 1 ½ cups of mashed banana.
Step 4: Mix Wet Ingredients (2 minutes)
Add the cooled brown butter, vegetable oil, sugar, eggs, and vanilla to the mashed bananas. Whisk or stir vigorously until everything is well combined. The mixture might look a bit curdled at first—that’s okay. It will come together in the next steps. Let the kids help with the stirring. It’s good exercise and they get to see the batter change.
Step 5: Add Dry Ingredients (2 minutes)
Add the flour, baking soda, and salt to the wet mixture. Gently fold them in with a spatula. Stop as soon as the flour disappears. Overmixing makes the bread dense. I know it’s tempting to keep stirring, but trust me—stop when you see no more white streaks. This is a good moment to teach kids about “just until combined.”
Step 6: Fold in Mix-Ins (1 minute)
Stir in the chocolate chips and nuts (if using). Use a spatula to gently fold them in. Let the kids sprinkle the chocolate chips in—they’ll feel like they’re decorating a cake. This is the fun part!
Step 7: Bake (55-65 minutes)
Pour the batter into the prepared loaf pan. Smooth the top with a spatula. Bake for 55-65 minutes. Check at 55 minutes by inserting a toothpick into the center. If it comes out clean or with just a few moist crumbs, it’s done. If it’s wet, bake for 5 more minutes. The top should be golden brown. If it’s browning too fast, tent it with foil. This is the hardest part for kids—waiting! But the smell will keep them interested.
Step 8: Cool and Serve (30 minutes)
Let the bread cool in the pan for 10 minutes, then lift it out using the parchment overhang. Transfer to a cooling rack and let it cool completely before slicing. This is crucial for clean slices. If you cut it hot, it’ll be gummy. Let the kids help lift it out—it’s a big moment!
Total Time: About 1 hour 15 minutes (15 minutes active, 1 hour mostly hands-off)
Expert Tips & Tricks
Here’s everything I’ve learned from making this dozens of times. These tips will save you from my mistakes.
Use Very Ripe Bananas
The browner the banana, the better. If your bananas are still yellow, bake them in the oven at 300°F for 15 minutes until the skins are black. This concentrates the sugar and flavor. I’ve tried this with green bananas, and it just doesn’t work. Don’t skip it.
Don’t Overmix
Once you add the flour, mix only until combined. Overmixing develops gluten, which makes the bread tough and dense. You want a tender, soft crumb. I’ve ruined several loaves by being too thorough with the mixing. Trust me—less is more.
Watch the Brown Butter Closely
Brown butter can go from perfect to burnt in seconds. Use a light-colored pan so you can see the color change. When it smells nutty and looks golden, remove it from the heat immediately. Burnt butter tastes bitter and will ruin the bread.
Let It Cool Completely
I know it’s tempting to cut into the warm bread. I do it too. But the structure is still setting. If you cut it hot, it’ll be gummy and fall apart. Let it cool for at least 30 minutes. The reward is worth the wait.
Store Properly
Banana bread stays fresh at room temperature for 2-3 days in an airtight container. For longer storage, wrap it tightly in plastic wrap and freeze for up to 3 months. Thaw at room temperature. I’ve found that freezing it whole tastes better than slicing it first.
Common Mistakes:
Mistake: Bread is dry
Fix: You used underripe bananas or overmixed the batter. Use very ripe bananas and mix gently. Also, check your oven temperature with a thermometer—ovens vary.
Mistake: Bread is dense
Fix: You probably overmixed the batter or used old baking soda. Make sure your baking soda is fresh and mix only until combined.
Mistake: Top is burnt
Fix: Your oven runs hot or the bread was too close to the heating element. Tent the bread with foil halfway through baking. If the top is already burnt, cover it with foil for the rest of the baking time.
Variations & Substitutions
Once you’ve nailed the basic version, here’s how you can mix it up. I’ve tried all of these.
Gluten-Free Version
Use a 1:1 gluten-free flour blend. I’ve used Bob’s Red Mill and it works great. The texture might be slightly different, but it’s still moist and delicious. Make sure your baking soda is gluten-free.
Dairy-Free Version
Replace the butter with coconut oil (melted) and use dairy-free chocolate chips. The flavor will be slightly different, but still good. I’ve made this for my lactose-intolerant friend, and she loved it.
Vegan Version
Replace the eggs with flax eggs (2 tablespoons ground flaxseed + 6 tablespoons water, rested for 5 minutes). Replace butter with coconut oil. It’s not quite the same texture, but it’s still tasty. My vegan nephew enjoys it.
Nut-Free Version
Simply omit the nuts. The bread is still delicious without them. If you want crunch, add pumpkin seeds or sunflower seeds.
Spiced Version
Add 1 teaspoon cinnamon and ½ teaspoon nutmeg to the dry ingredients. It adds a warm, cozy flavor. Great for fall.
White Chocolate Chip
Swap semi-sweet chips for white chocolate chips. It’s sweeter and milder. Kids love this version.
Blueberry Banana
Fold in 1 cup fresh or frozen blueberries instead of chocolate chips. The berries burst in the oven, creating little purple pockets. It’s like a berry muffin in bread form.
Serving & Storage
How to Serve:
I usually serve this straight from the cooling rack, sliced thick. It’s perfect for breakfast with coffee or tea. For a special treat, warm a slice in the microwave for 30 seconds and top with a pat of butter. It’s like a banana bread French toast. I also serve it with my fluffy ricotta cinnamon roll pancakes on lazy weekends.
Toppings:
When I have guests, I put out: extra chocolate chips, powdered sugar, whipped cream, and fresh berries. Everyone customizes their slice.
Storage Instructions:
Refrigerator:
Store in an airtight container for up to 4 days. The bread will stay moist. Don’t refrigerate it if you want it to stay soft at room temperature.
Freezer:
Wrap the whole loaf tightly in plastic wrap, then in foil. Freeze for up to 3 months. Thaw at room temperature. I’ve found that freezing it whole preserves the texture better than slicing it first.
Reheating:
Warm slices in the microwave for 30 seconds or in a 350°F oven for 10 minutes. It brings back the freshness. Don’t try to reheat it in the toaster—it’ll dry out.
Pro tip: If the bread is drying out, wrap it in a damp paper towel and microwave for 15 seconds. It steams it slightly and brings back moisture.
Nutrition Information
I’m not a nutritionist, but here’s the breakdown if you’re tracking. This is per slice (1/10 of the loaf).
Calories: 220
Protein: 3g
Carbs: 32g
Fiber: 1g
Sugar: 18g
Fat: 10g
Saturated Fat: 5g
Cholesterol: 25mg
Sodium: 180mg
What’s Good:
– Natural sugars from bananas
– Some protein from eggs and nuts
– Can add fiber by using whole wheat flour
What to Know:
– Higher in sugar and fat from butter and chocolate
– Contains gluten and dairy
– Moderate sodium
My Take:
Look, this is a treat. It’s sweet and rich. It’s not a health food. But it’s better than store-bought cake, and you know exactly what’s in it. When I want to make it lighter, I reduce the sugar and add more nuts. But usually? I just enjoy a slice and move on.
Final Thoughts
So that’s my ultra-moist one-bowl banana bread with brown butter! I’ve probably talked your ear off at this point, but when you make a recipe this often, you have a lot to say about it.
This has saved our weekend mornings more times than I can count. It’s my answer to “what are we doing today?” when I want to spend time with the kids but don’t want to go anywhere. We bake, we eat, we laugh, and we clean up together. It’s simple, but it’s meaningful.
Make it yours! Try different mix-ins, adjust the sweetness, or let the kids design their own “choco-dot” patterns. The best recipes are the ones you adapt to your family’s tastes. And if something doesn’t work, tell me that too—I’m here to help troubleshoot.
If you make this, drop a comment and let me know what you think! I love hearing how recipes turn out in your kitchen. And I hope your kitchen smells half as good as mine does right now.
Frequently Asked Questions
Can I use green bananas?
You can, but the bread won’t be as sweet or flavorful. Green bananas have less sugar and more starch, so the bread will be bland and dense. If you only have green bananas, bake them in the oven at 300°F for 15 minutes to soften and sweeten them. But really, wait for them to ripen—it’s worth it.
Why did my banana bread turn out dry?
Usually means you used underripe bananas or overmixed the batter. Underripe bananas don’t have enough sugar or moisture. Overmixing develops gluten, which makes the bread tough. Use very ripe bananas and mix only until the flour disappears. Also, check your oven temperature with a thermometer.
Can I make this ahead for a party?
Absolutely! Bake the bread 1-2 days ahead and store it in an airtight container at room temperature. It actually tastes better after a day as the flavors meld. Just slice and serve. I do this all the time for bake sales and gatherings.
Can I freeze this banana bread?
Yes! Wrap the whole loaf tightly in plastic wrap, then in foil. Freeze for up to 3 months. Thaw at room temperature. Don’t freeze sliced bread—it’ll dry out. I’ve found that freezing it whole preserves the texture best.
Can I use whole wheat flour?
You can, but the bread will be denser. I recommend using half whole wheat and half all-purpose flour for a balance of flavor and texture. If you use all whole wheat, add an extra tablespoon of oil or milk to keep it moist.
How do I know when the bread is done?
Insert a toothpick into the center. If it comes out clean or with just a few moist crumbs, it’s done. If it’s wet, bake for 5 more minutes. The top should be golden brown. If it’s browning too fast, tent it with foil.
Can I add other mix-ins?
Yes! Try dried cranberries, chopped apples, or even a swirl of peanut butter. Just fold them in gently at the end. I’ve made a version with chopped apples and cinnamon, and it was amazing. Get creative!
Pin This Recipe!
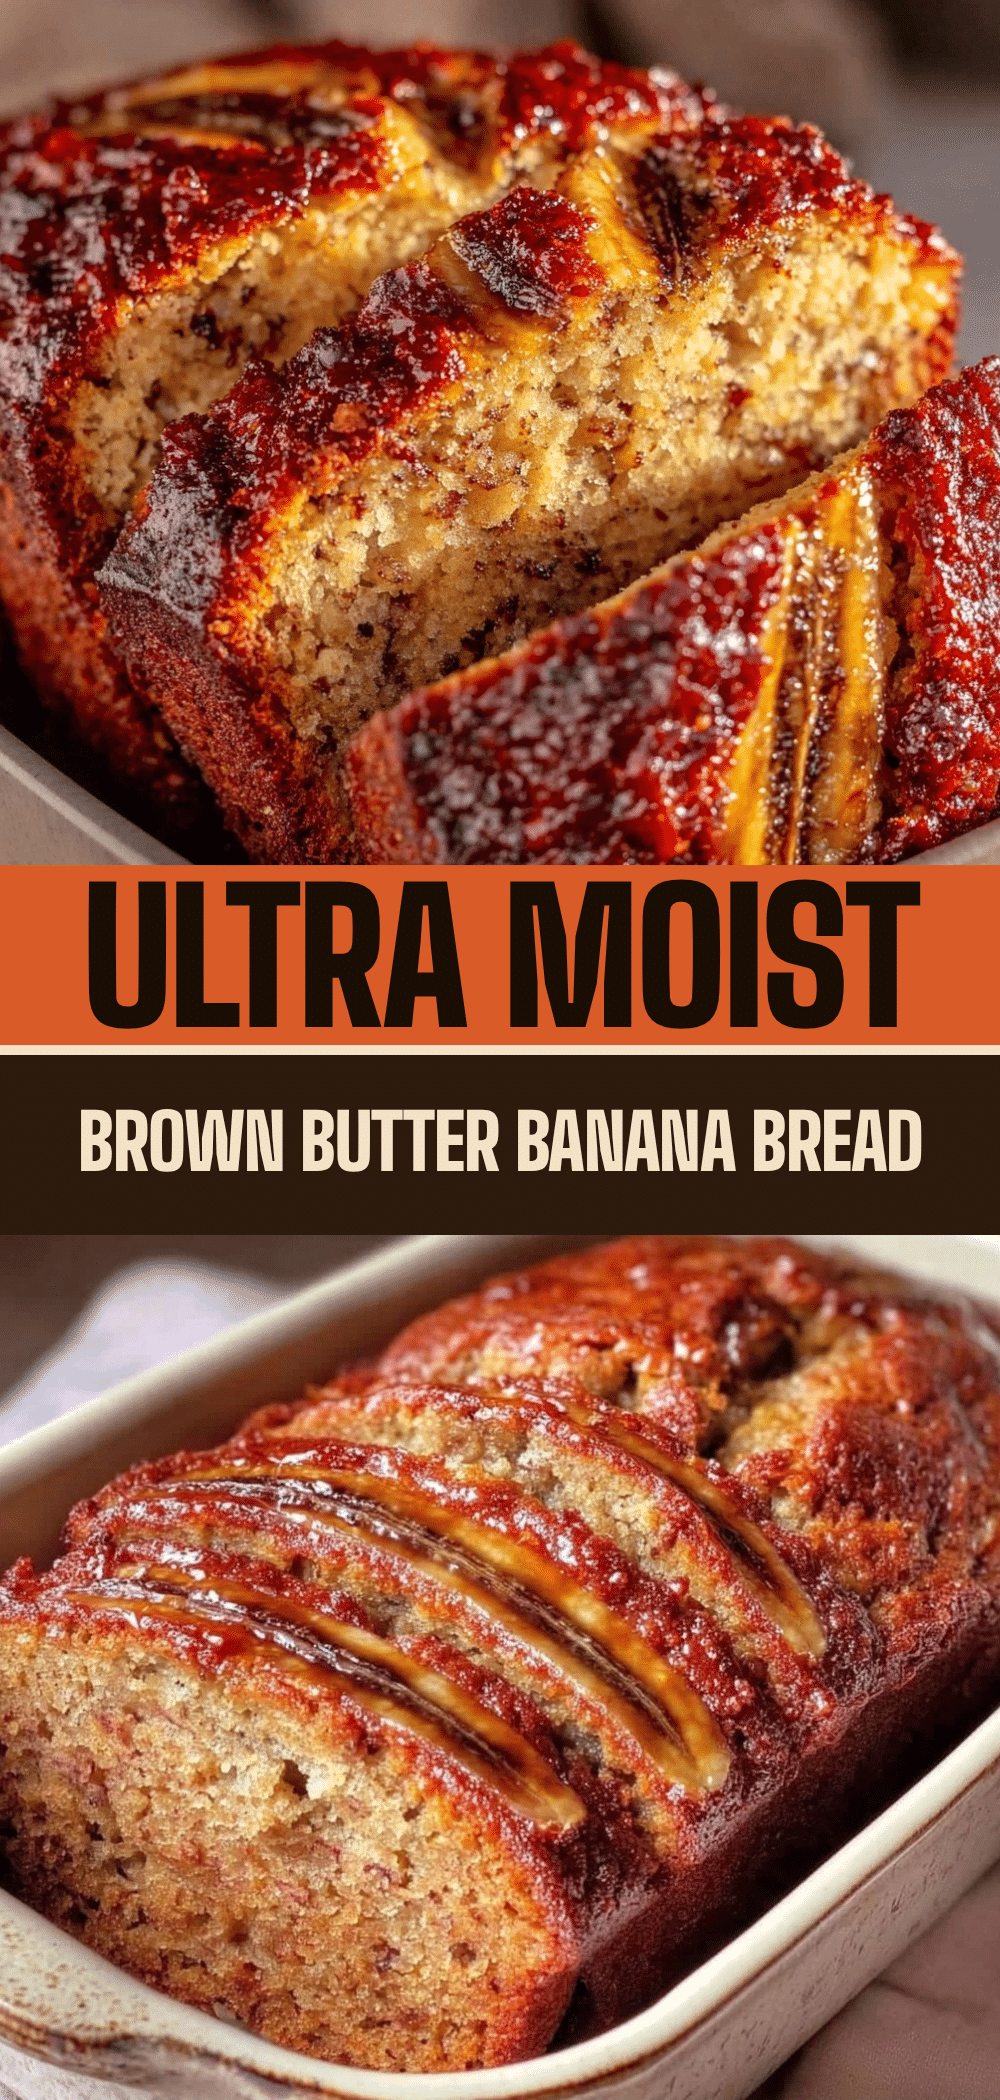
Easy One-Bowl Banana Bread Kids Love to Make
- Total Time: 1 hour 15 minutes
- Yield: 10 servings 1x
Description
An ultra-moist one-bowl banana bread made with brown butter, designed to be simple, forgiving, and fun for kids to help make. It features crispy edges, a soft center, and requires minimal cleanup.
Ingredients
- 3 large ripe bananas (about 1 ½ cups mashed / 350g)
- ½ cup unsalted butter (115g)
- ¾ cup granulated sugar (150g)
- ¼ cup vegetable oil (60ml)
- 2 large eggs (room temperature)
- 1 teaspoon vanilla extract
- 1 ½ cups all-purpose flour (190g)
- 1 teaspoon baking soda
- ½ teaspoon salt
- ½ cup semi-sweet chocolate chips (85g)
- ½ cup walnuts or pecans, chopped (optional)
Instructions
- Preheat oven to 350°F (175°C). Line a 9×5 inch loaf pan with parchment paper, leaving an overhang on the sides.
- Melt the butter in a small saucepan over medium heat. Watch closely until it foams, settles, and turns golden brown with a nutty aroma (5-7 minutes). Immediately pour into a heatproof bowl to stop cooking and let cool for 5 minutes.
- In a large mixing bowl, mash the ripe bananas until smooth.
- Add the cooled brown butter, vegetable oil, sugar, eggs, and vanilla to the mashed bananas. Whisk or stir vigorously until well combined.
- Add the flour, baking soda, and salt to the wet mixture. Gently fold in with a spatula until just combined; do not overmix.
- Fold in the chocolate chips and nuts (if using).
- Pour batter into the prepared loaf pan and smooth the top. Bake for 55-65 minutes, or until a toothpick inserted into the center comes out clean or with moist crumbs.
- Let the bread cool in the pan for 10 minutes, then lift out using the parchment overhang. Transfer to a cooling rack and let cool completely before slicing.
Notes
Use very ripe bananas for maximum sweetness and moisture. Do not overmix the batter once flour is added to avoid a dense texture. Brown butter can burn quickly, so watch it closely. Let the bread cool completely before slicing to prevent it from being gummy. Store in an airtight container at room temperature for 2-3 days or freeze for up to 3 months.
- Prep Time: 15 minutes
- Cook Time: 55-65 minutes
- Category: Dessert
- Cuisine: American
Nutrition
- Serving Size: 1 slice (1/10 of the
- Calories: 220
- Sugar: 18
- Sodium: 180
- Fat: 10
- Saturated Fat: 5
- Carbohydrates: 32
- Fiber: 1
- Protein: 3
Keywords: banana bread, brown butter, one-bowl recipe, kid-friendly baking, easy dessert, moist banana bread, gluten-free option


