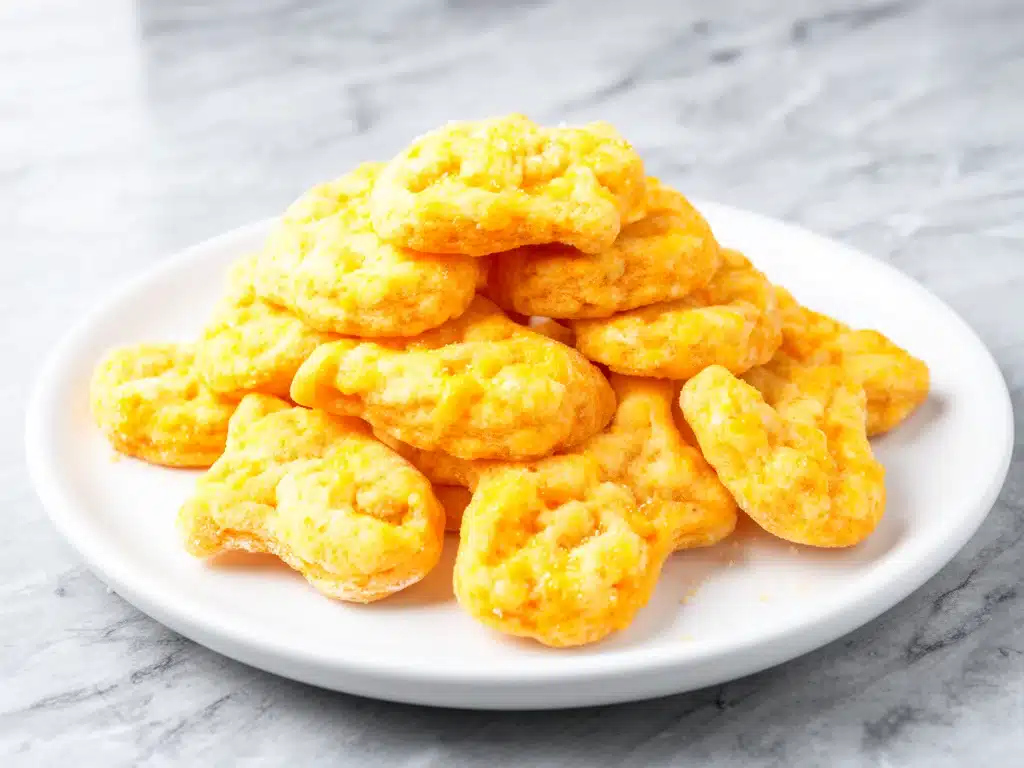
Last August, I stood in the school pickup line holding a Tupperware container of store-bought cheese crackers, feeling like a failure. My daughter had asked for “homemade” ones, and I, in my sleep-deprived, back-to-school chaos, had assumed the aisle at the grocery store counted. She took one bite, looked at me with that polite but devastating kid expression, and said, “These taste like cardboard.” Ouch.
I realized then that I was giving up too easily. I wanted to support her lunchbox dreams, but I also wanted snacks that didn’t arrive in a plastic wrapper from a factory I couldn’t pronounce. So, I spent that entire weekend in the kitchen, experimenting with grating cheese, rolling dough, and burning my fingers on hot trays. By Monday, I had something magical.
These Homemade Cheese Crackers are crispy, golden, and have that sharp, savory punch that makes you want to eat the whole batch before the school bus even arrives. They’re not just “good for homemade”—they’re genuinely better than the takeout boxes. Better than the store-bought ones. Better than the sad, stale crackers sitting in the back of the pantry.
I’ve made these at least fifteen times since that Monday. Some weeks they’re cheddar, some weeks they’re parmesan, and once I even threw in some jalapeños because my son was feeling spicy. They are now a non-negotiable part of our September routine. If you’re tired of the processed stuff and want a snack that your kids will actually beg for, you need to try this. It’s easier than you think, and the smell alone will have your house feeling like a bakery.
Why You’ll Love This Recipe
There are about ten reasons I keep making these cheese crackers every single school year, but let’s be real—you’re probably looking for the big wins. Here’s why this recipe has completely changed our snack game.
- Stupid Simple Ingredients — Seriously, if you have flour, butter, and cheese, you’re 90% there. I don’t mean fancy aged cheeses or exotic flours. I mean the stuff you already have in your fridge and pantry. I’ve made these with leftover rotisserie chicken cheese (okay, that’s a stretch, but you get the point) and it still works.
- Lightning Fast Prep — The dough comes together in under 10 minutes. I’m talking while the coffee brews. While you’re waiting for the bus. While you’re pretending to listen to your kid talk about their math test. It’s that fast.
- Pantry-Friendly — You probably have 80% of these ingredients already. I keep a block of sharp cheddar and a stick of butter stocked specifically so I can throw these together on a whim. No special trips to the store.
- Crowd-Pleaser — I’ve served these to my picky eater son, my vegetarian neighbor’s kids, and my husband’s coworkers during a last-minute office party. Everyone loved them. The texture is addictive—crispy on the outside, slightly tender on the inside.
- Makes Amazing Leftovers — Actually, they don’t last long enough to be leftovers. But if they do survive until the next day, they stay crispy for days if stored correctly. I deliberately make extra for Tuesday morning when I’m running late.
- Budget-Smart — Feeds 4-6 people for under $5. That’s less than one box of the name-brand crackers at the store. Plus, you’re saving your kids from preservatives. Win-win.
This is my go-to when I need a snack to just work. No complicated techniques, no weird ingredients, just reliable, delicious food that makes everyone happy. And honestly? It feels good to hand your kids something you made with your own hands. It’s a small thing, but it matters.
Ingredients You’ll Need
Here’s the best part: you probably have most of this already. This isn’t a recipe that requires a trip to three different specialty stores. It’s humble, honest, and delicious.
For the Dough
Unsalted Butter (1 cup / 225g) — This needs to be cold. I mean, straight-out-of-the-fridge cold. I usually cube it while it’s still hard. This creates the flaky layers. If you use melted butter, you get a biscuit, not a cracker. Trust me on this.
Sharp Cheddar Cheese (2 cups / 200g, freshly grated) — This is the star. Do not use pre-shredded cheese. It has anti-caking agents that make the dough greasy and prevent it from melting properly. Buy a block of sharp cheddar and grate it yourself. It takes two minutes and makes a huge difference in flavor.
All-Purpose Flour (2 ½ cups / 315g) — Standard stuff. No need for fancy bread flour. Just make sure it’s not clumpy. If it’s been sitting in the back of the cupboard for years, sift it first.
Salt (½ teaspoon) — Since we’re using unsalted butter, we need to add salt for flavor. But go easy here; the cheese is already salty.
Cold Water (2-3 tablespoons) — Just enough to bring the dough together. Too much water and the crackers get tough. Too little and they crumble. Add it one tablespoon at a time.
For the Topping
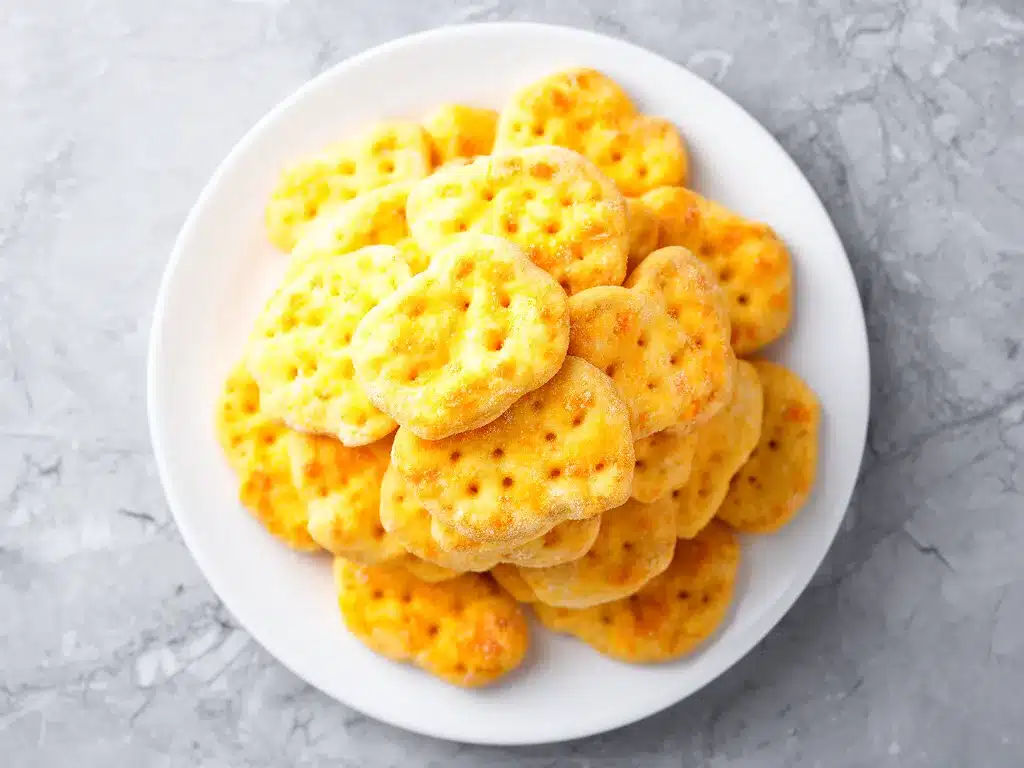
Egg Wash (1 egg beaten with 1 tablespoon water) — This gives them that gorgeous golden-brown shine. If you’re dairy-free, you can skip this, but you’ll miss out on the color.
Poppy Seeds (1 tablespoon) — Optional, but I love the little crunch and visual appeal. Sesame seeds work too, or just leave them plain.
Sea Salt Flakes (for sprinkling) — A little sprinkle on top before baking adds that gourmet touch. I get this at the grocery store near the olive oils.
Pro Tips on Ingredients
I always use Extra Sharp cheddar. Mild cheddar is too bland for crackers; you want that punch. If you’re a fan of parmesan, you can swap half the cheddar for parmesan, but keep at least half cheddar for the structure. Also, keep everything cold. If your dough feels warm while you’re rolling it, pop it in the fridge for 10 minutes. Warm butter = greasy crackers.
Equipment Needed
You don’t need fancy equipment for this. Here’s what I actually use.
Food Processor — This is my favorite tool for this recipe. It cuts the cold butter into the flour and cheese quickly without warming it up with your hands. If you don’t have one, a pastry cutter works, but it takes longer.
Rolling Pin — Any rolling pin works. I use a wooden one. Just make sure it’s clean and dry.
Cheese Grater — Box grater or microplane. I use the medium holes for cheddar. Freshly grated is non-negotiable.
Baking Sheets — Two standard half-sheet pans. I line them with parchment paper. Silicone mats work too, but parchment is easier for cleanup.
Pizza Cutter or Sharp Knife — To score the dough. A pizza cutter makes clean lines and is faster than a knife.
Fork — To prick the crackers before baking. This stops them from puffing up too much.
Parchment Paper — Essential for easy cleanup. I never bake these directly on the pan.
Optional but Nice
– Stand Mixer — With the paddle attachment, you can mix the dough, but watch it closely. You don’t want to overmix.
– Cookie Cutters — If you want fun shapes for the kids. We usually just roll and score for a rustic look.
How to Make It: Step-by-Step
Alright, let’s make this! I’m walking you through exactly how I do it, including the little tricks I’ve picked up over the years.
Step 1: Prep Your Ingredients (5 minutes)
Before you start, make sure your butter is cold. Cube it into ½-inch pieces. Grate your cheese. Measure your flour and salt. Having everything ready before you mix is crucial because the dough comes together fast. I know it seems fussy, but it makes the actual cooking way less stressful.
Step 2: Mix the Dough (5 minutes)
If using a food processor: Add the flour, salt, and grated cheese. Pulse a few times to combine. Add the cold butter cubes. Pulse in short bursts (about 1 second each) until the mixture looks like coarse crumbs with some pea-sized bits of butter remaining. Do not over-process!
If mixing by hand: Use a pastry cutter or two forks to cut the cold butter into the flour and cheese mixture until it resembles coarse meal. The key is to keep the butter in small, distinct chunks. These chunks create steam in the oven, which makes the crackers flaky.
Step 3: Bring It Together (2 minutes)
Add the cold water, one tablespoon at a time, pulsing or mixing gently. Stop as soon as the dough starts to clump together. It should hold together when you pinch it, but not be sticky. You might not need all the water. Over-hydration leads to tough crackers.
Step 4: Chill the Dough (15 minutes)
Turn the dough out onto a piece of plastic wrap. Form it into a flat rectangle (about 1-inch thick). Wrap it tightly and refrigerate for at least 15 minutes. This relaxes the gluten and re-chills the butter. If you skip this, the dough will be too soft to roll and the butter will melt into the flour.
Step 5: Roll Out the Dough (5 minutes)
Preheat your oven to 350°F (175°C). Line two baking sheets with parchment paper. On a lightly floured surface, roll out the dough to about ⅛-inch thickness. Don’t worry if it’s not perfect; rustic edges are charming. If it sticks, add a tiny bit more flour. If it’s too cold and cracking, let it sit for a minute.
Step 6: Score and Prick (5 minutes)
Use a pizza cutter or sharp knife to cut the dough into squares or rectangles. I like 2-inch squares. Then, take a fork and prick each cracker 3-4 times. This prevents them from bubbling up and ensures even baking. Don’t skip this step!
Step 7: Bake (12-15 minutes)
Brush the tops lightly with the egg wash. Sprinkle with poppy seeds and a pinch of sea salt. Bake for 12-15 minutes, or until the edges are golden brown and the centers are set. They should look firm, not soft. If they’re still soft when you take them out, they’ll crisp up as they cool, but don’t leave them in until they’re dark brown—they’ll burn.
Step 8: Cool Completely
Let the crackers cool on the baking sheet for 5 minutes, then transfer to a wire rack. They crisp up significantly as they cool. If you try to eat them hot, they might feel slightly chewy. Patience is key!
Total Time: About 45 minutes (15 minutes prep, 15 minutes chill, 15 minutes bake)
Built-in Troubleshooting
– Dough is too sticky: Add a tablespoon of flour. But check if your butter is warm first.
– Crackers are too hard: You rolled them too thick or over-baked them. Aim for ⅛-inch thickness.
– Crackers are too soft: Not enough salt or butter was too warm. Ensure butter is cold and salt is measured correctly.
Expert Tips & Tricks
Here’s everything I’ve learned from making these dozens of times. These tips will save you from my mistakes.
Keep Everything Cold
This is the #1 rule. Cold butter creates steam, which creates flakiness. If your kitchen is hot, work quickly. If your dough feels warm, chill it again. I’ve made these in July and had to keep the dough in the fridge between rolling steps. It’s annoying but worth it.
Grate Your Own Cheese
Pre-shredded cheese is coated in cellulose to prevent clumping. This stops it from melting smoothly into the dough. Freshly grated cheese melts into the butter and flour, creating a cohesive, flavorful dough. It’s a small step that makes a big difference.
Don’t Overwork the Dough
Once you add the water, mix just until it comes together. Overmixing develops gluten, which makes the crackers tough instead of tender. You want a delicate, crumbly texture.
Even Baking
Rotate your baking sheets halfway through baking. Ovens have hot spots, and rotating ensures all crackers bake evenly. I usually put one sheet on the top rack and one on the bottom, then swap them at the 7-minute mark.
Storage is Key
Let them cool completely before storing. Any residual heat will create steam and make them soggy. Store in an airtight container at room temperature for up to 1 week. If you live in a humid climate, add a piece of bread to the container to absorb moisture.
Variations & Substitutions
Once you’ve nailed the basic cheddar version, here’s how you can mix it up. I’ve tried all of these.
Jalapeño Cheddar
Add 1 finely diced jalapeño (seeds removed) to the dough. This is a hit with my spicy-loving son. The heat cuts through the richness of the cheese.
Garlic Parmesan
Swap cheddar for parmesan. Add 1 teaspoon garlic powder and ½ teaspoon onion powder to the flour. These are great with soup.
Herb & Cheese
Add 1 tablespoon dried dill or chives to the dough. Fresh herbs work too, but chop them finely. This is more savory and less “cheese board” style.
Gluten-Free
Use a 1:1 gluten-free flour blend. The texture might be slightly more crumbly, but they still taste amazing. I’ve used Bob’s Red Mill and it works well.
Dairy-Free
Use dairy-free butter and dairy-free cheese. The texture might be different because dairy-free cheese doesn’t melt the same way, but they’re still tasty. I recommend using a firmer dairy-free cheese block.
Spicy Kick
Add ½ teaspoon cayenne pepper or red pepper flakes. Great for adults who like a bit of heat.
Sweet & Savory
Add 1 tablespoon honey to the dough and use a mild cheese. Top with sesame seeds. These are more like shortbread crackers.
Serving & Storage
How to Serve: I usually serve these straight from the cooling rack. They’re best warm. I put them in a small bowl with a dip like marinara sauce, hummus, or a spicy mustard. For lunchboxes, pack them in a small container with a cheese stick or fruit.
Side Dishes: These go great with tomato soup, chili, or a simple green salad. They’re also perfect for charcuterie boards.
Storage Instructions:
Refrigerator: Store in an airtight container for up to 1 week. They might soften slightly, but you can crisp them up in the oven at 300°F for 5 minutes.
Freezing: Yes, you can freeze them! Freeze the baked crackers in an airtight container for up to 3 months. Thaw at room temperature. You can also freeze the unbaked dough. Roll, cut, freeze on a baking sheet, then transfer to a bag. Bake from frozen, adding 2-3 minutes to the bake time.
Pro Tip: If they lose their crunch, pop them in the oven for 5 minutes. They’ll be good as new.
Nutrition Information
I’m not a nutritionist, but here’s the breakdown if you’re tracking. This is a snack, so enjoy it in moderation!
Per Serving (based on 24 crackers):
- Calories: 120
- Protein: 3g
- Carbs: 10g
- Fiber: 0g
- Sugar: 0g
- Fat: 8g
- Saturated Fat: 5g
- Cholesterol: 20mg
- Sodium: 150mg
What’s Good: High in protein from the cheese. No added sugar. You control the sodium.
What to Know: Higher in fat from butter and cheese. Contains gluten and dairy.
My Take: Look, these are buttery, cheesy crackers. They’re not a diet food. But they’re way better than store-bought because you know exactly what’s in them. When I want to make them lighter, I use less butter and more cheese, but usually? I just eat a reasonable portion and enjoy them.
Final Thoughts
So that’s my go-to Homemade Cheese Crackers recipe! I’ve probably talked your ear off at this point, but when you make a recipe this often, you have a lot to say about it.
This has saved our back-to-school mornings more times than I can count. It’s my answer to “what’s for a snack” when I’m tired, don’t want to buy processed food, and still want something that tastes really good. My kids are happy, I’m happy because I’m not stressed about cooking, and we’re happy because we’re eating something made with love.
Make it yours! Try different cheeses, add some herbs, or make them spicy. The best recipes are the ones you adapt to your family’s tastes.
If you make this, drop a comment and let me know what you think! I love hearing how recipes turn out in your kitchen. And if something doesn’t work, tell me that too—I’m here to help troubleshoot.
Happy cooking! And I hope your kitchen smells half as good as mine does right now.
Frequently Asked Questions
Can I use mild cheddar instead of sharp cheddar?
You can, but the flavor will be much milder. Sharp cheddar has more flavor and less moisture, which is better for crackers. If you only have mild, you can add a bit more salt or mix in some parmesan for extra flavor. But I highly recommend sharp cheddar.
Why did my crackers spread too much?
This usually means the butter was too warm. If the butter melts before it hits the oven, the crackers will spread. Make sure your butter is cold and your dough is chilled before rolling. Also, don’t overwork the dough.
Can I make these ahead for a party?
Absolutely! You can make them up to 3 days ahead and store them in an airtight container. If they lose their crunch, pop them in the oven for 5 minutes. I often make a double batch on Sunday for the week.
Can I freeze the dough?
Yes! Form the dough into a disc, wrap it tightly in plastic, and freeze for up to 3 months. Thaw in the fridge overnight before rolling and baking.
Can I use a stand mixer?
Yes, but be careful. Use the paddle attachment on low speed. Stop as soon as the mixture looks like coarse crumbs. Overmixing in a stand mixer is easy and leads to tough crackers.
How do I store them to keep them crispy?
Store them in an airtight container at room temperature. If your kitchen is humid, add a piece of bread to the container to absorb moisture. If they get soft, bake them at 300°F for 5 minutes to crisp them up.
Can I add other ingredients to the dough?
Yes! Try adding cooked bacon bits, diced jalapeños, or herbs like dill or chives. Just make sure any wet ingredients (like jalapeños) are patted dry first to avoid soggy dough.
Pin This Recipe!


Homemade Cheese Crackers: Best Back-to-School Snack
- Total Time: 45 minutes
- Yield: 24 crackers 1x
Description
Crispy, golden, and savory homemade cheese crackers that are easier to make than you think. These buttery, cheesy snacks are perfect for lunchboxes and family gatherings.
Ingredients
- 1 cup (225g) unsalted butter, cold and cubed
- 2 cups (200g) sharp cheddar cheese, freshly grated
- 2 ½ cups (315g) all-purpose flour
- ½ teaspoon salt
- 2–3 tablespoons cold water
- 1 egg beaten with 1 tablespoon water (for egg wash)
- 1 tablespoon poppy seeds (optional)
- Sea salt flakes (for sprinkling)
Instructions
- Preheat oven to 350°F (175°C) and line two baking sheets with parchment paper.
- In a food processor, pulse flour, salt, and grated cheese to combine.
- Add cold butter cubes and pulse in short bursts until the mixture resembles coarse crumbs with pea-sized bits of butter remaining.
- Add cold water one tablespoon at a time, pulsing gently until the dough starts to clump together. Do not over-mix.
- Turn dough out onto plastic wrap, form into a 1-inch thick rectangle, wrap tightly, and refrigerate for at least 15 minutes.
- Roll out the chilled dough on a lightly floured surface to about ⅛-inch thickness.
- Cut the dough into 2-inch squares or rectangles using a pizza cutter or sharp knife.
- Prick each cracker 3-4 times with a fork to prevent puffing.
- Brush tops lightly with egg wash and sprinkle with poppy seeds and sea salt flakes.
- Bake for 12-15 minutes until edges are golden brown and centers are set.
- Cool on the baking sheet for 5 minutes, then transfer to a wire rack to cool completely before storing.
Notes
Keep all ingredients cold to ensure flaky crackers. Do not use pre-shredded cheese as it contains anti-caking agents. If the dough feels warm while rolling, chill it again. Crackers will crisp up significantly as they cool completely.
- Prep Time: 15 minutes
- Cook Time: 15 minutes
- Category: Snack
- Cuisine: American
Nutrition
- Serving Size: 1 cracker
- Calories: 120
- Sodium: 150
- Fat: 8
- Saturated Fat: 5
- Carbohydrates: 10
- Protein: 3
Keywords: homemade cheese crackers, back-to-school snacks, kid-friendly snacks, cheddar crackers, easy snack recipe, gluten-free option


