
There is a specific kind of magic that happens in the kitchen when autumn truly settles in. It’s not just about the weather changing; it’s about the food shifting from quick salads to things that hug you from the inside out. For me, that shift happens the moment I buy a butternut squash. I don’t know why, but roasting one feels like a ritual. Maybe it’s the smell of the kitchen filling up with something warm and earthy, or maybe it’s just that I finally have an excuse to make something that tastes like comfort.
Five years ago, I tried making butternut squash soup from scratch. I used a knife, I burned my fingers, I got pieces of peel in the blender, and the whole thing tasted bitter and watery. I almost gave up. I considered buying the canned stuff instead. But then I learned the roasting trick—cutting the squash in half, scooping out the seeds, and letting the oven do all the heavy lifting. That one change turned a stressful chore into my favorite weeknight dinner. Now, this roasted butternut squash soup with sage brown butter is the one dish I make on repeat. It’s simple. It’s forgiving. And honestly? It tastes better than anything from a restaurant.
If you’re looking for a recipe that feels fancy but is actually impossible to mess up, this is it. You don’t need fancy equipment. You don’t need a degree in culinary arts. You just need a few ingredients and a little patience while the oven works its magic. I’ve made this soup dozens of times, and it never fails to make my family stop scrolling on their phones and actually look at the table. Let’s get into why this works, what you need, and how to pull it together without any stress.
Why You’ll Love This Recipe
I’m not exaggerating when I say this has become my go-to for everything from casual Tuesday dinners to holiday appetizers. It’s versatile, it’s cheap, and it’s incredibly satisfying. Here’s why I keep coming back to it:
- Zero Stress Prep — The hardest part is scooping out the seeds. The rest is just chopping and roasting. I’ve made this while holding a baby, and it still turned out perfect.
- Minimal Ingredients — You really can’t mess this up. You need squash, onion, garlic, broth, cream, and butter. That’s it. No weird spices you’ll never use again. If you can buy these at the grocery store, you can make this soup.
- Restaurant-Quality Finish — The brown butter sage topping takes it from “good” to “wow.” It adds a nutty, savory crunch that contrasts with the silky smooth soup. It feels high-end, but it takes 2 minutes to make.
- Freezer-Friendly — This soup freezes beautifully. I make a big batch, freeze half in containers, and have a cozy meal ready for when I’m too tired to cook. It reheats perfectly.
- Beginner-Proof — There’s no chopping fine dice. No precise temperature checks. You roast until tender, blend until smooth. If it’s too thick, add water. If it’s too thin, simmer longer. It’s incredibly forgiving.
This is the kind of recipe that builds your confidence in the kitchen. Once you make this, you’ll realize that cooking doesn’t have to be complicated. It can just be simple, delicious food that makes you feel good.
Ingredients You’ll Need
Here’s the best part: you probably have most of this already. This recipe relies on high-quality basics because there aren’t many of them. Each ingredient plays a specific role, so I’m not going to skimp on the details.
For the Soup Base
Butternut squash (1 large, about 3-4 pounds / 1.5 kg) — This is the star. Look for one that feels heavy for its size and has a matte, tan skin. Avoid shiny or soft spots. Peeling it raw is a nightmare, so we roast it first. You’ll save yourself so much frustration.
Yellow onion (1 medium, chopped / about 200g) — Gives the soup a savory base. You can use white onion if that’s all you have, but yellow has a better sweetness when roasted.
Garlic (4-6 cloves, minced / about 2 tablespoons) — Don’t be shy with the garlic. It adds depth. Fresh is best here. If you’re feeling lazy, you can use jarred garlic, but fresh tastes noticeably better.
Vegetable or chicken broth (4 cups / 960ml) — I use low-sodium broth so I can control the saltiness. Chicken broth adds a bit more richness, but vegetable works just fine for a vegetarian version.
Heavy cream (½ cup / 120ml) — Optional, but it makes the soup luxuriously smooth. If you want it lighter, you can skip it or use half-and-half. I usually add it at the end for that restaurant texture.
Butter (2 tablespoons) — For sautéing the onions and garlic before blending. Unsalted is best so you control the salt.
Olive oil (2 tablespoons) — For roasting the squash. Use whatever you have on hand.
For the Brown Butter Sage Topping

Unsalted butter (4 tablespoons / 60g) — This is for the topping. You want to brown it until it smells nutty and turns amber. It changes everything.
Fresh sage leaves (10-12 leaves) — Fresh is non-negotiable here. Dried sage tastes like potpourri. Fresh sage gets crispy in the butter and adds an amazing aroma.
Salt and pepper — To taste. I usually use flaky sea salt if I have it, but regular kosher salt works great too.
Optional Add-ins — I sometimes add a pinch of nutmeg or red pepper flakes for a little kick. I also love adding crispy bacon bits on top if I’m not being vegetarian. It’s a great way to use up leftover crispy potato and chorizo leftovers if you have them!
Equipment Needed
You don’t need fancy gadgets for this. Here’s what I actually use:
Baking sheet — A standard rimmed baking sheet. Line it with parchment paper for easy cleanup. I hate scrubbing baked-on squash off pans.
Large pot or Dutch oven — Something with a lid. I use a 6-quart pot. It needs to hold the roasted squash, onions, and broth comfortably.
Immersion blender or regular blender — An immersion blender is easiest because you blend right in the pot. If you use a regular blender, let the soup cool slightly before blending in batches. Be careful with hot liquid—it can explode out of the lid if you’re not careful.
Small skillet — For the brown butter. A non-stick pan works well so you can see the color change easily.
Paring knife and spoon — For scooping seeds. The spoon is your friend here.
How to Make It: Step-by-Step
Alright, let’s make this! I’m walking you through exactly how I do it. It’s straightforward, but pay attention to the roasting part—that’s where the flavor lives.
Step 1: Roast the Squash (45-60 minutes)
Preheat your oven to 400°F (200°C). Line a baking sheet with parchment paper. Cut the butternut squash in half lengthwise. Use a sturdy spoon to scoop out the seeds and stringy bits. You don’t need to peel it yet—that would be too hard. Just halve and scoop.
Brush the cut sides generously with olive oil. Sprinkle with a little salt and pepper. Place them cut-side down on the baking sheet. Roast for 45-60 minutes until the skin is blistered and a fork slides easily into the flesh. Let it cool until you can handle it, then scoop the flesh out of the skin. Discard the skin. You should have about 6 cups of squash flesh.
Why this matters: Roasting concentrates the flavor. Boiling squash makes it watery. Roasting makes it sweet and nutty.
Step 2: Sauté the Aromatics (5 minutes)
While the squash roasts, heat 2 tablespoons of butter in your large pot over medium heat. Add the chopped onion and cook for 5-7 minutes until soft and translucent. Add the minced garlic and cook for 1 more minute until fragrant. Don’t let the garlic brown—it will turn bitter.
Step 3: Simmer the Soup (15 minutes)
Add the roasted squash flesh to the pot with the onions. Pour in the broth. Stir everything together. Bring it to a boil, then reduce the heat to low. Cover and simmer for 15 minutes. This helps the flavors meld and makes the squash even softer for blending.
Step 4: Blend Until Smooth (2 minutes)
Remove the pot from the heat. Let it cool for a few minutes if you’re using a regular blender. If you have an immersion blender, just plunge it in and blend until completely smooth. Scrape the sides and blend again to make sure there are no lumps. This is the key to a silky texture.
Step 5: Finish and Season (2 minutes)
Stir in the heavy cream (if using). Taste the soup. Add salt and pepper as needed. Remember, the broth has some salt, so taste before adding more. If it’s too thick, add a splash of water or extra broth. If it’s too thin, simmer it uncovered for a few more minutes.
Step 6: Make the Brown Butter Sage Topping (3 minutes)
In a small skillet, melt the 4 tablespoons of butter over medium heat. Watch it closely. It will foam up, then calm down. You’ll see brown bits form at the bottom and smell a nutty aroma. This is brown butter. It takes about 3-5 minutes. Don’t walk away!
As soon as it’s amber-colored, remove from heat and immediately add the sage leaves. They will sizzle and crisp up in the hot butter. Pour this over the soup just before serving.
Expert Tips & Tricks
Here’s everything I’ve learned from making this soup dozens of times. These tips will save you from my mistakes.
Don’t Skip the Roasting
I know it takes longer than boiling, but roasting is non-negotiable for flavor. If you’re in a rush, you can boil the squash, but it will taste flatter. If you want the best result, roast it.
Watch the Brown Butter
Brown butter goes from perfect to burnt in seconds. Keep the heat medium, not high. If it smells like burnt toast, start over. It’s cheap butter. Don’t let it ruin the soup.
Blend Carefully
If using a regular blender, don’t fill it more than halfway. Hot liquid expands. Remove the center cap of the lid and cover it with a towel. This lets steam escape without spraying soup all over your kitchen.
Adjust Consistency
Soups thicken as they cool. If you’re meal-prepping, make it a bit thinner than you want it to be final. It will thicken in the fridge.
Use Good Butter
Since the brown butter is the garnish, use good quality butter. It makes a difference in the nutty flavor. I use European-style butter if I can find it.
Variations & Substitutions
Once you’ve nailed the basic version, here’s how you can mix it up. I’ve tried all of these.
Spicy Version
Add 1 teaspoon of red pepper flakes or a diced jalapeño with the onions. It adds a nice kick that balances the sweetness of the squash.
Coconut Curry
Swap the cream for coconut milk and add 1 tablespoon of curry powder. It’s a totally different vibe but still creamy and delicious.
Apple Addition
Add 1 diced apple (like Granny Smith or Honeycrisp) when sautéing the onions. It adds a tartness that cuts through the richness. This pairs well with the sage.
Gluten-Free
This recipe is naturally gluten-free. Just make sure your broth is certified gluten-free if you’re sensitive.
Dairy-Free
Use olive oil instead of butter for sautéing, and skip the cream or use coconut cream. For the topping, use olive oil and sage, or skip the topping entirely. It’s still good.
Protein Boost
Add cooked chickpeas or white beans when you add the broth. It makes the soup heartier and adds protein. I love this for lunch leftovers.
Serving & Storage
How to Serve:
I serve this straight from the pot with crusty bread. It’s perfect with a side salad or some soft cheddar garlic biscuits for a complete meal. The brown butter sage topping is the star, so drizzle it generously.
Storage:
Store leftovers in an airtight container in the fridge for up to 4 days. The soup will thicken as it cools, which is normal.
Reheating:
Reheat gently on the stove over low heat, adding a splash of water or broth to loosen it up. Stir frequently. Avoid microwaving if you can—it can separate the cream. If you must microwave, do it in short bursts and stir well.
Freezing:
This soup freezes well for up to 3 months. Cool it completely, then freeze in portions. Thaw in the fridge overnight and reheat gently. The texture might be slightly grainier after freezing, but it’s still tasty.
Nutrition Information
I’m not a nutritionist, but here’s the breakdown if you’re tracking. This is based on 6 servings.
Per Serving:
- Calories: 280
- Protein: 6g
- Carbs: 42g
- Fiber: 6g
- Sugar: 12g
- Fat: 12g
- Saturated Fat: 7g
- Sodium: 450mg
What’s Good: It’s high in fiber and vitamins from the squash. It’s a great way to get your vegetables in. What to Know: It’s higher in calories if you use the full cream and butter topping. But honestly? It’s comfort food. Enjoy it.
Final Thoughts
So that’s my roasted butternut squash soup with sage brown butter. I’ve probably talked your ear off at this point, but when you make a recipe this often, you have a lot to say about it. This has saved me on nights when I don’t know what to cook. It’s simple, it’s cheap, and it tastes amazing. My kids love it, my husband loves it, and I love it because it’s foolproof.
Make it yours! Add spices, swap the cream, or skip the topping. The best recipes are the ones you adapt to your tastes. If you make this, drop a comment and let me know how it turned out! I love hearing from you. And if something doesn’t work, tell me—I’m here to help.
Happy cooking! I hope your kitchen smells as good as mine does right now.
Frequently Asked Questions
Can I use frozen butternut squash?
You can, but fresh tastes better. If you use frozen, thaw it first and drain any excess water. It might make the soup thinner, so you may need to simmer it longer. I prefer fresh because the roasting step adds so much flavor.
Why did my brown butter burn?
The heat was probably too high, or you walked away. Brown butter happens quickly. Keep the heat at medium and watch the color. If it smells like burnt nuts, it’s done. If it smells like ash, toss it and start over.
Can I make this ahead for a dinner party?
Yes! Make the soup up to 2 days ahead. Store it in the fridge. Reheat it gently before serving. Make the brown butter sage topping right before serving so the sage stays crispy. It saves you stress during the party.
Is this soup thick enough?
It should be creamy and pourable, but not watery. If it’s too thick, add broth or water. If it’s too thin, simmer it uncovered. The consistency depends on the squash and how much liquid you add. Adjust to your preference.
Can I use a food processor instead of a blender?
You can, but it’s harder to get a smooth texture. Blenders are better for soups. If you use a food processor, you might get a chunkier result. I recommend a blender for the silkiest texture.
What kind of sage should I use?
Fresh sage is best. Dried sage doesn’t crisp up in butter and tastes bitter. Buy a small bunch of fresh sage—it’s cheap and you can freeze the rest for later. It’s worth it for the flavor.
Pin This Recipe!
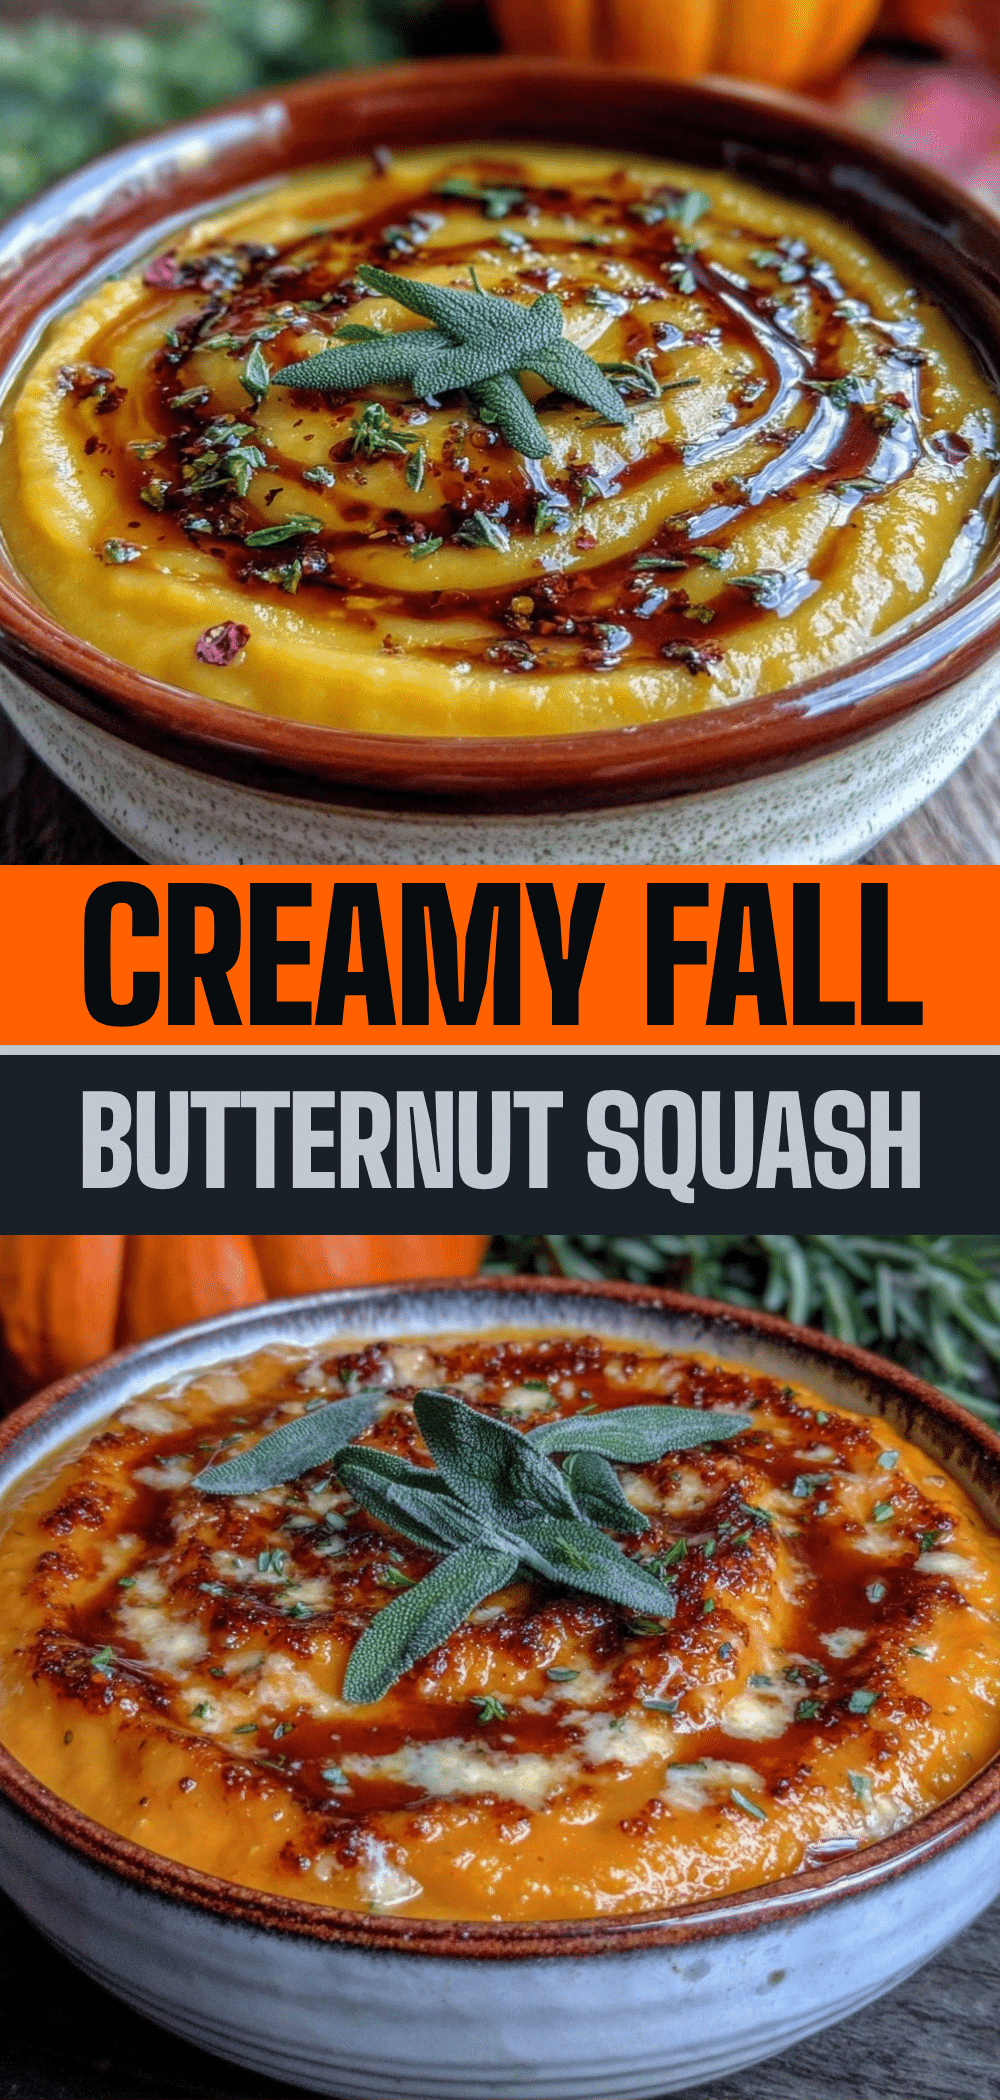

Roasted Butternut Squash Soup: Easiest Comfort Food
- Total Time: 80 minutes
- Yield: 6 servings 1x
Description
A simple, forgiving, and restaurant-quality roasted butternut squash soup topped with nutty brown butter and crispy sage. This comfort food is perfect for autumn and beginner-proof.
Ingredients
- 1 large butternut squash (about 3–4 pounds / 1.5 kg)
- 1 medium yellow onion, chopped
- 4–6 cloves garlic, minced
- 4 cups vegetable or chicken broth (low-sodium)
- 2 tablespoons olive oil
- 2 tablespoons unsalted butter (for sautéing)
- ½ cup heavy cream (optional)
- Salt and pepper to taste
- 4 tablespoons unsalted butter (for brown butter topping)
- 10–12 fresh sage leaves
- Optional: pinch of nutmeg, red pepper flakes, or crispy bacon bits
Instructions
- Preheat oven to 400°F (200°C). Line a baking sheet with parchment paper.
- Cut the butternut squash in half lengthwise and scoop out seeds. Brush cut sides with olive oil and season with salt and pepper. Place cut-side down on the baking sheet.
- Roast for 45-60 minutes until skin is blistered and flesh is tender. Let cool, then scoop flesh out of skin and discard skin. You should have about 6 cups of squash flesh.
- While squash roasts, heat 2 tablespoons butter in a large pot over medium heat. Add onion and cook for 5-7 minutes until soft. Add garlic and cook for 1 minute until fragrant.
- Add roasted squash flesh to the pot with onions. Pour in broth, stir, and bring to a boil. Reduce heat to low, cover, and simmer for 15 minutes.
- Remove from heat. Use an immersion blender to blend until smooth, or carefully blend in batches in a regular blender.
- Stir in heavy cream (if using). Taste and adjust seasoning with salt and pepper. Add water or broth if too thick, or simmer uncovered if too thin.
- In a small skillet, melt 4 tablespoons butter over medium heat until it foams, then browns and smells nutty (about 3-5 minutes).
- Remove from heat and immediately add sage leaves. They will sizzle and crisp.
- Pour the brown butter sage topping over the soup just before serving.
Notes
Roasting the squash concentrates flavor and prevents watery soup. Watch brown butter closely as it burns quickly. If using a regular blender, let soup cool slightly and vent the lid to prevent steam explosions. Soup thickens as it cools; add liquid when reheating. Freezes well for up to 3 months.
- Prep Time: 15 minutes
- Cook Time: 65 minutes
- Category: Main Course
- Cuisine: American
Nutrition
- Serving Size: 1 bowl with brown bu
- Calories: 280
- Sugar: 12
- Sodium: 450
- Fat: 12
- Saturated Fat: 7
- Carbohydrates: 42
- Fiber: 6
- Protein: 6
Keywords: butternut squash soup, roasted squash, comfort food, autumn recipes, sage brown butter, vegetarian soup, gluten-free soup, easy dinner


